Free watermarks on photos: how to add one, what the limits are, and when to upgrade

Free watermarks on photos: how to add one, what the limits are, and when to upgrade

You publish photos online. You want anyone who sees them to know they belong to you, before they end up somewhere they should not. Adding a watermark is the simplest way to do that, and you do not need to pay for software before you know whether it fits your workflow.

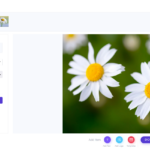
Watermarquee free watermark editor showing a photo with a logo watermark and opacity controls

What a free watermark on a photo actually does

A watermark is a visible mark, your logo, a text caption, or both, placed directly on an image to identify its owner and deter unauthorised reuse. It is a pre-publish step: you add it before the image leaves your hands.

DRM restricts who can open or copy a file. Steganography hides data invisibly inside an image. Watermarking does neither. It works by making ownership visible so that anyone who sees the photo can see who it belongs to.

A visible watermark deters casual reuse. Someone looking for a photo to drop into a blog post without permission will skip a watermarked image and choose one that looks cleaner. That is the realistic threat model for content protection. A determined actor with image-editing skills can reduce or remove a watermark, so the goal is deterrence, not prevention.

Watermarquee is built for three audiences: sellers listing products on Etsy, Amazon, or eBay; photographers sharing galleries with clients; and content creators posting to blogs, social feeds, or newsletters. If you are in any of those groups, the free tier is the right place to start.

Two versions of the same photo showing different watermark placement and opacity settings

Who actually uses free photo watermarking tools

Three types of people reach for a free watermarking app before committing to a paid plan.

The first is a photographer who has just finished a shoot and needs to share 20 or 30 preview images with a client. They need a repeatable process, not a one-off tool they have to reconfigure every time. The watermark needs to carry their studio name or logo so the client, and anyone the client forwards the link to, can see who took the photos.

The second is a seller listing product photos on Etsy, Amazon, or eBay. Listing images get scraped. Adding a logo watermark to each photo makes the image less useful to a scraper and ties the visual back to the original seller.

The third is a creator who posts regularly to a blog, newsletter, or social account and wants every image credited. They are not necessarily dealing with active theft; they want attribution baked in so that if an image travels, it carries their name with it.

All three groups are at the same awareness stage: they know what a watermark looks like, they are not sure whether a free tool is good enough for their volume, and they want to try the workflow before paying.

A note on format: this page covers still images (JPG, PNG, WebP). Watermarquee also supports video watermarking via ffmpeg-wasm, which renders marks client-side in the browser, as of July 2026, but that is a separate workflow.

What Watermarquee's free tier gives you

What Watermarquee’s free tier gives you

Watermarquee’s free tier lets you watermark up to five photos at a time directly in your browser with no signup required. You can add a logo watermark, a text (caption) watermark, or both, and adjust opacity and position. For current limits on file size, sharing features, and any branding applied to outputs, check their official pricing page, as these details can change.

The editor runs in the browser with no install needed on any device. You upload your photo, choose whether to add a logo, a text caption, or both, then adjust watermark placement, size, opacity, and blend mode. A live preview on the Konva canvas shows you the result before you download anything. When you are happy, you export as JPG, PNG, or WebP.

For watermark placement, the bottom-right corner is the most common choice because it is visible without covering the main subject. Opacity in the range of 30 to 60 percent keeps the mark readable while letting the photo show through. Scale the mark relative to the image: a watermark that looks right on a large file may disappear on a thumbnail, so check the result at the size you plan to publish.

For watermark design, a logo mark reads faster than text at small sizes. A caption (your name or URL) adds attribution context that a logo alone does not. Using both together is the most common choice for photographers who want the mark to work both visually and as a text reference.

Every watermarked image gets a public share URL with a branded landing page, included on the free tier.

The Watermarquee credit stamp on free-tier output is real and visible. If you are sharing images professionally, you will notice it. That is the honest reason to consider a subscription upgrade.

Watermarquee pricing: free, Plus, and Studio

Watermarquee pricing: free, Plus, and Studio

All figures are from Watermarquee’s published pricing as of June 2025.

Free: $0 forever. One image at a time, up to 10 MB and 2048 px, logo plus caption watermark, one-link sharing, basic alt text, Watermarquee credit on output. No time limit, no trial expiry.

Plus: $9.99 per month, or $99.99 per year (17 percent off). Batch export up to 100 images per session as of July 2026, brand kit (your logo, fonts, and palette saved so every export stays consistent), AI alt text and SEO metadata, AI background removal (up to 100 per month, though it’s worth checking the current pricing page), multi-size export, premium fonts, and no Watermarquee stamp on output.

Studio: $19 per month, coming soon, though it’s worth checking the current pricing page. Everything in Plus, batch processing up to 500 images as of July 2026, AI HD upscale, pattern watermark (a repeating tile that cannot be cropped out), PDF watermarking for proofs and contracts, SEO keyword research, and 500 AI operations per month, though it’s worth checking the current pricing page.

There is also a legacy Pro tier at $19 lifetime, held by approximately 4,800 original members from the earlier WordPress plugin era, though it’s worth checking the current pricing page. That tier is closed to new users.

The upgrade trigger is straightforward: the free tier works well for one image at a time. The moment you need to watermark a full gallery in one session, or need clean output without the Watermarquee stamp, Plus is the relevant tier.

Watermarquee free tier: what works and what does not

Watermarquee free tier: what works and what does not

What works:

  • Genuinely free with no time limit and no account required to try the editor
  • Live preview means you see exactly what the watermark looks like before you download the file
  • Supports both a logo watermark and a caption watermark in one pass
  • One-link share page is included, so you can send a branded URL directly from the app
  • Runs in the browser on any device, no software to install
  • Output formats cover JPG, PNG, and WebP

What does not (free tier limitations):

  • One image at a time only. There is no batch processing on the free tier. A photographer with 30 preview images to process will need to repeat the upload-adjust-download cycle 30 times.
  • The Watermarquee credit stamp appears on every free-tier output. For professional use, this is off-brand and is the clearest reason to upgrade.
  • The 10 MB and 2048 px cap will clip high-resolution originals. If you shoot at full resolution and want to watermark before you resize, you may need to resize the file first.
  • No brand kit on the free tier. Your watermark settings do not persist between sessions, so you will need to reconfigure position, size, and opacity each time.
  • Basic alt text only. AI-generated SEO metadata is a Plus feature.

These free tier limitations are worth knowing before you build a workflow around the free plan. Any digital content writer or image publisher will be able to batch watermark their digital content or images with Watermarquee once they move to Plus. On the free tier, the one-at-a-time limit is the ceiling.

Other free tools for watermarking photos

Two other tools come up when people search for free watermarking options online.

Canva is a broad design app with a watermark workflow built in. It is stronger for text-heavy watermark designs than for logo-only marks, and it has a large library of fonts and templates. The free tier adds a Canva watermark on some export formats. Check current export restrictions at canva.com, as these change with plan updates.

GIMP is a free, open-source, desktop-only image editor. It has no built-in batch watermarking; processing multiple files requires scripting, which has a steep learning curve. There is no output stamp, but you need to set up your watermark layer manually each session.

The choice between tools comes down to workflow: Canva suits creators already designing in that environment; GIMP suits photographers who want desktop control without a subscription; Watermarquee suits anyone who wants a dedicated watermarking app with a one-link share page and a clear upgrade path to unlimited watermarking and batch processing.

Is Watermarquee’s free tier the right starting point for you

Use the free tier if you need to add free watermarks on photos one at a time, you want to test the workflow before committing to a paid plan, or you post infrequently and can live with the Watermarquee credit on output. The free tier has no expiry, so there is no pressure to upgrade before you are ready.

Upgrade to Plus ($9.99 per month) if you are a photographer who needs to process a full gallery in one session, a seller who needs clean output without the stamp, or a creator who wants their brand kit saved so every export is consistent without reconfiguring from scratch. The batch export limit of 100 images per session covers most gallery workflows.

Wait for Studio ($19 per month, coming soon) if you are processing at higher volumes (up to 500 per batch), need pattern watermarks that cannot be cropped out, or need PDF watermarking for proofs and contracts.

Watermarquee is building toward a broader content protection and SEO-prep workflow, with AI alt text, image upscaling, and pattern watermarks all inside the same editor. The free tier is the entry point to that stack, and it costs nothing to find out whether the workflow fits yours. If you are ready to add free watermarks on photos and see how the editor handles your files, start with the free plan at Watermarquee.

FAQ

Can I add a watermark to a photo for free without creating an account? Yes. Watermarquee’s free tier does not require an account to use the editor. You can upload a photo, add your logo or text watermark, and download the result without signing up.

Does a watermark stop people from copying my photos? A visible watermark deters casual copying by making ownership obvious. It does not prevent a determined person from removing or cropping the mark using image-editing software. Think of it as a clear ownership signal, not a technical lock.

What is the difference between a logo watermark and a caption watermark? A logo watermark is an image file (your brand mark or symbol) placed on the photo. A caption watermark is a line of text, typically your name, studio name, or website URL. Using both together gives you a visual mark that reads quickly and a text reference that carries attribution even if the logo is not recognised.

Why does my downloaded image have a Watermarquee stamp on it? The Watermarquee credit stamp is added to all free-tier exports. It is removed on the Plus plan ($9.99 per month as of June 2025) and above.

What file types can I watermark with Watermarquee? The editor supports JPG, PNG, and WebP for still images. Video watermarking is also available via ffmpeg-wasm, which processes the file client-side in the browser.

When should I upgrade from the free tier to Plus? The clearest trigger is needing to process more than one image per session. If you are watermarking a gallery of client previews, a batch of product listings, or a set of blog images all at once, the free tier’s one-at-a-time limit will slow you down. Plus adds batch export of up to 100 images and removes the output stamp.

The best fonts for watermarks: readability, contrast, and brand consistency

The best fonts for watermarks: readability, contrast, and brand consistency

Protecting your images with watermarks starts with a choice most people make in thirty seconds and then regret: the font. Pick the wrong one and your watermark either disappears into the background or looks so clunky it distracts from the image itself. This guide cuts through the options and gives you a clear, practical answer.

Comparison of a decorative script watermark versus a sans-serif watermark on a photograph, showing the legibility difference

Why your watermark font choice matters more than you think

A text watermark does two things: it deters casual reuse and it attributes the image to you. That is different from DRM (digital rights management), which restricts who can access a file in the first place, and from steganography, which hides data invisibly inside an image. A visible text watermark works by making unauthorised reuse socially and practically awkward. It does not prevent a determined person from removing it, but it stops the vast majority of casual copying and scraping.

A watermark that cannot be read defeats its own purpose. If your name dissolves against a bright sky or turns into a blurry smudge on a dark reception photo, you have spent time on something that provides no protection and no attribution.

The font problem is the same for three different groups: photographers watermarking galleries before client delivery, sellers protecting product listings on Etsy or Amazon, and content creators adding a brand signature to blog or social images. All three need a font that stays legible across varied backgrounds, looks professional, and applies consistently without manual effort on every image.

Which creators actually need to think about watermark fonts

Photographers face the hardest version of this problem. A single wedding gallery might include bright outdoor portraits, dark reception shots, white dress details, and colourful flat-lays. The font that reads clearly on one image needs to hold up across all of them. According to the WaterMarquee tool summary as of July 2026, photographers can watermark a whole gallery in one click using the brand kit, but that only works well if the font choice was right to begin with.

Online sellers on Etsy, Amazon, and eBay deal with product images being scraped and reused without credit. A legible, consistent watermark signals ownership clearly. Watermark text vs logo is a real decision here: a text watermark with your shop name is often more informative than a logo that a scraper’s audience won’t recognise.

Content creators publishing to blogs, social media, or newsletters have a slightly different priority. The watermark doubles as a brand signature, so font choice is as much a brand consistency decision as a protection decision. A creator who posts daily needs a font that looks intentional, not like an afterthought.

Sans-serif watermark text shown over four different image backgrounds to illustrate contrast and legibility challenges

What makes a font work for watermarks: the four criteria that matter

What makes a font work for watermarks: the four criteria that matter

1. Readability at small sizes

The stroke width of a letter is what determines whether it survives at watermark sizes. Sans-serif fonts (fonts without the small decorative tails on each letter, like Montserrat, Roboto, Open Sans, and Helvetica) have consistent, even strokes that hold their shape when small. Serif fonts (fonts with those small tails, like Times New Roman or Georgia) can work at larger watermark sizes but their thin strokes degrade at smaller sizes, especially on complex backgrounds. Decorative fonts, cursive fonts, and handwritten fonts typically have very thin strokes and irregular letterforms that become unreadable quickly.

2. Font contrast against varied backgrounds

Font color for watermarks is not a single answer. White disappears over a bright sky. Black disappears over a dark subject. The practical fix used by most photographers is a semi-transparent white or light-grey font with a subtle drop shadow behind the text. The drop shadow creates a thin dark edge that keeps the letters readable regardless of the background colour. Font opacity in the range of roughly 40-70% is often a working range for deterrence without obscuring the image, though the right level depends on your images and how prominent you want the watermark to be.

3. Font weight

A medium or semi-bold font weight reads better than a light or thin weight at watermark sizes. Light weights can vanish even at full opacity. Bold weights can feel heavy and intrusive. Semi-bold is the practical middle ground for most watermark fonts.

4. Brand consistency

Using the same font across every export builds a recognisable signature over time. A photographer who switches fonts between galleries, or a seller who uses a different style on each product category, undermines the brand signal. Consistency is what makes the watermark feel intentional rather than accidental.

Worked example: imagine watermarking a 200-image wedding gallery. The font needs to read on a white dress detail shot (bright, low contrast), a dark candlelit reception photo (dark, low contrast), and a colourful flat-lay of table decorations (busy, mid-tone). A semi-bold sans-serif in white at around 50-60% opacity with a drop shadow handles all three. A thin cursive font in white fails on at least two of them.

Where to find watermark fonts: free, premium, and what the license actually covers

Where to find watermark fonts: free, premium, and what the license actually covers

Free fonts from Google Fonts

Google Fonts (fonts.google.com) is the most practical starting point. Many fonts on the platform carry an Open Font License (OFL), which permits commercial use including embedding in exported images. As of July 2026, the following free fonts perform well as watermark fonts:

  • Montserrat – modern, geometric sans-serif with strong legibility at small sizes
  • Roboto – clean, neutral sans-serif; the default choice for a reason
  • Open Sans – slightly wider letterforms, very readable across varied backgrounds
  • Lato – elegant fonts with a slightly warmer feel than Roboto; works well for photographers
  • Raleway – more distinctive than the others; semi-bold weight holds up well

Premium font marketplaces

Adobe Fonts and MyFonts offer higher design quality and more distinctive font styles. Font licensing for commercial use on these platforms varies significantly. A font used in a watermark on images you sell or license to others may require a commercial or extended license rather than a standard desktop license. Always check the license page for the specific font before using it in a watermark workflow. Licensing rules vary by jurisdiction, so what applies in the US may differ from what applies in the EU or Australia.

Fonts inside WaterMarquee

According to the WaterMarquee tool summary, premium fonts are included in the Plus tier ($9.99/mo or $99.99/yr as of the document date, though it’s worth checking the current pricing page) and the legacy Pro tier. The Free tier uses standard fonts and allows one image at a time, which is enough to test your font choice before committing to a batch workflow, though current features may vary. As of July 2026, on Plus, the brand kit locks your chosen font so every export uses the same typeface, opacity, and position automatically.

Font types for watermarks: what works, what fails, and why

Font types for watermarks: what works, what fails, and why

Font type Strength Weakness Verdict
Sans-serif Clean, legible at small sizes, works across varied backgrounds Can feel generic; less distinctive as a brand signature Default recommendation for most creators
Serif More formal, editorial feel; works at larger sizes Thin serifs degrade at small sizes on complex backgrounds Use large or not at all
Script / cursive Personal, distinctive, feels like a signature Poor readability at small sizes; thin strokes disappear Avoid as a primary watermark font
Handwritten Personal brand feel Same weaknesses as script; inconsistent stroke width Avoid unless used very large
Monospace Technical, neutral; distinctive in some niches Wide character spacing makes it bulky Niche use only
Decorative / display Memorable at large sizes Almost always fails at watermark sizes Reserve for logo-based watermarks

A note on monoline fonts (fonts where every stroke is the same width, like many geometric sans-serifs): they can work well for watermarks because the consistent stroke width survives scaling. Monospace fonts share some of this quality but take up more horizontal space, which can be a problem at smaller font sizes.

On font opacity and watermark transparency: running a font at 100% opacity can obscure the image significantly. Dropping to around 50-60% opacity while using a semi-bold weight to compensate is a common approach. The exact level is a judgment call based on your images and how visible you want the watermark to be.

Applying your font choice: placement, size, and getting it consistent across a batch

Watermark placement is a real decision. Bottom-right corner placement is conventional but easy to crop out. Centre or diagonal placement is harder to remove but more intrusive. The right watermark placement depends on your threat model: if you are primarily deterring casual reuse, a corner works. If you have had repeat theft of product images, a more central or diagonal placement makes cropping harder.

Font size should be proportional to the image. Large enough to read clearly at the image’s intended display size, small enough not to dominate the subject. Test at the smallest size you will actually use, not at full screen.

Batch consistency is where the workflow either holds together or falls apart. Applying the same font, size, font opacity, and watermark placement manually across a full gallery is error-prone. According to the WaterMarquee tool summary as of July 2026, the brand kit locks logo, fonts, and palette so every export uses the same wordmark, the same opacity, and the same corner position, with no drift across galleries. The live preview on the Konva canvas lets you test font legibility on a real image before committing to a batch export.

A creator watermarking images one at a time on the Free tier will eventually hit the limit of manual consistency. The brand kit on Plus is the natural step up when batch watermarking becomes a regular part of the workflow.

Choosing your watermark font: a practical decision framework

  1. Start with a sans-serif from Google Fonts. Montserrat, Roboto, Open Sans, or Lato cover the needs of most photographers, sellers, and creators. They are free fonts with commercial-use licenses and they hold up at small sizes.
  2. Test at the smallest size you will actually use. Not at full screen. At the size the watermark will appear on a thumbnail or a social image.
  3. Check font contrast on your darkest and lightest typical image. If the font disappears on either, add a drop shadow or adjust the font color for watermarks. White with a drop shadow is the most reliable combination across varied backgrounds.
  4. Lock the choice in a brand kit. Once you have a font that works, save it so every export uses the same settings. Brand consistency across hundreds of images is what makes the watermark feel like a deliberate signature, not an accident.

Who benefits from a premium font: creators for whom the watermark is a visible brand signature and who publish at scale. A distinctive, properly licensed font pays off when it appears across thousands of images.

Who should stick with free fonts: creators primarily deterring casual reuse who do not need a distinctive brand signature. Google Fonts covers this use case completely.

One honest limitation: even the best font choice for a watermark cannot prevent a determined person from removing a visible watermark. The font choice optimises for deterrence and attribution, not absolute protection. A visible watermark deters casual theft; it does not stop someone with image editing software and time.

Try WaterMarquee’s free tier to test your chosen font on a real image before committing to a batch workflow.

FAQ

What is the best font type for a watermark? A semi-bold sans-serif is the most reliable choice for most creators. Sans-serif fonts have even stroke widths that stay readable at small sizes and across varied backgrounds. Montserrat, Roboto, and Open Sans are all solid starting points and are available free from Google Fonts.

Should I use white or black font color for my watermark? Neither works on every background. White disappears over bright skies; black disappears over dark subjects. The most reliable approach is white or light-grey text at reduced opacity with a subtle drop shadow, which creates enough contrast to stay readable on both light and dark backgrounds.

Can I use Google Fonts in a commercial watermark? Many fonts on Google Fonts use the Open Font License (OFL), which permits commercial use including embedding in exported images. Check the individual font’s license page on fonts.google.com to confirm, as licensing rules can vary.

What font opacity should I use for a watermark? There is no single correct answer. Many photographers and creators often work in the 40-70% opacity range as a starting point, using a semi-bold weight to keep the text readable at reduced opacity. Test on your actual images rather than relying on a fixed number.

Is a text watermark or a logo watermark better for protecting images? It depends on your goal. A text watermark with your name or business name is more informative to someone who finds the image, because they can search for you directly. A logo watermark is more visually distinctive if your logo is well known. Many creators use both: a logo for brand recognition and a text caption for attribution.

How do I keep my watermark consistent across a large batch of images? Manual application is error-prone across large galleries. A brand kit that locks your font, opacity, and position settings means every export uses the same settings automatically. WaterMarquee’s Plus tier ($9.99/mo or $99.99/yr as of the tool’s published pricing, see their official pricing for current rates) includes a brand kit and batch export for up to 100 images.

Watermarks for Photos: How to Protect Your Images from Theft and Unauthorised Use

Watermarks for Photos: How to Protect Your Images from Theft and Unauthorised Use

If you share your photos online, whether on a portfolio site, Instagram, or an e-commerce store, your images can be downloaded and reused without your permission. A watermark is the most direct, low-effort step you can take to make that harder and to keep your name attached to your work wherever it travels.

![Photo of \[subject\] shown without and with a watermark applied using WaterMarquee](https://icos-core-staging.fly.dev/public/media/eb2ad96f-b3d6-4299-ba43-2cb82d092a6b/article-images/69718bc316db5b65-fdba818f.jpeg)

What a watermark is and what it actually does for your photos

A watermark is a visible overlay, typically your name, website URL, logo, or copyright symbol, applied directly to a photo to identify the creator and discourage unauthorised use.

It is worth separating watermarking from two related concepts. DRM (digital rights management) restricts who can access a file in the first place, usually through encryption or platform controls. Steganography hides data invisibly inside an image, with concealment as the primary goal. A watermark, by contrast, is intentionally visible. Its power comes from being seen.

Photos shared online can be downloaded, reposted, or used commercially without credit or payment. A visible watermark raises the cost of doing that. A casual user who wants to repost your image without credit has to either leave your name on it or go to the effort of removing it. Many won’t bother.

Watermarks serve two functions at once. First, deterrence: the mark signals ownership and makes misuse visible. Second, attribution: even when an image is shared dozens of times across social media, your name or logo can remain attached to it.

Two main types cover most use cases. A text watermark uses your name, handle, or website. A logo watermark uses a brand mark or signature, typically uploaded as a PNG with a transparent background.

One important limit to set clearly: a watermark is not a substitute for formal copyright registration, which varies by jurisdiction (in the US, registration with the US Copyright Office strengthens your legal position significantly). A watermark is a practical deterrent, not a legal guarantee, and a determined bad actor with editing tools can attempt watermark removal. The goal is to stop casual image theft, not to defeat every possible attack.

Who needs to watermark their photos (and who can skip it)

Three groups of people will get the most from watermarking their photos.

Portfolio photographers sharing work on a public website or sending client preview galleries face the risk of images being downloaded and used without a licence. A watermark on preview images keeps your name on the work and signals that the full-resolution, unwatermarked version requires a purchase or agreement.

Digital content creators posting to Instagram and other social platforms risk their images being screenshotted or downloaded and reposted without credit. Watermark visibility matters here: place your watermark so it can survive the crop to Instagram’s common aspect ratios (square, 4:5 portrait, 16:9 landscape) as of July 2026, otherwise a simple crop removes it entirely.

E-commerce sellers who photograph their own products face a specific threat: competitors scraping product images and using them on their own listings. A watermark on product photos makes scraped images immediately identifiable and unusable without effort.

Who can reasonably skip watermarking? People sharing photos in private, access-controlled albums, or creators whose platform already restricts downloads, have less to gain from visible watermarks.

If you watermark across more than one platform or format, doing it manually in a general-purpose editor each time adds up quickly. A dedicated watermarking tool with saved presets and batch capability makes more sense for anyone publishing regularly.

What to look for in a watermarking tool for photos

Diagram showing common watermark placement positions on a photo: corner, centre, and tiled

The right watermarking tool depends on your volume and workflow. Here are the capabilities that actually matter.

Text watermark options. You should be able to add your name, website, copyright symbol, or social handle as a text watermark. Watermark font choice matters: a font that looks clean at large sizes can become pixelated or unreadable when the image is resized for web. Pick a watermark style with clear letterforms that hold up at small sizes.

Logo watermark support. Upload your logo as a PNG with a transparent background to create a transparent watermark overlay. The editor should let you resize, rotate, and reposition the logo without the result looking pixelated or degraded.

Watermark placement and positioning. Common options include bottom-right corner, bottom-left corner, centre, and a tiled repeat pattern across the whole image. Corner placement is easy to crop out. Centre placement is harder to remove cleanly but more intrusive. A tiled watermark across the full image is the hardest to defeat but works only in specific contexts, such as client previews. Good watermark placement depends on your use case.

Watermark opacity control. A transparent watermark with lower opacity is less visually intrusive but easier to overlook. Higher opacity improves visibility and deterrence but can distract from the image itself. The right watermark opacity sits somewhere in the middle for most uses, though client preview images can justify a more prominent mark.

Batch watermarking. For a photographer with hundreds of JPG files from a shoot, or a digital content creator preparing a week of social posts, applying watermarks one at a time is impractical. Batch watermarking (also called bulk watermarking) processes multiple images in one operation with a consistent watermark style. This is one of the biggest workflow gains a dedicated tool offers over a general image editor.

Image quality preservation. Watermarking should not degrade your photo. Look for tools that export at full image resolution without introducing compression artefacts. A watermark applied carelessly can make a sharp photo look pixelated or soft.

Online vs desktop. An online watermarking tool runs in the browser with no installation, which suits occasional use. Desktop tools typically handle higher volumes and offline workflows. Some tools offer both.

Bulk watermarking workflow showing multiple photos being watermarked at once in WaterMarquee

Step by step instructors/tutorial for Watermarquee only:

  1. Go to WaterMarquee and create a free account.
  2. Upload your photo or photos (JPG or other supported formats).
  3. Choose your watermark type: add a text watermark with your name, URL, or copyright symbol, or upload a PNG logo for a logo watermark.
  4. Set your watermark font, size, watermark opacity, and watermark style using the editor.
  5. Choose your watermark placement: corner, centre, or tiled pattern.
  6. For multiple images, use the batch watermarking feature to apply the same watermark to all photos in one operation.
  7. Preview the result to check watermark visibility and that the image resolution looks clean.
  8. Export your watermarked images at full quality.

Free vs paid watermarking: what you actually get

Free vs paid watermarking: what you actually get

Free watermarking tools can cover basic needs, but they come with real limits.

Free tools typically restrict how many images you can process at once, which makes batch watermarking impractical. Many add their own branding to your exported images, which undermines the point of putting your own name on your work. Some cap the output image resolution, meaning your watermarked JPG comes back at a lower quality than the original.

Paid tools generally remove those limits. You get custom logo upload, full image resolution output, larger or unlimited batch sizes, and access to a wider range of watermark style and watermark font options. For a photographer or digital content creator publishing regularly, these differences add up fast.

As of mid-2025, WaterMarquee offers a free tier alongside paid plans. The free tier lets you try the tool and watermark individual images. Paid plans unlock bulk watermarking, higher image resolution exports, and additional customisation. Check the current pricing at watermarquee.com, as plans and pricing are updated periodically, though it’s worth checking the current pricing page for the most up-to-date details.

The upgrade trigger is simple: if you are regularly watermarking photos in batches, or if a free tool is stamping its own logo on your work, a paid plan pays for itself in time saved and cleaner output.

If you watermark a handful of images occasionally, a free online watermarking tool may be all you need.

Watermarking your photos: honest tradeoffs to know before you start

Watermarking your photos: honest tradeoffs to know before you start

Watermarking is a practical step worth taking for most people publishing photos publicly. But it helps to go in with accurate expectations.

What watermarking does well:

  • Deters casual image theft. Most unauthorised reuse is opportunistic. A visible watermark stops the majority of it.
  • Keeps your name on your work as it spreads across social media and other platforms.
  • Signals professionalism. A clean, well-placed watermark tells viewers you take your work seriously.
  • Requires minimal ongoing effort once you have a template or preset saved.

What watermarking does not do:

  • Stop a determined bad actor. Watermark removal tools exist, and someone with editing skills can attempt to remove or obscure a watermark. This is why watermarking deters rather than prevents misuse.
  • Prevent screenshots. Anyone can photograph their screen or take a screenshot. Watermarking does not stop this, though a well-placed watermark will still appear in the screenshot.
  • Replace copyright protection. A watermark is not a legal instrument. In the US, formal copyright registration with the US Copyright Office is what strengthens your legal position if you pursue a claim.

Quality tradeoffs to watch:

Watermark opacity set too high makes your photo look like a branded advertisement rather than a piece of work. Watermark placement in a corner is easy to crop out. A watermark that is pixelated or poorly sized looks amateurish and undermines the professional signal you are trying to send. Getting watermark quality right, meaning the right size, opacity, font, and position for the image, takes a little setup but pays off across every image you export.

The watermark style you choose should match your brand: a clean sans-serif text watermark suits a modern portfolio; a signature-style logo suits fine art or wedding photography.

Other ways to watermark photos: tools worth knowing

Several tools can add a watermark to your photos. The right one depends on what you already use and how often you watermark.

Canva is a browser-based design editor with watermark capability as a secondary feature. If you already use Canva for social graphics and only need to watermark occasionally, it works. It is not optimised for batch watermarking or high-volume photo workflows, and exporting large numbers of watermarked JPG files is slower than a dedicated tool.

Adobe Lightroom is a professional photo editor and organiser with built-in export watermark presets. A photographer already working in Lightroom can set up a text watermark or logo watermark in the export dialog and apply it consistently. The limitation is that Lightroom can require an Adobe subscription, and the watermarking feature is basic compared to dedicated tools. Watermark positioning and opacity options are limited within the export panel.

iWatermark is a dedicated watermarking app available for desktop and mobile as of July 2026. It handles batch watermarking and often supports text watermarks, logo watermarks, and QR code overlays. It suits photographers who want a standalone tool outside the Adobe ecosystem.

Dedicated online watermarking tools such as Visual Watermark and Watermarkly are built specifically for bulk watermarking photos. They offer stronger batch processing, preset management, and watermark style options than general editors.

WaterMarquee is a dedicated online watermarking tool built for photographers and digital content creators who need to watermark photos efficiently, including batch watermarking across large sets of images. If you want a purpose-built tool that handles both occasional and high-volume watermarking without requiring a broader software subscription, WaterMarquee is worth trying.

Should you watermark your photos, and which approach fits your workflow?

Watermarking your photos is a low-effort, high-visibility step for anyone sharing original images publicly. It will not stop every instance of image theft, and a determined editor can attempt watermark removal. But it stops the majority of casual misuse, keeps your name attached to your work as it travels across social media and other platforms, and signals that you take your work seriously.

The honest weakness: watermarking is a deterrent, not a guarantee.

Match the approach to your situation:

  • If you share photos occasionally and want basic image protection, start with a free watermarking option. A free online watermarking tool is enough for low-volume use.
  • If you are a photographer watermarking client preview galleries or large batches of JPG files from shoots, you need batch watermarking and consistent presets. A dedicated paid tool saves significant time.
  • If you are a digital content creator posting regularly to Instagram or other social media, set up a watermark template once and apply it to every image before posting. Watermark placement matters: keep it inside the safe zone for the crop ratios your platform uses.
  • If you run an e-commerce store and photograph your own products, watermark every product image before it goes live to deter scraping.

For photographers and creators who want a dedicated watermarking workflow without the overhead of a full photo editor subscription, WaterMarquee is the recommended starting point. Sign up at watermarquee.com, set up your watermark style once, and apply it to your photos individually or in bulk from that point forward.

FAQ

Does adding a watermark reduce my photo’s image quality? It should not, if you use a tool that exports at full image resolution. The risk comes from tools that compress the output JPG or downscale the image during export. Always check that your watermarked file matches the resolution of the original.

Can someone remove a watermark from my photos? Yes. Watermark removal tools and editing techniques exist, and a skilled editor can reduce or eliminate a visible watermark. This is why watermarking deters casual image theft rather than preventing all misuse. Centre placement and tiled watermarks are harder to remove cleanly than a corner mark.

What is the best watermark placement to stop cropping? A corner watermark is the easiest to remove by cropping. Centre placement or a tiled watermark across the full image is significantly harder to crop out without damaging the photo. For social media, check that your watermark positioning survives the platform’s standard crop ratios before publishing.

Do I need to watermark my photos if I have copyright automatically? In most jurisdictions, including the US and UK, copyright in a photo belongs to the creator automatically from the moment of creation. However, a watermark makes your ownership visible and deters casual misuse. In the US, formal registration with the US Copyright Office strengthens your legal options if you pursue a claim, regardless of whether a watermark is present.

What is the difference between a text watermark and a logo watermark? A text watermark overlays your name, website, handle, or copyright symbol directly on the image. A logo watermark uses a graphic, typically uploaded as a PNG with a transparent background, so the image shows through. Logo watermarks suit creators with an established brand mark; text watermarks are quicker to set up and work well for photographers using their name or website URL.

Is batch watermarking worth setting up for a small photo library? If you regularly publish photos, yes. Setting up a watermark template once and running bulk watermarking across a folder of images takes a fraction of the time of watermarking each photo individually in a general editor. Even for a library of a few dozen images, the time saving is noticeable.

Watermarks for Photos: How to Protect Your Images Without Ruining Them

Watermarks for Photos: How to Protect Your Images Without Ruining Them

Adding a watermark to your photos is one of the simplest steps you can take before publishing online. This guide explains what watermarks actually do, who gets the most value from them, and how WaterMarquee handles the whole workflow from single images to batch exports across multiple formats.

WaterMarquee browser editor showing a watermark applied to a photo with position and opacity controls

What a watermark does for your photos (and what it does not)

A visible watermark overlays your name, logo, or URL directly onto an image file. Anyone who sees the photo also sees the credit, whether it ends up on Pinterest, in a Google image search, or reposted on someone else’s Instagram. That is the core job: make attribution obvious at a glance and deter casual scraping.

Watermarking is distinct from two related techniques. DRM (digital rights management) restricts access to a file entirely, typically through login gates or encrypted delivery. Steganography hides data inside an image invisibly, with concealment as the primary goal. A visible watermark does neither of those things. It signals ownership openly, which is what deters most opportunistic reuse.

What a watermark does not do is prevent a determined person from removing it. Someone with image editing skills can crop, clone-stamp, or retouch a watermark out of a photo. The realistic threat model is casual theft: a competitor copying your Etsy listing photos, a blog reposting your images without credit, or a client sharing your gallery previews publicly before purchase. A clearly placed watermark stops most of that because it makes the theft obvious and the source traceable.

Watermarking is a pre-publication step, not a recovery tool. Apply it before you upload or share, and keep the unmarked master files separate.

Who needs watermarks on their photos

Three audiences get the most practical value from watermarking, and all three share the same core problem: they publish images online regularly and need a consistent mark applied across many files, not one at a time.

Photographers sharing gallery previews with clients or posting to social media face two real risks. A client might share a preview publicly before purchasing prints. A third party might repost a shot without credit. A watermark with your studio name or website URL keeps your brand in the image wherever it travels.

Online sellers on Etsy, Amazon, and eBay deal with listing photos being scraped and reused by competing shops. A watermark with your shop name or URL makes the source of the image obvious and discourages direct copy-paste. According to the customer’s internal tool summary, WaterMarquee is built explicitly for this audience, with platform-ready export for Etsy and Amazon in one batch, though it’s worth checking the current feature set on watermarquee.com.

Content creators (bloggers, newsletter writers, social media accounts) publish images that get indexed and reshared. A visible logo or text credit line keeps the attribution in the image itself, not just in a caption that gets stripped when the image is saved and reposted.

WaterMarquee brand kit panel with saved logo and font settings applied consistently across a photo gallery

How WaterMarquee adds watermarks to photos

WaterMarquee is a browser-based watermarking editor. No software download is required. The editor runs on a Konva canvas with a live preview, so you see exactly how the watermark sits on your photo before you export any files.

What you can add to each image:

  • A logo watermark, a text caption (name, URL, copyright line), or both combined in one export
  • Position controls to place the mark in any corner, centred, or diagonally across the image
  • Size and opacity settings to balance visibility against image readability
  • Blend mode options for more control over how the watermark sits on different backgrounds

On opacity: lower settings make the watermark less intrusive but easier to visually remove by cropping or cloning. Higher opacity deters casual removal but can obscure the photo itself. There is no single correct value. A corner logo at moderate opacity is the most common approach for gallery previews; a diagonal text watermark at higher opacity is more common for proof images sent before payment.

Batch export and format support:

According to the customer’s internal tool summary, the Plus tier supports batch export of up to 100 images per run, and the Studio tier (coming soon as of June 2026) will support up to 500. The Free tier processes one image at a time. Export formats include JPG, PNG, and WebP as of June 2026. You can convert and resize to multiple output sizes in a single batch, covering web, print, and thumbnail sets in one go. Named platform compatibility includes Pixieset, ShootProof, Etsy, and Amazon as of June 2026.

Brand kit:

Save your logo, watermark fonts, and opacity setting once. Every subsequent export uses the same wordmark, the same position, and the same corner. No drift across a gallery of hundreds of images.

Additional tools in the same workflow:

  • AI alt text generation using Claude Haiku vision, producing descriptive text and platform-tuned keywords you can edit before export; see watermarquee.com for current availability
  • Client-side video watermarking using ffmpeg-wasm, so video files never leave your machine as of June 2026
  • Background removal (Plus tier) and HD upscale (Studio tier)

WaterMarquee batch export dialog with multiple photos queued for watermarking and multi-format output options

WaterMarquee pricing: Free, Plus, and Studio tiers

All pricing below is sourced from the customer’s internal tool summary and was accurate as of June 2026. Check watermarquee.com for current rates.

Free tier: $0 forever. One image at a time, up to 10 MB and 2048 px per file. Supports logo and caption watermarks, one-link sharing, and basic alt text. Exported files carry a WaterMarquee credit stamp. This is a real starting point for solo creators who post one photo at a time, but it becomes a bottleneck the moment you have a gallery to process; see watermarquee.com for current details.

Plus tier (most popular): $9.99/month or $99.99/year (17% off). Removes the one-at-a-time limit. Batch export up to 100 images, full brand kit, AI alt text and SEO metadata, AI background removal (100 operations per month), multi-size export, premium watermark fonts, and no WaterMarquee stamp on output. This is the practical tier for most photographers and sellers; check watermarquee.com for current pricing.

Studio tier (coming soon as of June 2026): $19/month. Everything in Plus, plus batch up to 500 images, HD upscale, pattern watermark (a repeating tile that cannot be cropped out of the frame), PDF watermarking for proofs and contracts, SEO keyword research, and 500 AI operations per month; see watermarquee.com for current rates.

Legacy Pro tier: $19 lifetime, closed to new users. Approximately 4,800 original members from the WordPress plugin era are being migrated to Plus with $19 off year one, though it’s worth checking watermarquee.com for current migration details. Not shown in public pricing.

The upgrade trigger from Free to Plus is straightforward: if you are regularly watermarking more than one image per session, the Free tier will slow you down.

WaterMarquee pricing: Free, Plus, and Studio tiers

WaterMarquee for photo watermarking: strengths and limitations

WaterMarquee for photo watermarking: strengths and limitations

Strengths:

  • Browser-based with no install. Open the editor, upload your files, export. Works on any device with a browser.
  • Brand kit prevents inconsistency. A gallery of 80 photos exports with the same logo position, the same font, and the same opacity every time.
  • Multi-format batch export covers the most common platform requirements. JPG, PNG, and WebP out, with resize to web, print, and thumbnail sizes in one run.
  • AI alt text generation is a real time-saver for sellers and creators who need SEO metadata alongside the watermarked image, not as a separate step.
  • Client-side video watermarking means your video files stay on your machine. No upload to a third-party server.

Limitations:

  • The Free tier is one image at a time. For anyone with a backlog of photos to process, this is a genuine constraint, not a minor inconvenience.
  • Studio tier features (pattern watermark, PDF watermarking, HD upscale) are not yet live as of June 2026. If you need a repeating-tile watermark that cannot be cropped, you will need to wait or choose a different tool.
  • The Plus batch cap of 100 images per run may be limiting for high-volume studio workflows until Studio launches as of June 2026.
  • Like all visible watermarks, these can be removed by a determined person with image editing tools. WaterMarquee deters casual theft; it does not prevent skilled removal.

WaterMarquee alternatives for watermarking photos

As of June 2026, the main alternatives to consider are:

Canva. A broad design tool that can add a watermark to photos, but watermarking is not its primary purpose. Better for creating one-off branded graphics than for running a batch watermarking workflow across a full photo gallery. No dedicated brand kit for watermark settings.

Adobe Lightroom. The standard choice for photographers who need watermarking as part of a full editing and export pipeline. Supports logo and text watermarks on export, with batch processing across a catalogue. Requires a Creative Cloud subscription and a desktop install. The better fit when you are editing and watermarking in the same session rather than watermarking already-edited files.

Visual Watermark. A dedicated watermarking desktop app with strong batch processing capabilities. A better option for users who prefer a native app over a browser-based tool. Pricing details are available on the Visual Watermark website; this article does not publish a figure that could be out of date.

iWatermark. A mobile-first watermarking app suited to photographers who shoot and share directly from a phone. Better for mobile workflows than for desktop batch processing of large galleries.

The differentiator for WaterMarquee, as of June 2026, is that it often combines browser-based access (no install), brand kit consistency across multiple images, and AI alt text generation in the same export step. Many tools in this list combine some of these features, but not all three in one workflow.

Is WaterMarquee the right watermarking tool for your photos?

WaterMarquee is a strong fit for photographers, online sellers, and content creators who need to add consistent watermarks to photos at scale without installing desktop software. The brand kit and batch export are the core value proposition: set your logo, font, and opacity once, then process a full gallery in one run.

The Free tier is a genuine starting point. Upload a photo, add your logo or a text caption, choose your position and size, and export as JPG, PNG, or WebP. The moment that one-at-a-time limit becomes a bottleneck, the Plus tier at $9.99/month (or $99.99/year as of June 2026) removes it and adds brand kit, batch up to 100 images, and AI metadata.

Studio is the tier to watch for high-volume studios and anyone who needs pattern watermarks or PDF proofing, but it is not yet live as of June 2026.

Two situations where WaterMarquee may not be the right choice: if you need advanced photo editing alongside watermarking in the same tool (Adobe Lightroom handles both), or if you need offline desktop batch processing at very high volume right now rather than waiting for Studio to launch.

Start with the Free tier at watermarquee.com to test the workflow with your own photos and files. Upgrade to Plus when batch export becomes the real bottleneck.

FAQ

What does a watermark actually do to protect my photos? A visible watermark overlays your name, logo, or URL on the image so that credit travels with the photo wherever it is shared or reposted. It deters casual theft and makes the source obvious, but it does not prevent a skilled person from removing it with image editing tools.

Can I add a watermark to multiple photos at once with WaterMarquee? Yes, on the Plus tier. According to the customer’s tool summary, Plus supports batch export of up to 100 images per run as of June 2026, with the same watermark settings applied to every file. The Free tier processes one image at a time.

What file formats does WaterMarquee export? WaterMarquee exports JPG, PNG, and WebP files. You can also resize to multiple output sizes in a single batch, covering web, print, and thumbnail dimensions at once.

How do I choose the right opacity for my watermark? Lower opacity is less intrusive but easier to remove visually by cropping or cloning. Higher opacity is harder to ignore but can obscure the photo. For gallery previews, a moderate-opacity corner logo is the most common approach. For proof images sent before payment, a higher-opacity or diagonal text watermark is more common.

Is WaterMarquee free to use? There is a Free tier at $0 that lets you watermark one image at a time with a logo or text caption and export as JPG, PNG, or WebP. Exported files carry a WaterMarquee credit stamp on the Free tier. The Plus tier at $9.99/month removes that stamp and adds batch processing, brand kit, and AI metadata; check watermarquee.com for current rates.

Do I need to install software to use WaterMarquee? No. The editor runs entirely in the browser. Upload your image or image files, configure your watermark, and download the exported files. Video watermarking also runs client-side, so video files never leave your machine.

How to watermark your pictures: a step-by-step guide for creators

How to watermark your pictures: a step-by-step guide for creators

You post a photo. Someone else uses it on their website, their Etsy listing, or their social feed without asking. A visible watermark on that image would have made the source clear from the start. This guide walks you through exactly how to add one before you hit publish.

Watermarquee editor showing a watermark applied to a photo before export

What watermarking your pictures actually does

A watermark is a visible mark, usually your logo, your name, a URL, or some combination, that is embedded directly into an image. Anyone who sees the photo sees the credit. That is the core job: attribution and deterrence.

Watermarking is different from DRM (digital rights management), which restricts who can open or copy a file. It is also different from steganography, which hides data invisibly inside an image with concealment as the goal. A watermark is visible by design.

The honest version of what a watermark does: it deters casual image theft and makes unauthorized use harder to deny. It does not stop a determined person from cropping a corner or cloning out a mark in editing software. The protection it offers is social and legal, not technical. Someone who uses a clearly watermarked image without permission has a harder time claiming they did not know who owned it.

Timing matters. Watermarking is a pre-publish step. Once your photos are live without a watermark, that window has closed. The right moment to add a watermark is before the image leaves your machine.

Who needs to watermark their pictures (and who can skip it)

Three groups get the most from watermarking their photos:

  • Photographers sharing preview galleries. You send a client a gallery link before they pay. Every image in that gallery is a potential download. A watermark keeps your name on every photo and discourages unpaid use.
  • Sellers on Etsy, Amazon, or eBay. Product photos get scraped. A seller whose listing image turns up on a competitor’s page with no credit has little recourse if the image carries no identifying mark. A logo watermark or text watermark with your shop name makes the source visible.
  • Bloggers and social media creators. A header image or original graphic reposted without credit is a common experience. A watermark does not stop the repost, but it travels with the image and points back to you.

Who can skip it: if the image is low-resolution, purely decorative, and attribution genuinely does not matter to you, adding a watermark creates friction for no real benefit. Stock-style filler images or background textures are rarely worth the effort.

Five-step diagram showing how to watermark a picture from upload to export

How to watermark a picture: the step-by-step process

Use this sequence every time you prepare photos for publishing. It works for a single portrait or a full product shoot.

  1. Upload your image. Open an online watermarking tool such as Watermarquee and upload your photo. On the free tier, you can upload one image at a time, up to 10 MB and 2048 px, according to the Watermarquee tool summary; it’s worth checking the current pricing page for any updates. For batch processing of multiple photos, you need a paid plan (covered in the next section).
  1. Choose your watermark type. You have two options: a logo watermark (your brand image as a PNG with a transparent background), a text watermark (your name, website URL, or a copyright year), or both together. A logo is faster to recognise at a glance. A text watermark works well if you do not have a logo yet. For copyright protection purposes, including the year (for example, “2025 YourName.com”) is useful.
  1. Position and style the watermark. Watermark placement is the most important visual decision. A corner placement, typically lower-right, is standard and keeps the subject visible. Centre placement deters cropping but can obscure the image. Set the opacity: lower opacity (around 20 to 40 percent) often looks professional and unobtrusive; higher opacity can make the watermark harder to remove by cropping. You can also adjust the font, color, and size. The Watermarquee editor shows a live preview on a Konva canvas so you can see the result before exporting.
  1. Select your export format. Choose from JPG, PNG, or WebP depending on where the image is going. JPG is standard for social media and web listings. PNG preserves transparency if needed. WebP gives smaller file sizes for web performance. If you need platform-specific sizing (for example, a square crop for Instagram and a landscape version for a blog header), multi-size export is available on paid plans. You can resize and export a web set, print set, and thumbnail set in one batch.
  1. Export and share. Single images export immediately as a publish-ready export. Watermarquee generates a public share URL for each watermarked image, so you can send a link directly to a client or collaborator.

Worked example: a photographer uploads a JPEG portrait, places a semi-transparent logo in the lower-right corner at around 30 percent opacity, exports a JPG for Instagram and a full-resolution PNG for client delivery. Both files carry the watermark. Both files are ready to share before anything goes online.

Note: a visible watermark deters casual image theft. A determined person with editing software can still attempt removal. The value is deterrence and clear attribution, not absolute prevention.

Watermarquee pricing tiers compared: Free, Plus, and Studio feature comparison

Free vs. paid watermarking: what you get at each level

As of June 2025, Watermarquee offers three active tiers (pricing from the Watermarquee tool summary):

Free: $0 forever (see their official pricing for current rates)

  • 1 image at a time, up to 10 MB and 2048 px
  • Logo and caption watermark
  • One-link sharing per image
  • Basic alt text
  • Watermarquee credit appears on the output

Plus: $9.99/month or $99.99/year (17% off) (see their official pricing for current rates)

  • Batch export up to 100 images
  • Brand kit (logo, fonts, color palette locked for brand consistency)
  • AI-generated alt text and SEO metadata
  • AI background removal (100 per month)
  • Multi-size export for platform-specific sizing
  • Premium fonts
  • No Watermarquee stamp on output

Studio: $19/month (coming soon as of the internal summary dated 2026-06-18) (see their official pricing for current rates)

  • Everything in Plus
  • Batch watermark up to 500 images
  • AI HD upscale
  • Pattern watermark and PDF watermarking
  • SEO keyword research
  • 500 AI operations per month

A legacy Pro plan ($19 lifetime) exists for approximately 4,800 original members from the earlier WordPress plugin era (see their official pricing for current rates). It is closed to new users.

The natural upgrade trigger: if you are watermarking more than one image at a time on a regular basis, or if the Watermarquee credit on the output matters to your brand, Plus is the logical next step. The brand kit alone, which locks your logo, font, and color so every export matches, saves meaningful time across a full gallery.

Free vs. paid watermarking: what you get at each level

What works well and what to watch for

What works well and what to watch for

What works well:

  • No installation required. The editor runs in the browser, so there is nothing to download or update.
  • Client-side processing for video. According to the Watermarquee tool summary, as of June 2026 video watermarking uses ffmpeg-wasm, which renders the watermark directly in the browser. Your video file never leaves your machine.
  • The brand kit locks your logo, font, and color palette so every export is consistent, with no drift across galleries or posting sessions.
  • AI alt text generation produces descriptive image metadata and platform-tuned keywords in one click, which saves time for anyone managing SEO metadata across a large image library.
  • The free tier is genuinely usable for solo creators posting one image at a time.

What to watch for:

  • Free tier outputs carry the Watermarquee credit stamp. For professional client delivery, this matters. Plus removes it.
  • The Studio tier features, including pattern watermark, PDF watermarking, and HD upscale, are not yet live as of the internal summary dated 2026-06-18.
  • As of June 2026, the batch limit of 100 images on Plus may be a constraint for high-volume studio workflows. Studio (when live) can raise this to 500.
  • A corner watermark can be cropped by anyone with basic editing skills. For images where copyright protection is critical, consider a centre placement or, when Studio launches, a repeating pattern watermark that covers the whole image.

Other ways to watermark your pictures

If Watermarquee is not the right fit, these alternatives are worth considering:

Canva. A design-first tool with watermark capability built into its broader template editor. If you are already creating graphics in Canva and want to add a watermark without switching apps, this is a natural fit. Check current pricing at canva.com, as plans change.

Adobe Lightroom or Photoshop. Professional-grade, subscription-based tools where watermarking is one small feature inside a large editing suite. Better suited to photographers already paying for the Adobe Creative Cloud stack who want to handle watermarking and editing in one place. Check current pricing at adobe.com.

Manual method (no dedicated tool). Add a text layer in any image editor, flatten the image, and export. This works for a single photo and costs nothing. It does not scale to batch watermarking, does not include a brand kit, and produces no image metadata or alt text. For one-off images, it is fine. For regular publishing, it becomes slow.

Which approach is right for you

The decision comes down to volume and brand needs:

  • One image occasionally: the free tier at watermarquee.com is enough. Upload, watermark, export, share. No account required to try it.
  • Regular posting with brand consistency needs: Plus at $9.99/month (as of June 2025) adds batch export up to 100 images, the brand kit, and AI-generated alt text and SEO metadata. The watermark becomes part of a repeatable publish workflow rather than a manual step each time.
  • High-volume studio delivery: watch for the Studio tier launch, which will add batch processing up to 500 images, HD upscale, and pattern watermarking.

One weakness worth naming: if you need a pattern watermark across the whole image right now, that feature is not yet live. A corner watermark is the current option for deterring cropping.

The core rule does not change regardless of which tier or tool you choose: watermark before you post, not after. The moment an image is public without a watermark, the copyright protection it could have carried is gone. Start on the free tier at watermarquee.com, run one photo through the full workflow, and see whether it fits before committing to a paid plan.

FAQ

Do watermarks actually stop people from stealing my photos? A visible watermark deters casual image theft and makes unauthorized use harder to deny, but it does not prevent a determined person from cropping or editing it out. The value is attribution and deterrence, not absolute protection.

What is the difference between a visible and invisible watermark? A visible watermark is a logo or text you can see on the image. An invisible watermark (sometimes called a steganographic mark) hides data inside the image file without altering the visible picture. Most creators use visible watermarks because the deterrence only works if the mark can be seen.

Should I watermark in the corner or across the centre of the image? A corner watermark is less intrusive and looks more professional for client previews and social posts. A centre watermark is harder to remove by cropping and is better for preview images you are sharing before payment. Choose based on how much deterrence you need versus how much of the image you want visible.

What image file format should I export after watermarking? JPG works for most social media and web listings. PNG is better when you need a transparent background or maximum quality. WebP produces smaller file sizes for web use. Most online watermarking tools, including Watermarquee, export all three image file formats.

Can I watermark multiple photos at once? Batch watermarking is available on paid plans. According to the Watermarquee tool summary, as of June 2026 the Plus tier supports batch export of up to 100 images, and the upcoming Studio tier can support up to 500. The free tier processes one image at a time.

Does adding a watermark affect my image’s SEO? The watermark itself does not affect SEO, but the image metadata does. Tools that generate alt text and SEO metadata alongside the watermark, such as Watermarquee Plus, help ensure your images are properly described for search engines at the same time you are preparing them for publishing.

Best fonts for watermarks: how to choose one that stays readable and looks professional

Best fonts for watermarks: how to choose one that stays readable and looks professional

Choosing the best fonts for watermarks comes down to one practical question: will your name or logo still read clearly when it’s sitting at reduced opacity on top of a photo, document, or video frame? The answer depends less on aesthetics than on a handful of technical properties most font guides don’t cover.

![Comparison of bold sans-serif and serif watermark fonts overlaid on a photograph at 30% opacity]

What makes a font work well as a watermark

A watermark is a visible identifier embedded in an image, document, or video to signal ownership and deter casual unauthorised reuse. It is distinct from DRM (which restricts access to a file) and steganography (which hides data invisibly inside a file). A visible watermark deters casual copying; it does not prevent a determined person from removing it with image editing software.

Font Weight is the most important variable. Weight refers to how thick the strokes of each letter are. A bold or extra-bold weight keeps enough ink on the page (or pixels on screen) to remain visible at low Opacity. A light or thin weight disappears first as opacity drops, because the strokes are already narrow.

Letterform clarity matters at small sizes. Fonts with open counters (the enclosed or partially enclosed spaces inside letters like “e”, “a”, and “o”) hold their shape better when scaled down. Fonts where letters are tightly packed or highly decorative tend to blur into an unreadable smudge at thumbnail scale. This is the core of Readability and Legibility for watermark use: the font must survive both size reduction and opacity reduction simultaneously.

Letter spacing (the gap between characters) affects whether a word reads as text or as a visual texture. Slightly wider spacing helps at small sizes; very tight spacing causes letters to merge.

Contrast Ratio is the variable most guides skip. A watermark that reads clearly on a white document background can become invisible on a pale blue sky or a light-toned product photo. The contrast between your watermark colour and the image background determines visibility, and no font choice compensates for a Contrast Ratio that is too low. If your images vary widely in tone, consider a dual-layer approach: a dark watermark with a very light drop shadow, or a semi-transparent white watermark on a slightly darker tinted box.

Which use case shapes your font choice

The surface your watermark sits on changes what “readable” means in practice.

Photography Watermarks sit directly on top of an image, which means the background is unpredictable. Your watermark might land on dark foliage, bright snow, a pale sky, or a busy street scene in the same batch of photos. Thin decorative scripts that look elegant on a white mockup disappear on complex backgrounds. Heavy Sans-Serif Fonts hold Legibility across varied backgrounds because their strokes are thick enough to read even when contrast is moderate.

Document Watermarks (PDFs, contracts, draft reports) are usually viewed at full screen resolution or printed. The background is almost always white or a very light colour, which gives you more contrast to work with. Diagonal placement across the page is common here, and the font can be larger and more formal. A condensed serif or a medium-weight sans-serif both work at this scale.

Video Watermarks are locked to a corner of the frame and must stay readable across motion and scene changes. The font renders at a fixed size relative to the frame resolution, so it needs to hold at whatever pixel size that translates to. Bold, simple letterforms with no fine decorative details are the safest choice.

Creative and design work (illustrations, digital art, prints) is the one context where Brand Identity can take priority over pure legibility. If your watermark is large and placed prominently, a more distinctive letterform can reinforce your visual style while still deterring casual reuse. Even here, avoid scripts so decorative that the letters merge.

Watermarking is a pre-publication step. You choose the font before the asset goes out, not after an infringement is discovered. If you publish regularly across a large library of images, applying a consistent font and style in bulk is where most creators save or lose significant time. For a deeper look at how watermark style connects to brand consistency, see our guide to building a consistent watermark identity.

Specific font recommendations by use case

![Side-by-side examples of Montserrat Bold, Bebas Neue, and Playfair Display Bold as watermarks on varied photographic backgrounds]

These fonts are all available through Google Fonts as of 2025. Each entry includes the classification, the use case it suits best, and the property that makes it work.

  • Montserrat Bold – Sans-Serif Fonts – photography and social media images – high x-height and consistent stroke weight mean it holds at small sizes and low Opacity; the geometric letterforms are distinct without being decorative.
  • Roboto Bold – sans-serif – general purpose, Video Watermarks – slightly condensed proportions make it efficient in a corner placement; open counters keep it legible at small sizes.
  • Open Sans SemiBold or Bold – sans-serif – documents and photography – wider letter spacing than Roboto gives it slightly better legibility on busy backgrounds; a reliable default for creators who want something neutral.
  • Raleway Bold – sans-serif – creative work and art prints – slightly more distinctive letterforms (particularly the “W”) give it a visual identity without sacrificing legibility at medium sizes; less suited to very small watermarks.
  • Bebas Neue – condensed sans-serif – photography, video, large-format – all-caps with tall, narrow letterforms; reads clearly in a single line across the bottom of a photo without taking up much vertical space; works best at medium-to-large sizes.
  • Lato Bold – sans-serif – Document Watermarks and photography – a humanist sans-serif with slightly warmer letterforms than Roboto; holds well at low opacity because of its consistent stroke weight.
  • Playfair Display Bold – Serif Fonts – formal documents, certificates, high-resolution art prints – the thick-to-thin stroke contrast looks authoritative at large sizes and on white backgrounds; the thin strokes thin out further at low opacity, so use it at higher opacity or larger sizes than you would a sans-serif.
  • Source Sans Pro Bold – sans-serif – documents and UI-heavy contexts – designed for screen legibility, with open counters and clear differentiation between similar characters (like “I”, “l”, and “1”); a strong choice for watermarks that include URLs or alphanumeric codes.

Serif Fonts vs. Sans-Serif Fonts: sans-serif options generally hold legibility better at small sizes and low opacity because they lack the fine terminal strokes (the small decorative feet at the ends of letters in serif fonts) that thin out and disappear first. Serif Fonts can work well at larger sizes, on high-resolution prints, and in formal document contexts where the white background provides enough contrast.

Script and decorative fonts: most decorative scripts fail as watermarks. Individual letters merge at reduced opacity, and the resulting mark looks like a smear rather than text. Avoid them unless your use case is a large-format art print where the watermark is placed at high opacity and large size.

Bold Font Weight is almost always the right choice. A font at 30% opacity in Bold reads more clearly than the same font at 30% opacity in Regular, because the strokes are thicker to begin with. If a font you like only comes in Regular, consider going up in size to compensate, but bold is the more reliable fix.

Free vs. paid fonts: what the licensing actually means for watermark use

Font Licensing is a step many creators skip, and it can create legal exposure on commercially distributed work.

As of June 2025, all fonts listed above are available through Google Fonts under the SIL Open Font License (OFL). The OFL permits commercial use, including use in watermarks on commercially sold or licensed images. This applies in most jurisdictions, but Font Licensing is a legal matter that can vary by country, so verify the OFL terms against your local context if needed.

The key question for watermark use is not “can I download this font for free” but “does the license permit embedding the font in a distributed image or document.” These are different questions. When you render a watermark, the font is baked into the image pixels, which is generally covered by the OFL. When you embed a font in a PDF (where the font file itself is included in the document), some licenses treat that as a separate embedding right. Our overview of font licensing for creators covers the most common scenarios in plain language.

Premium font foundries, such as those distributing fonts through Adobe Fonts or MyFonts, typically offer desktop licenses and web licenses as separate products. Some require an additional embedding license for PDF or image distribution. Check the license terms on the foundry’s own site before using a paid font in a watermark on commercially distributed work.

Practical guidance: if the watermarked image will be sold or licensed commercially, use a Google Fonts option with a confirmed OFL license and you avoid the research step entirely. A watermarking tool that bundles pre-cleared fonts removes this friction for creators who watermark at volume.

Tradeoffs to know before you commit to a font

What works in your favour:

A clean, heavy sans-serif at consistent opacity reads as deliberate and professional across almost any background. Using the same font as your logo or brand mark reinforces your Brand Identity and makes the watermark harder to dismiss as a generic overlay. Montserrat, for example, is widely used as a brand typeface, so a Montserrat watermark can feel like a natural extension of a creator’s existing identity. For more on aligning watermark style with broader visual branding, see our article on watermark design principles.

What works against you:

Highly distinctive or branded fonts can date quickly if you rebrand. Retroactively changing watermarks on images already published or distributed is impractical; the old watermark is baked into those files permanently. Test any font on a representative sample of your actual images before committing to a bulk run, because fonts that look strong on screen can render poorly when an image is printed or converted to a different colour space (for example, from RGB to CMYK for print).

No font choice alone makes Tamper-Proofing effective on its own. A visible text watermark deters casual reuse; it does not stop a determined person from removing it with clone-stamp tools, cropping, or recolouring. The font is one layer of deterrence, not a security system. If your threat model includes deliberate, skilled removal, a visible watermark addresses only the casual end of that spectrum. Read more about Tamper-Proofing strategies for digital assets if your work is at higher risk.

Beyond font choice: sizing, opacity, and placement

Font choice is one variable. Font Sizing, Opacity, and Watermark Placement have at least as much impact on how well your watermark works.

Font Sizing relative to the image matters more than the absolute pixel size. A watermark that is too small becomes invisible at thumbnail scale, which is where most casual theft happens (someone screenshots a social media post or saves a preview image). A watermark that is too large overwhelms the content and reduces the perceived value of the image. As a starting point, aim for a watermark width between 20% and 40% of the image width, then adjust based on your specific content.

Opacity is the balance between visibility and intrusiveness. A watermark at very low Opacity disappears on varied backgrounds; one at very high opacity distracts from the content. Bold fonts can be readable at lower opacity than light-weight fonts, which is another reason bold is the default recommendation. For most Photography Watermarks use cases, an opacity between 25% and 50% with a bold font gives a workable balance.

Watermark Placement has a direct effect on how hard the watermark is to remove. A corner watermark is easy to crop out. A watermark placed diagonally across the centre of the image is harder to crop without removing significant content, but it is also more intrusive for the viewer. Tiled watermarks, where the same text repeats across the whole image, are the hardest to remove without damaging the underlying image, but they are also the most visually disruptive. The right placement depends on how much you prioritise deterrence versus viewer experience.

![Diagram showing three Watermark Placement options: corner, diagonal centre, and tiled, with notes on crop resistance for each]

WaterMarquee handles font selection, Font Sizing, Opacity, and Watermark Placement in a single workflow, including bulk application across a library of images. For creators who watermark regularly, that consolidation removes the step of applying settings manually to each file.

Which font should you actually use

For the most common use case, Photography Watermarks and digital images published online, the strongest single recommendation among the best fonts for watermarks is Montserrat Bold. It has a high x-height, consistent Font Weight, open counters, and a clean geometric style that reads as professional without being generic. It is available through Google Fonts under the OFL, covers commercial use, and holds Readability and Legibility at small sizes and moderate opacity across varied photographic backgrounds.

For Document Watermarks and PDF use, where the background is typically white and the font can be larger and more formal, Playfair Display Bold suits a professional or legal register well. Use it at a size where the thin strokes of the Serif Fonts remain visible, and at higher opacity than you would use for photography.

The honest caveat: font choice is the least important variable after placement and opacity. A mediocre font placed diagonally across the centre of an image at the right opacity will deter more casual reuse than a perfectly chosen font sitting in the bottom-right corner at 15% opacity where it disappears on any dark background. Get the placement and opacity right first, then refine the font to match your Brand Identity and use case.

Once the best fonts for watermarks are chosen, applying them consistently across a large library of images is where most creators lose time. Doing it file by file in an image editor is slow and introduces inconsistency. A bulk watermarking tool that locks in your font, size, opacity, and placement settings and applies them across an entire folder in one pass is where the font decision pays off at scale.

WaterMarquee as a watermarked video sharing platform: features, limits, and alternatives

WaterMarquee as a watermarked video sharing platform: features, limits, and alternatives

What WaterMarquee is and what problem it solves

WaterMarquee is a free, browser-based image watermarking tool built for photographers, designers, and visual content creators who want to deter Unauthorized redistribution of their work before it happens. According to watermarquee.com, the platform does not store uploaded images on its servers and states that no one at the company can access your photos, though its own copy describes a conventional upload-and-download workflow rather than purely local, client-side processing.

As of mid-2025, WaterMarquee is designed for images, not video. If you need a full watermarked video sharing platform, you will need a different tool. That gap is worth understanding clearly before you commit to any workflow.

A quick terminology note, because the word “watermark” gets used loosely. Visible watermarking embeds a logo or text overlay that any viewer can see, which deters casual reuse by making ownership obvious. Invisible/forensic watermarking hides an identifier in the file’s data that survives copying and can be used for leak tracing after the fact. Digital Rights Management (DRM) is a separate category entirely: it restricts who can open or play a file, rather than marking it. WaterMarquee operates in the Visible watermarking category.

One more framing point: watermarking is a pre-leak deterrence step. A visible watermark raises the social cost of reuse and signals that the image is owned. It does not prevent a determined person from cropping, editing, or otherwise removing it. No watermarking technique, visible or invisible, is undefeatable by a sufficiently motivated attacker. The value is in deterring the majority of casual infringement and Unauthorized redistribution, not in guaranteeing absolute protection.

Who benefits most from WaterMarquee and who needs something different

WaterMarquee fits best when your primary assets are images and your workflow lives in a browser.

The clearest use case is a photographer watermarking a gallery of preview JPEGs before sending a client link. You process a batch of images in the browser, add your studio logo or name, and share the watermarked versions without ever uploading originals to a third-party server. That privacy-preserving, zero-install workflow is where WaterMarquee earns its place.

Other creators who fit this profile well include:

  • Designers sharing portfolio images on social media or client portals
  • Stock photographers adding visible marks to preview files before licensing
  • Illustrators watermarking artwork samples for commission inquiries
  • Social media managers watermarking static graphics before posting

The gap becomes clear when the asset is video. Organisations that need a full watermarked video sharing platform include:

  • Corporate learning and development teams distributing proprietary training videos
  • Film studios sharing screener copies with reviewers under embargo
  • Educational institutions hosting lecture recordings with per-viewer identification
  • Digital marketing agencies delivering client video content with usage controls

These teams need capabilities that go beyond what WaterMarquee currently offers: Dynamic watermarking (where the mark changes per viewer or session to enable leak tracing), Invisible/forensic watermarking that survives re-encoding, Content tracking to monitor where a file is reshared, and often enterprise compliance certifications. A dedicated video platform is the right starting point for those requirements, not an image watermarking tool.

Key features of WaterMarquee and how they map to video content protection needs

The confirmed features of WaterMarquee, drawn from the tool’s own published pages, are:

  • Browser-based, client-side processing. Images are processed locally in your browser. No file is uploaded to a server. For creators handling sensitive client work or pre-release assets, this is a meaningful privacy advantage over cloud-upload tools.
  • Bulk watermarking. You can watermark multiple images in a single session, which matters for photographers processing large galleries. Manually watermarking hundreds of images one at a time is a workflow bottleneck; bulk processing removes it.
  • Text and logo watermark options. You can add a text string (your name, studio name, copyright notice) or upload a logo image as the watermark. This covers the two most common Visible watermarking needs for photographers and designers.
  • Free tier. The tool is available at no cost, as described on watermarquee.com.

Here is how those features map, honestly, to the jobs a watermarked video sharing platform typically needs to perform:

| Protection job | WaterMarquee | Dedicated video platform | |—|—|—| | Visible watermark on images | Yes | Varies | | Bulk image processing | Yes | Varies | | Visible watermark on video | Not confirmed | Typically yes | | Invisible/forensic watermark | Not confirmed | Often yes | | Dynamic watermark per viewer | Not confirmed | Often yes | | Content tracking and analytics | Not confirmed | Often yes | | API integration | Not confirmed | Often yes | | CMS compatibility | Not confirmed | Often yes |

Invisible/forensic watermarking embeds a hidden identifier that can survive format conversion and be extracted later to trace a leak back to a specific recipient.

Dynamic watermarking generates a unique visible or invisible mark for each viewer or sharing session, so if a copy surfaces publicly, you can identify which recipient leaked it. This is the standard approach for screener distribution in film and for corporate training video protection. WaterMarquee does not appear to offer this as of mid-2025.

Content tracking monitors where a watermarked file is reshared across the web or within a platform, giving rights holders visibility into distribution patterns. This is a feature of dedicated Video hosting platforms, not of WaterMarquee.

API integration allows developers to embed watermarking into their own publishing workflows, Content Management Systems (CMS), or video pipelines. No confirmed API integration is published for WaterMarquee as of mid-2025. Teams that rely on a CMS to manage and distribute content at scale will find this absence a meaningful constraint.

The absence of these features does not make WaterMarquee a weak tool. It makes it the right tool for a specific job (fast, private, Visible watermarking of images) and the wrong tool for a different job (managed video distribution with forensic tracing).

WaterMarquee pricing: what the free tier covers and where paid options begin

WaterMarquee is described on its own site as a free tool. As of mid-2025, the core image watermarking functionality, including bulk processing and text or logo watermark options, is available at no cost.

No confirmed paid tier names, prices, or feature gates beyond the free offering are published in the entity data available for this article. Rather than speculate, check watermarquee.com directly for the current pricing structure, as the tool appears to be moving toward a subscription product with expanded capabilities.

For context on the value decision: a free image watermarking tool and a paid watermarked video sharing platform are not competing for the same budget. Dedicated Video hosting platforms with Dynamic watermarking, forensic tracking, and enterprise compliance certifications typically operate on monthly or annual subscription pricing that reflects the infrastructure required to process, store, and monitor video at scale. If your current need is image watermarking, WaterMarquee’s free tier covers that job without any investment. If your need is video, you are looking at a different category of spend regardless of which tool you choose.

WaterMarquee pros and cons for video content protection

Pros

  • Free with no upload required. Client-side processing means your images stay on your device. For photographers sharing pre-payment previews or creators handling sensitive unreleased work, this is a genuine advantage over tools that require cloud upload.
  • No installation needed. The tool runs in a browser. There is no software to install, update, or license, which matters for creators who work across multiple machines or want to get started immediately.
  • Bulk watermarking for image workflows. Processing a large gallery in one session is a real workflow efficiency gain. According to the tool’s published pages on watermarquee.com, bulk watermarking is a confirmed feature.
  • Accessible to non-technical users. Text and logo watermark options with browser-based controls require no technical knowledge to use effectively.
  • Privacy-preserving by design. Because processing is client-side, there is no server-side data retention risk for your original files.

Cons

  • Designed for images, not video. Creators who need a watermarked video sharing platform will need a separate tool.
  • No confirmed Invisible/forensic watermarking. If you need to trace a leak back to a specific recipient after it happens, WaterMarquee’s visible-only watermark does not provide that capability.
  • No confirmed Dynamic watermarking. Per-viewer or per-session marks, which are the standard for screener distribution and corporate training video protection, are not a confirmed WaterMarquee feature.
  • No confirmed Content tracking or analytics. There is no published evidence of monitoring where a watermarked file is reshared, which limits post-distribution visibility.
  • No confirmed API integration or CMS support. Teams that want to embed watermarking into an automated publishing pipeline or Content Management Systems (CMS) cannot currently do so through a WaterMarquee API integration.

The Visible watermarking WaterMarquee applies deters casual reuse effectively. It does not prevent a determined person from removing or obscuring it, and it provides no mechanism to detect or respond to Unauthorized redistribution after the fact.

Alternatives to consider for watermarked video sharing

If your requirement is video watermarking, Dynamic watermarking, forensic leak tracing, or enterprise compliance, the following categories of tools are worth evaluating. Specific pricing and feature availability should be verified directly with each vendor, as these details change. All characterisations below reflect publicly available information as of mid-2025.

Dedicated video Digital Rights Management (DRM) and watermarking platforms (such as those used by film studios and streaming services) combine Visible watermarking burned into video frames with Invisible/forensic watermarking that survives re-encoding and screen capture. These platforms typically offer per-viewer Dynamic watermarking, Content tracking dashboards, and API integration for pipeline automation. They are built for the screener distribution and corporate training use cases that WaterMarquee does not cover. Vendors in this space often publish security certifications relevant to enterprise buyers; check which certifications a vendor holds before committing if compliance is a requirement in your jurisdiction.

Video hosting platforms with built-in watermarking offer watermark overlays applied at the streaming layer, so the original file is never distributed in unwatermarked form. This approach is common for marketing agencies delivering client video and for educational platforms hosting course content. Most Video hosting platforms in this category support API integration and Content Management Systems (CMS) plugins, making them straightforward to embed into existing publishing workflows. Free trials are common; look for published API documentation and supported format lists before evaluating.

Forensic watermarking specialists focus specifically on Invisible/forensic watermarking embedding and extraction for post-leak attribution. These tools are typically used by media companies and content distributors who need to identify which recipient leaked a file, rather than simply deter casual reuse. They are a different product category from Visible watermarking tools and carry a corresponding price point.

The right alternative depends on whether your primary need is deterrence (Visible watermarking on video), leak tracing (Invisible/forensic watermarking), access control (Digital Rights Management (DRM), which restricts playback rather than marking the file), or a combination of all three.

For a deeper look at how these platform categories compare on pricing and feature depth, see our full guide to watermarked video sharing platforms. If you are evaluating specific tools, our breakdown of Dynamic watermarking solutions for enterprise video covers the leading vendors in detail. For teams managing video through a CMS, our guide to CMS-integrated video watermarking walks through the integration options available across major platforms. Teams with compliance requirements may also find our overview of Digital Rights Management (DRM) and forensic watermarking for regulated industries useful before shortlisting vendors. Finally, if budget is a constraint, our comparison of free and low-cost video watermarking tools outlines what is realistically available at each price point.

Verdict: when to use WaterMarquee and when to look elsewhere

Use WaterMarquee if you are a photographer, designer, or visual content creator who needs fast, free, private image watermarking from a browser with no technical setup. The client-side processing model, bulk watermarking, and zero-cost entry make it a strong fit for image-heavy workflows where Visible watermarking is the goal. A wedding photographer watermarking a gallery of preview JPEGs before sharing a client link, or a designer adding a studio logo to portfolio samples before posting, will find it covers the job well.

Look elsewhere if you need a full watermarked video sharing platform. Corporate training teams, film studios distributing screeners, educational institutions hosting lecture recordings, and digital marketing agencies managing video delivery all need capabilities that sit outside WaterMarquee’s current scope. Unauthorized redistribution of video content, in particular, requires forensic tracing tools that Visible watermarking alone cannot provide.

One honest limitation to name directly: the visible watermark WaterMarquee produces deters casual infringement. It does not stop a determined attacker who is willing to crop, edit, or otherwise work around the mark. If your threat model includes sophisticated adversaries, you need Invisible/forensic watermarking or Digital Rights Management (DRM) on top of, or instead of, a visible mark.

WaterMarquee appears to be building toward a subscription product with expanded capabilities. Creators who find the free image watermarking tier useful today may find the tool grows to meet more advanced needs over time. For now, the honest framing is: excellent free image watermarking tool, not yet a watermarked video sharing platform.

To try the tool and check the current feature scope and any paid options, visit watermarquee.com directly.

Best fonts for watermarks: how to choose type that protects and reads

Best fonts for watermarks: how to choose type that protects and reads

A watermark font has two jobs that pull against each other: stay readable at a glance and avoid dominating the image it sits on. Get the balance right and the watermark deters casual copying while leaving the subject visible. Get it wrong and you either have text nobody notices or a stamp that ruins the photo. This guide gives you a practical framework for choosing the best fonts for watermarks, with WaterMarquee, a free browser-based image watermarking tool, as the practical context throughout.

A quick distinction before going further. Watermarking embeds a visible or traceable identifier in an image. DRM (digital rights management) restricts access to content at the platform level. Steganography hides arbitrary data inside a file with concealment as the primary goal. This guide covers visible text watermarks. They deter casual theft and establish attribution; they do not prevent a determined actor from removing the mark. That is the honest threat model, and font choice affects how well the deterrence works.

The guidance here covers three media contexts: digital images shared online, print media outputs, and video. Each renders type differently, and the right font choice shifts depending on which you are working in.

![Example of a clean sans-serif watermark applied to a landscape photograph at medium opacity]

What makes a font work for watermarks

A watermark font earns its place by being legible under difficult conditions: small size, reduced opacity, and a busy or variable background. Legibility is the first requirement. Decorative or script fonts fail this test quickly. A flourished script that looks elegant in a logo becomes unreadable when set at 30% opacity over a textured background.

Legibility matters, but so does intentionality. A watermark in a thin, wobbly novelty font signals that the creator did not think carefully about protection, which undermines the deterrence effect. The font choice communicates something about how seriously you take your work.

The third factor is tamper resistance in a practical sense. A font that is easy to read is also easier for a viewer to mentally dismiss or crop around. Positioning matters too, but font weight and font sizing affect how much of the image the watermark occupies and therefore how easy it is to remove by cropping. A watermark that spans a meaningful portion of the image is harder to crop out cleanly than one tucked in a corner.

No font choice makes a watermark unremovable. A motivated person with basic image editing software can remove any visible watermark given enough time. The goal is to make casual copying inconvenient and to ensure attribution is visible to anyone who sees the image in normal use.

You can learn more about how watermark positioning affects protection, the difference between visible and invisible watermarks, and how to set up a bulk watermarking workflow in related guides on this site.

Who needs to think carefully about watermark fonts

Most people who add a watermark do it once, look at the result, and move on. That works fine for a single image. The stakes rise in several specific situations.

Photographers sharing preview galleries with clients before payment need the watermark to be taken seriously. If the font looks amateurish or the text is so faint it barely registers, clients may not feel any friction about sharing the previews without paying. A clean, medium-weight sans-serif at a visible opacity signals that the protection is deliberate.

Digital publishers and bloggers who add a brand mark to original images before posting on social media have a different concern: brand consistency. If your brand uses a specific typeface, using a completely different font in your watermark creates a disconnect. Viewers who see your watermarked image shared elsewhere may not connect it back to you.

Videographers adding video watermarks as a corner bug or lower-third credit need to account for the fact that video compression and motion affect how text renders. A font that looks sharp on a still image may shimmer or blur in compressed video. Sans-serif fonts with heavier weights hold up better in this context.

Anyone running a bulk watermarking workflow faces the highest stakes of all. When the same font, size, and opacity combination is applied to hundreds or thousands of images, a poor choice is multiplied across the entire library. WaterMarquee’s bulk watermarking feature makes font selection a one-time decision that scales, which is exactly why it is worth spending time on the choice upfront rather than rushing it.

Serif vs. sans-serif: which type style works better for watermarks

The answer depends on where the image is going.

Sans-serif fonts for digital media

Sans-serif fonts, such as Helvetica, Arial, and Montserrat, render cleanly at small sizes and low opacity on screen. The strokes are uniform in thickness, which means they hold their shape even when the font is small or the opacity is reduced. For digital media images shared online, a sans-serif is the default recommendation for the best fonts for watermarks.

As of mid-2025, Montserrat in particular appears frequently in practitioner recommendations for watermark use because it is free, widely available, and has a range of weights that work well at medium opacity. Arial and Helvetica are reliable workhorses that most operating systems include by default.

Serif fonts for print media

Serif fonts, such as Georgia, Times New Roman, and Playfair Display, have fine strokes at the ends of each letterform. On screen, those fine strokes can disappear at small sizes or low opacity, making the watermark harder to read. In print media, where resolution is typically much higher than a screen, those fine strokes are preserved and serif fonts can convey a sense of authority and craft that suits certain professional contexts, such as fine art prints or editorial photography.

If your primary output is digital, start with a sans-serif. If you are watermarking images that will be printed at high resolution, a serif can work well, but test it at the actual print size before committing.

Font weight is the most important single variable

A medium or semi-bold weight — values 500 (Medium) and 600 (Semi Bold) on the CSS numeric scale — strikes the right balance for watermarks: substantial enough to remain legible at reduced opacity, yet restrained enough not to dominate the image. Light weights (300 or below) tend to disappear, especially on bright or busy backgrounds. Heavy weights (700 and above) can overpower the subject. Light weights (300 or below) tend to disappear, especially on bright or busy backgrounds. Heavy weights (700 and above) can overpower the subject.

Avoid decorative, script, or display fonts entirely. They are harder to read at a glance, often fail at small sizes, and give the watermark an unintentional look that works against the credibility you are trying to establish.

Free fonts vs. licensed fonts for watermark use: what to know

A large number of high-quality sans-serif fonts suitable for watermarks are available under open licenses. Google Fonts hosts hundreds of options under the SIL Open Font License, which permits free use including commercial use. Montserrat, Open Sans, and Lato are three well-regarded examples that work well for watermarks and carry no licensing restrictions for typical creator use.

Premium fonts are a different matter. Many commercial typefaces are licensed for use in specific contexts, such as print, desktop applications, or web embedding, and the license terms may not explicitly cover use as a watermark on published images. This is not a universal rule, and licensing terms vary by foundry and jurisdiction. In the US, UK, and Australia, commercial font licenses are contracts between the buyer and the foundry, and the terms differ. If you are using a premium font you purchased for design work, it is worth checking whether the license covers its use on publicly distributed images. This is not legal advice, and the specifics depend on your location and the font’s license agreement.

For most creators, the practical answer is straightforward. A free, openly licensed sans-serif from Google Fonts gives you a professional result, zero licensing risk, and immediate availability. There is no meaningful quality gap between a well-chosen free font and a premium one for watermark purposes.

WaterMarquee is a free browser-based tool. Check watermarquee.com directly for current font options and whether the tool supports custom font uploads.

Font size and opacity: the two settings that make or break a watermark

Font choice matters, but font sizing and opacity are the settings you will actually adjust every time you apply a watermark. Getting these two variables right is what separates a watermark that works from one that either disappears or overwhelms the image.

![Side-by-side comparison showing watermark opacity at 30%, 50%, and 70% on the same image]

Sizing proportionally, not by pixel count

Font sizing should be proportional to the image dimensions, not set as a fixed pixel value. A watermark that looks right on a 4000-pixel-wide image will be tiny and unreadable on a 1000-pixel social media crop of the same photo. A practical guideline used by many photographers and digital creators is to aim for the watermark text to span roughly 20 to 30% of the image’s shorter dimension. This keeps the watermark visible and meaningful without taking over the frame.

The exact proportion depends on your intent. A watermark on a preview image sent to a client before payment can afford to be more prominent. A watermark on a published portfolio image that you want to look clean should sit closer to the lower end of that range.

Opacity as the primary balance control

Opacity is the main tool for balancing visibility with content protection. Higher opacity means the watermark is harder to miss and harder to remove by simply adjusting the image’s levels or curves. Lower opacity preserves the image’s visual impact but risks the watermark becoming invisible on certain backgrounds.

A commonly cited starting point among practitioners is a medium opacity in the 40 to 60% range, combined with a medium font weight. This combination keeps the watermark present without dominating. It is a starting point, not a rule. A watermark on a photo with a light, plain background may need higher opacity to remain visible. One on a dark, detailed background may need less.

One practical issue that catches people out: a font that looks sharp in a design tool may render with soft edges when flattened onto a JPEG at export. This happens because of how JPEG compression handles fine detail. Test your font, size, and opacity combination on a sample image and export it at your usual quality setting before applying it to a full batch. What you see in the editor is not always what you get in the final file.

See also: how to choose watermark placement for maximum tamper resistance and a comparison of watermarking tools for photographers.

Applying font choices in WaterMarquee and other watermarking tools

WaterMarquee is a free, browser-based image watermarking tool that runs entirely client-side, meaning your images are not uploaded to a server. This matters for creators who handle client work or sensitive content and do not want images passing through a third-party service. It is one of the more practical ways to apply the best fonts for watermarks at scale without a desktop application.

The practical payoff of getting your font decision right comes in bulk workflows. Once you have settled on a font, size, and opacity combination that works for your images, WaterMarquee’s bulk watermarking feature applies it consistently across an entire library. A single well-considered choice scales to hundreds of images without any additional work.

For video watermarks, the rendering conditions differ from still images. A watermark in a video must remain legible across motion and through the compression artifacts that video codecs introduce. Sans-serif fonts with a heavier weight and slightly higher opacity generally hold up better in video than light-weight or serif options. Whether WaterMarquee’s video watermarking feature supports custom font selection is not documented in the available information; check watermarquee.com directly for current video capabilities.

Two other tools worth knowing about for context: iWatermark is a desktop and mobile application with more granular control over watermark positioning and layering. Visual Watermark is a desktop-based tool focused on batch processing with a visual preview workflow. Neither replaces WaterMarquee’s browser-based, no-upload approach, but they serve different workflows.

Read more: getting started with WaterMarquee for batch image watermarking.

Choosing the right watermark font: a practical summary

The decision comes down to five variables. Work through them in order and you will have a defensible choice for the best fonts for watermarks without needing a design background.

Media type first. Digital media images shared online call for a sans-serif. Print media outputs at high resolution can support a serif. Video needs a heavier sans-serif that survives compression.

Font style. Default to sans-serif for most use cases. Montserrat, Open Sans, and Arial are reliable, freely available choices as of mid-2025. Use a serif only if you have a specific print context where it suits the work.

Font weight. Choose medium to semi-bold (500 to 600 on the CSS scale). Light weights disappear at low opacity. Heavy weights dominate the image.

Opacity. Start at 40 to 60%. Adjust based on the background of your specific images. Test on a real export before applying to a batch.

Brand consistency. If you already have a brand font, using it in your watermark reinforces attribution even when the watermark is partially obscured. A viewer who knows your brand will recognise the typeface even if they cannot read the full text.

Font choice is a deterrence and attribution tool. A well-chosen font makes the watermark credible and readable. It does not prevent removal by a motivated person with image editing software. The goal is to make casual copying inconvenient and to ensure your name or brand is visible to anyone who encounters the image in normal use.

If you already have a brand font, apply it. If you do not, pick an openly licensed sans-serif at medium weight and test it on a real image before scaling up. To apply this guidance immediately, open WaterMarquee’s free browser-based tool at watermarquee.com, set your font, weight, and opacity, and run a test on one image before applying it to your full library.

Recent Articles