A body building photo shoot is one of the most fun sets a photographer can work on – you get to meet top athletes, play around with lighting and photography techniques, all the while showcasing the peak physical condition of the human body. In fact, fitness photography is also becoming a very lucrative niche, with body building photo shoots and other fitness related visual content creation coming in high demand thanks to the rise in popularity of fitness influencing on social media.
This is all excellent news for any photographer looking to expand their skills and break into the body building photography market. However, before diving in, its important to be aware of what equipment you’ll need, the etiquette around body building photography as well as some of the best tricks to get the most out of your shoots.
What Equipment Is Needed For A Body Building Photo Shoot
Camera
If you’re planning on shooting body building professionally, you’ll come to find that the majority of work is done in a photography studio due to the flexibility they offer a photographer regarding lighting, backdrop and general photo set up. As such, the best cameras for body building are usually cameras that react well to staged lighting and are regarded as studio workhorse cameras, such as:
The Canon EOS R3
The Canon EOS R3 is a top-tier tool of choice for working professionals. With a new dynamic range that sets a benchmark for pro-level cameras, and a lower pixel count enabling it to generate significantly less noise than the higher resolution rivals from Sony and Nikon, this camera is an absolute dream for any photographer. It is also a perfect camera for capturing the intricate muscle definition and small details needed in body building photography, and thanks to it’s next generation internal hardware, it wont need replacing for a significant period longer than any other option.
The Canon EOD 5D IV
Mirrorless cameras might have taken over but that doesn’t mean there isn’t still a place for the humble DSLR, and the Canon EOD 5D IV is the best of the best, despite being released in 2016. Combining a reasonably high-resolution 30.2MP sensor with decent continuous burst speeds and fast auto focus, this camera is an excellent studio work horse. Robust, reliable, and weather resistant, this camera can take anything you could throw at it, and more, so make sure to consider it a solid contender in your camera search.
“The best cameras for body building are studio workhorses that react well to staged lighting.”
Lighting
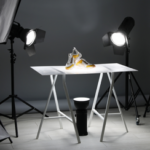
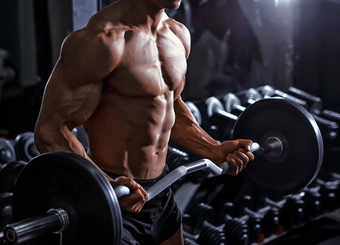 Unlike glamour shoots, and regular portraiture shoots, where you aim to use one key light, one rim light and a fill light, body building photography requires an entirely non traditional lighting set up. To begin with, the first major difference is the level of light diffusion required. In normal photography, soft light is often viewed as more flattering and a much nicer way to light a subject, however, body building photography is the opposite, requiring hard and harsh lights in order to cast shadows allowing for musculature contrast.
In terms of lighting placement, you’ll have to adapt on the fly according to which muscle structure you’d like emphasized. For example, if you want to emphasize the abs, then you’ll need to light your subject from the top down and use quite harsh light in order to create crisp shadows which will accentuate the muscles. If you want all the frontal muscles emphasized on your model wise then the strategy would be to put you key light at 45-degree angle from the model’s side without too much diffusion to create harsh shadows that will stretch across the body.
The main goal with lighting a bodybuilding shoot is to create local contrast around the muscles in order to highlight the size, shape and texture of the muscle. This can be difficult as some of the muscles you’re hoping to show case can be very small, needing harsh light to highlight them. If you were to use a soft light source it wouldn’t provide enough definition to them. Often, you’ll have to incorporate more complex light setups to increase the contrasts and emphasize certain muscles which will be covered in shadow from other muscles.
Other Items You May Need
One of the lesser known but equally as important aspects of a bodybuilding photography shoot is prepping your model for the shoot. The classic bodybuilding look involves a sweat glistened body and tight, striated musculature. The reality of this look however, is less glamorous and will involve discussion with your model about how they want their pictures to look, and what they’re willing to do in order to achieve that look.
In order to get your model to have the sweat-glistening look of a body builder, you’ll need to provide them with baby oil to rub over their whole body, which will help it look as expected, and is much easier than asking them to get sweaty before every click of your camera. A less easy step to get the body building photo look, involves dehydration.
Many body builders are aware of this process, however it is important to discuss it with your clients just so you’re both on the same page. Typically, a body builder will go the gym, avoid bloating foods and limit their water intake ahead of a photo session or competition so their body is in the most aesthetic form it can be in. If your client takes part in this process, make sure you provide water for after the shoot, letting them drink small sips throughout just to be safe.
Overlooked Parts of a Bodybuilding Photo Shoot
Post Processing Your Images
Post processing body building photos is a necessity as it allows you to really fine tune the final product you put out. However, the process is much more difficult when it comes to body building than most other photography niches. This is due to many factors, the first of which is that you are unable to use filters to smooth out skin since they will do harm to muscle structure and definition that has already been captured in your image. What this means is that you will need to go through and soften skin manually where needed, a tedious process but one that will guarantee a good result in the long run.
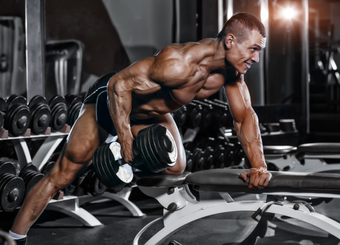 Additionally, you’ll also have to correct for the light around small and large muscle groups in order to achieve the proper form and structure, and increase the contrast around the impressions of the muscles themselves. However, be careful not to overdo it, since it can turn out quite unnatural if you don’t understand the body structure and if you aren’t consistent with the your editing process.
“You’ll need to provide your model with baby oil to rub over their whole body to get the sweaty look expected.”
Watermark Your Images
Watermarking is an important part of the process for all photography niches as it protects the copyright of your work and ensures that it cannot be reused or altered without your permission. This is perfect in the online photography world as it allows you to publish your work without the threat of theft. Watermarking can also double as a branding tactic. Much like a painter that mark their work with a signature, digital watermarking is a great way to get your name out there and heighten brand awareness.
The best thing about watermarking however, is that it is simple and free when using WaterMarquee! WaterMarquee is a free online watermarking service where you simply upload your photos and get them back with a custom watermark in no time at all. WaterMarquee also offers premium services that will help elevate any work you produce and mark you as a true photography professional. So what’re you waiting for? If you want to make your body building photos, safe, professional and stylish, look no further than WaterMarquee.


