 While it is a simple process, an E commerce Photoshoot can be the make or break of your business, with product photography being one of the most important factors that contribute to the success of online stores. After all, while we scroll past hundreds of words we tend to ignore, what instead catches our eyes are high quality images that show off a product on an Ecommerce store and make them look irresistible.
As such, more often than not Ecommerce product photography is the first stepping stone for consumers on their way to buy a product.
The Importance of Ecommerce Photography
According to a study made by Etsy, about 90% of surveyed shoppers believe the quality of eCommerce images was very important when deciding whether or not to make a purchase, and it makes sense as while a product description is important, what really sways our decisions to purchase are images of what we’re getting.
While it might sound superficial, but a good product image reflects the quality of an item. If an item up for sale has no image, how are we supposed to know what we’re spending our money on? When it comes to online sales, the image usually reflects the quality of the item–if your online product does feature an image but this image is of poor quality, what does that say about the product itself? On the other hand, a well-made photograph says a lot about your product–what it looks like, how it works, how well made it is.
It’s also worth noting that the quality of your product image doesn’t just reflect your product, but your company itself.
 If you can’t take a good photograph of what you have on offer, what does that say about how you run your company?
Luckily, taking a professional quality ecommerce photos can be done easily and without too much expense once you understand the shooting process and what you will need in order to help your ecommerce website stand out from the major ecommerce platforms.
How To Set Up an E Commerce Photoshoot
Sort Out Equipment
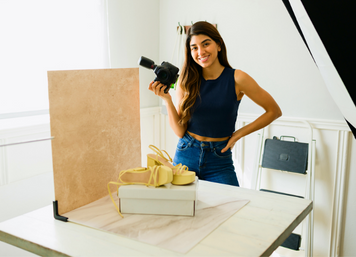
The first place to start with a E Commerce photoshoot is the studio. If you’re going to be taking a lot of product shots, then it helps to have a dedicated area for photography.
A well-organized studio and a streamlined workflow can go a long way in helping you take a lot of professional product photos for your ecommerce business in a short period of time.
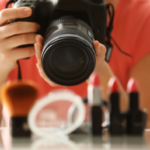
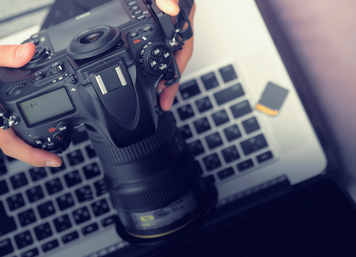
Of course, you’ll need to buy the basics first starting with a camera. You don’t have to buy a fancy DSLR camera with a range of lenses to take good product images.
Don’t be afraid to take product photos with your iPhone as contemporary smartphones have fairly advanced cameras.
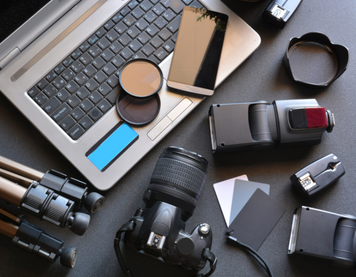 This is great because it means and the quality of your photos will depend more on your shot setup, lighting, and post-processing than on the camera you use, all of which are elements you can control easily.
Investing in some lighting equipment is the next step to building your e commerce photoshoot setup. Good lighting is essential to good photography but luckily, nature might already have some to provide you with.
Window light gives you a good amount of light with a soft shadow which is a good option to start with. We will delve into more detail about lighting strategies below, but in the set-up stage, it’s important to know that natural window light is best, so set up next to a large window. Related to lighting, it is important to try and find something that can be used as a reflector.
A reflector is anything white or metallic that bounces light onto the far side of your scene to brighten it and soften shadows.
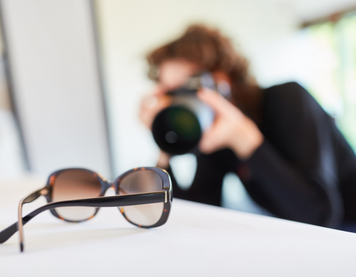
Now that you’ve got everything behind the frame sorted, the next set of things to grab all involve the actual shot. To start with, you’ll need a stable shooting surface to place your product, so a table or desk will work for most small products. For larger products, it’s easiest to use the floor as your set up surface, just keep in mind that you’ll want to pick a spot that gets a lot of window light and is relatively clean.
Once you have found a suitable place to stage your product, the final element of your e commerce photoshoot to sort out is a backdrop. Most professionals invest in a white sweep, which is a backdrop that curves down into the floor, but if you are on a budget, you can buy some craft paper or poster board and mount it over a table to achieve the same white background effect, elevating your e commerce photoshoot to a professional standard.
“About 90% of surveyed shoppers believe the quality of eCommerce images was very important.”
Sort Out Your Set-Up
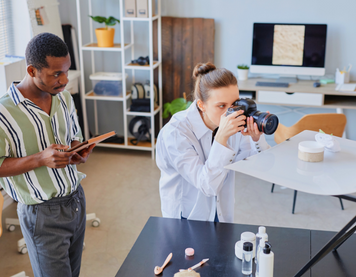
Now that you have everything you need to start shooting, it’s time to think about the set-up of your product photography.
 To begin with, you’ll want your setup to be lit from the side as side lighting helps highlight the shape and textures of the object being photographed.
To do this, start by placing your table next to your window, with your background behind it set up in an L-shape to create a table/wall effect.
Next, try mounting your reflector on the side opposite the window to bounce light back on to your subject.
If you don’t have a reflector, a piece of white poster board or a trifold poster board work just as well. With this studio setup, you’ll be able to swap products in and out to take multiple product photos in a short period of time. You can also experiment with different placements of your tripod and camera, depending on which angles work best with your subject.
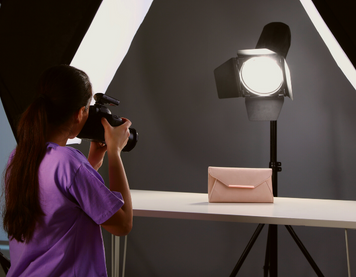
Experiment With Different Styles
While full-white backgrounds are great for your e commerce photoshoot, experimenting with different props, angles, and styling will help breathe life into your photos and give your audience a better sense of the physicality of your products. There are a lot of composition styles that you can try, but when it comes to ecommerce photography, two of the more common compositional styles are the diagonal and the “C.”
A diagonal setup is great for eye-level shots where your camera lens is positioned at the same level as your product. The idea here is to place objects in a diagonal line from back to front, with the tallest objects in the back and the shortest in the front.
 To get a better idea of how to employ this technique, start by placing one or two tall props in the back right or left corner, directly in front of your vertical surface.
Place your main subject near the centre of your horizontal surface, at least six inches in front of the vertical backdrop. Keeping it at least six inches from your vertical surface will keep it blurred when you shoot with a shallow depth of field.
Then place a short prop in the opposite front corner so that you’ve created a diagonal line when you look down on it.
This diagonal composition might look strange when viewed from above, but shot from the front with a shallow depth of field, you start to see why this style of composition is so common in ecommerce photography.
When choosing background and foreground props, consider objects a customer may use with your subject. For example, a bath poof and towel make sense with a skin care product. Alternatively, you might choose attractive objects that fit with your color scheme, even if they don’t relate to your product. For background objects, try glass bottles, vases, plants, or a bowl of fruit. For foreground objects, try a sprig of greenery, citrus slices, flowers, or a sprinkle of something textured, like coarse salt, oats, or loose tea.
However, if your product is flat like artwork or paper goods, a flat lay may be a better angle for you. This is where the ‘C’ composition comes in handy, allowing you to display a flat lay product easily and in an aesthetically appealing manner. The trick to the ‘C’ composition is to arrange your subject and props in a crescent shape, leaving the middle area bare. This draws the viewers eye and leaves you with an e commerce photoshoot that looks classy and professional, without detracting from your product.
“When choosing background and foreground props, consider objects a customer may use with your subject.”
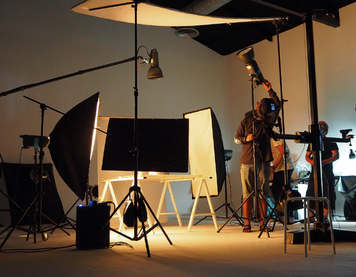
Adjust Your Lighting
Now that you have organised your set up, it’s time to perfect the shot’s lighting, an essential part of really defining your images and elevating you e commerce photoshoot to the next level.
 Using natural light, is always best as it will provide you a good amount of light with a soft shadow. If the shadow is too sharp, you can place a screen, paper, or cloth on the inside to soften it.
The only downfall with this is the ever changing nature of natural light. If you want to really maximize your time and get some beautiful shots, it would be best to shoot in the afternoon, during a time known as ‘golden hour’.
Typically, photographers refer to the last hour before sunset and the first hour after sunrise as the “golden hours,” because these times provide the perfect amount of light for shooting.
It’s also best to shoot on an overcast day, to avoid direct sunlight. Just like strong back-light, direct sunlight can be too harsh and can create unsightly dark shadows. If you have to use artificial lights, two identical soft-box setups can usually do the job, using one as your key light and the other as fill to soften any shadows. Sadly, no matter what you photograph or what type of light you use , you’re going to get shadows. The goal for an e commerce photoshoot is to assess and modify your shadows to achieve a look you and your customers will love.
“It would be best to shoot in the afternoon, during a time known as ‘golden hour’.”
Consider Focus, Stabilization and Consistency
When shooting for an e commerce photoshoot, do not underestimate the importance of a tripod to minimize blur and keep the angle consistent across multiple products.
 For those of you with a more advanced camera and tripod set up, you could even try setting the lens to a small aperture and a slow shutter speed.
This will give you a wide depth of field that brings your entire product into focus to give it a crisp look, as long as you ensure your camera is well-fixed on your tripod to avoid getting blurry images.
If you use a phone camera, you can get a similar effect by using portrait mode. Rather than changing the size of the aperture like DSLRs do, phone cameras use machine learning to blur the background and create a similar effect. Once you’ve taken a few shots, try mixing and matching different backdrops to experiment with different effects. For example, mixing and matching different vertical and horizontal backdrops will give you a ton of content for your e commerce photoshoot without any extra styling effort.
You can also choose backdrops of different colors and intensities that compliment your brand aesthetic and look great together. That way you can create light/light, dark/dark, and mixed dark/light combinations that lend variety to your listings and catch attention on Instagram. With just one e commerce photoshoot, you’ll be able to change your product page photos to suit the season and you’ll have an abundance of content for social media.
“If you’ve taken great shots, you’ll only need to do some light editing.”
Edit Your Photos
 After you’ve taken your shots during your e commerce photoshoot, you’ll want to move on to retouching them. Expensive photo editing software isn’t necessary for this step, as there are countless free image editing tools available for post production on your e commerce photoshoot. If you’ve taken great shots, you’ll only need to do some light editing to make the images from you e commerce photoshoot really pop.
The first thing to think about when it comes to editing is the base image’s sharpness. With good lighting and a stable tripod setup during your initial e commerce photoshoot, you should already have fairly sharp images. The goal with post production sharpening is only to slightly sharpen your images, giving them a more defined look if required. The next step is to adjust the white balance of your image.
White balance is the level of blue and red tints on the white areas of your photograph. Adjusting the white balance of your image can make it look more “cool” or “warm,” depending on your intention. Generally, commercial photography should look warmer, with the intention of creating a sense of warmth that invites potential customers in and draws them to your product.
Similar to white balance, the next thing to edit is the brightness and contrast in your images. Brightness can be used to give more highlight to certain areas of your image, but be careful not to turn the brightness up too much. A high level of brightness can give an image a “washed out” quality. Contrast describes the separation of light and dark areas of your photograph. Slightly higher contrast can give the textures of your photo more depth, but again, don’t overdo it. Excessively high contrast can stifle the range of colors in your photo and make the image appear flat and lifeless.
“In terms of security, watermarking can’t be beat.”
How To Prepare Your Ecommerce Product Photography For the Internet
 Once you have completed your e commerce photoshoot, edited the photos you produced and are happy with your overall product, the next step is to watermark your work. In terms of security, watermarking can’t be beat, allowing you to safeguard your work from any potential content thieves and protect your copyright on any photos you publish online, meaning other companies or competitors cant steal them.
Watermarking is also highly regarded as one of the best ways to establish an easily identifiable brand online. Much like how a painter adds their signature to a painting, watermarking with a custom watermark can help potential clients identify your work, helping your photography stand out in the sea of content on the internet. This means that when you publish the photos from your ecommerce photoshoot online and onto any external distribution sites like Pinterest or Instagram, your work will be easily identifiable, leading to more people looking at your work and more potential clients!
The only downside to the process is that watermarking can be difficult without professional photo editing knowledge. Luckily, WaterMarquee is here to help! While there are a few tools online that allow watermarking, no tool can match the free bulk watermarking offered by WaterMarquee. With this service you can watermark up to five images at a time, entirely free of charge! So what are you waiting for, protect your e commerce photoshoot and build your brand with WaterMarquee today!