How can HDR photography help you take better pictures?
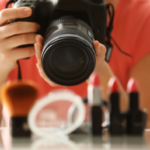
Have you ever tried to take pictures of a high-contrast scene (sometimes with your smartphone’s camera app), only to be frustrated when you find that the photos you snapped just don’t give justice to it? Don’t fret about it. It is not you; it is not your camera, either. Even with the ideal exposure, some scenes tend to get blown-out, flat shadows, or both. Although it is almost impossible to find a happy medium in such situations, there is a solution. This age-old dilemma can be resolved through the magic of HDR processing.
What is an HDR photograph? Here is a quick overview of what it is all about and how to get started.
High Definition Range (HDR) photography is popping up everywhere these days, generally with excellent results, but sometimes not.
What is High Definition Range (HDR) Photography?
HDR means “high dynamic range.” Dynamic range is essentially just the distinction between the brightest light and the darkest darkness you can capture in an image. When the subject in your scene surpasses the dynamic range of the camera, the highlights tend to be white, or the dark ones just become big black blobs. It is notoriously hard to snap a photo that encapsulates both ends of this spectrum, yet with advanced post-processing software and modern shooting techniques, photographers have formulated ways of making this happen.
This is primarily what HDR is: a particular style of photo with a remarkably high dynamic range that could not otherwise be obtained in a single image.
How Does HDR Photography Work?
Even the best images tend to leave out the details that humans can see with their eyes. HDR Photography lets you capture more detail in a photograph, so it appears more like what you would see in real life.
At the most primary level, HDR photography is actually just two or more photos taken at specific exposure levels and then fused together with the software to achieve a better image. It is a bit more complicated than that, but not a lot more — it is the short version of it.
HDR in Action


Ideally, the photographer takes a variety of bracketed photos — that is, images of the same subject taken with variable shutter speed combinations to generate a set of images with different luminosity. (HDR photography performs excellent with a camera on a tripod and remains entirely still and with landscapes empty of moving objects.) Then, with the help of sophisticated post-processing software, the photographer can combine the photos and make a single photo of the most well-lit, focused, and colorful areas of the scene.
To sum up, it works by capturing the image three times-normal exposure, slightly under-exposed, and somewhat overexposed. The three photos are then combined into one, creating a mixture of details from all three.
Photos are usually paired with software that can lead to some impressive results. Most modern HDR photography software could handle this process pretty well automatically but typically leave some configurations to the user, and these settings can be adjusted to find exciting effects.
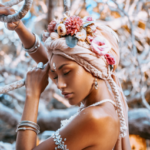
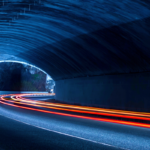
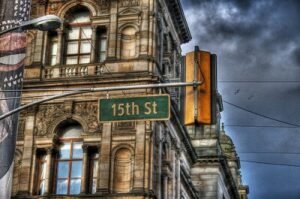
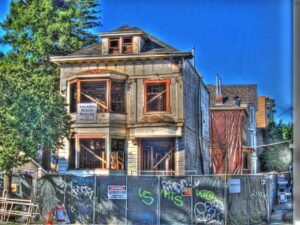
Here are some samples of cool HDR photography effects:


When You Should Use HDR
HDR can help you take more stunning images, particularly in certain situations. Here is where you should give HDR a try:
Landscapes
Wide landscape photographs normally have a lot of contrast between the ground and the sky, which is complex for your camera to capture in just one photo. With HDR photography, you could capture the sky’s details without making the earth look too dark.
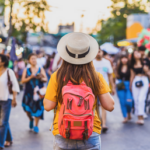
Portraits in Sunlight
We both understand that lighting is among the most critical elements of a good image, but too much lighting on people’s faces — like harsh sunlight — could result in bright glare, dark shadows, and other unflattering features. HDR could make everything out of it and improve the way yo
ur subject looks.
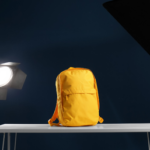
Low-light and Backlit Scenes
If your picture looks a little too dark — which sometimes happens when a scene has excessive back light — HDR will illuminate the foreground without fading the well-lit parts of your frame.

When You Should Not Use HDR
Of course, as you have found out, sometimes, the HDR just makes the images look worse. Here are several cases in which you shouldn’t use HDR:
Moving Images
if any of your subjects move, HDR increases the risk of a blurred shot. Know, HDR takes three images, so if your subject changes between the first and second shots, your final photo is not going to look very impressive.
High-contrast Shots
Some of the images look better with a sharp contrast between the dark and the light sections of the picture as if you have a dark shadow or a figure that you want to highlight. HDR would make it less intense and softer, resulting in a less interesting image.
Vivid Colors
When your scene is too dark or too bright, HDR will put back some of the colors. However, if you are working with colors that are already really bright, HDR will wash them away.
Advantages of Using HDR
Nowadays, HDR photography has become a common option. If you are new to the photography world, it is worth looking at the advantages of HDR photography.
Using HDR technology, photographers can compile various photographs taken at variable exposures. Not only this, but also that technique helps photographers to produce photographs with outstanding light accuracy, which is not possible in a single shot taken by ordinary cameras. Using HDR cameras, photographers can capture excellent still images, overexposed and underexposed environments. While photographers have the freedom to add multiple effects to images, it is still recommended that the picture be kept as realistic as possible.
Photography is an art, and in this field, anyone with the best artistic skills will succeed. Nonetheless, to sweeten the pot, HDR photography can be used. While this is not standard practice, at times, the use of this technology may actually render some fantastic art (like these fresh photography trends). And, to get the ideal angle, one should be holding a tripod. You will need the right photo editing software to edit the picture and add the necessary special effects.
Remember to protect your HDR online photographs with unlimited watermarks. Start watermarking here today.