How can you restore old photos and bring them back to life?
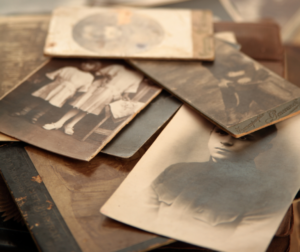
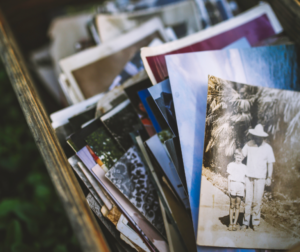
How to restore old photos. It is innate to us humans to treasure old photos. We cling to photos of your parents’ wedding, the family with the youngsters, the homestead, and the awkwardly cheesy fifth-grade haircut. Good, awkward, or bad, old photos help tell our history, our stories and serve as a reminder of who we are.

Floods, fires, hurricanes, and wars — whether the disasters are man-made or caused by the wrath of a very pissed-off Mother Nature, there’s an abundance of ways your old photos could be ruined. Even when properly stored, all kinds of terrible fates await old photos: warping, discoloration, staining, fading, rips, cracks, and tears.
The awful truth is that not many people actually take care of old pictures. Before you despair, however, there’s a way to bring old photos back to life. Yes, you might not be able to remedy the physical copy of the photo, but you could definitely fix a digital version to salvage the lost glory of the old photos. Here are our top tips for bringing old photos back to life.
How to restore old photos
Digitize the Old Photos
The initial step in repairing old images is to digitize them first. When digitizing them, it would be best to use a photo scanner rather than using a smartphone app. A scanner can really capture important details, and it can give you a clearer digital copy of the photo.
Likewise, you should scan the photo in color, regardless of whether it is black and white and at the highest quality possible. This would make it easier for you to fix and edit the picture later on, mostly when it comes to the finer details.

If the old photos are too fragile to scan, that’s alright. Find a bright and evenly lit area, and use your professional camera to snap a picture of the original image. Use your cam’s highest resolution setting, and remember to turn off the flash.
When you already have a digitized copy, please keep your original picture, store it in a safe place, and load your image-editing software or program. Regardless of which photo-editing and photo-enhancing software you pick, it would come with standard features that work great for remedying some kinds of photo-damage.
However, take note that the names of those commands might vary slightly, depending on the software or program.
Try Auto-correction Features
Because they are the quickest way to fix your old photos, give automatic correction features a try first.
With just a single click, automatic color correction can modify contrast and color based on your liking. Likewise, the auto levels feature can adjust overall contrast and usually affects color, too. This auto contrast feature, nonetheless, doesn’t affect color and adjusts contrast only.
Auto sharpen can identify edges in your old photos and make them even more defined, emphasizing smaller details and giving the image a much crisper look. Furthermore, the dust and scratches command can eliminate slight imperfections in the image. This feature works well for easily smoothing out a lot of minor problems with just one click.
Crop Out Damaged Backgrounds
It should not really come as a surprise to discover that the outermost part of your picture gets the most damage. The edges tend to get creased, bent, and be torn. Nonetheless, the good news is that these damaged edges are not all that significant in a lot of photos. As a matter of fact, they probably contain just blank spaces or small insignificant details.
This is the reason why you should just crop out these portions of the old photos. Otherwise, you would wind up spending a lot more time on an area that you might not be able to fix effectively. It actually makes sense to just get rid of those areas and concentrate on the image’s important elements.
Brighten Up Faded Images
You might likewise notice that the hues in your photos are already a bit faded. This could happen with black and white images as well! When old photos fade, however, it becomes a lot harder to distinguish between the details there. Thus, you would need to brighten them up.

This is fairly easy to do with a photo-editing program like Adobe Photoshop. You could do it through these steps:
Layer > New Adjustment Layer > Curve
Afterward, choose the black-point eyedropper icon, then proceed to click on the heaviest and darkest part of the photo. Next, choose the white-point eyedropper, then click on the lightest and brightest part of the image. To soften the effect slightly, you can reduce the opacity.
Fix the Details
If you want to fix the finer details in your image, there are a couple of tool options here – the clone stamp and healing spot brush. If you want to remedy the minor flaws in the background, the healing spot brush would be your best option. This would fix the texture of the flawed area of the photo and help fade it away.
If you are looking to fix a bigger flaw, however, the clone stamp would come in handy. This tool enables you to make a replica of a particular part of the image and recreate it somewhere else in the photo. Keep in mind to zoom the image first before using any of these tools.
How to restore old photos – Bottom-line
Image-editing software and programs take a bit of practice and effort to learn. Luckily, if you look for tutorials on the web, you are sure to find a treasure trove of advice and instructions for bringing old photos back to life.
Once you have successfully fixed an image and made new copies, store them properly. Humidity and extreme temperatures, along with light, insects, and water, ruin many pictures.

You would want to keep your photos in a firm box in a dim location at a temperature of about 70 degrees. A rigid plastic box with a hard cover could do the trick, but for the best protection available, a fireproof box is your bet for lasting storage.
Bringing old photos back to life could be a time-consuming project, but it is also gratifying. When you practice your skills and techniques on some old photos, you will see how a bit of photo editing could reap considerable rewards in the form of enhanced picture quality and preserved memories. In the end, you will also have the satisfaction of helping retain essential parts of your family’s history, as well.
Now that you have restored your old photos, remember to watermark them before you put them online. You can do unlimited watermarking with Watermarquee‘s easy to use watermarking.


