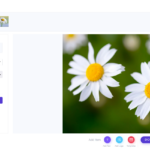
Instagram filters can improve photos on Instagram
Do you want to know the best Instagram filters? You’ve come to the right place. There are a lot of factors that go into picking the perfect filter, but we have narrowed it down to five must-have filters for your next picture. Keep reading and find out which ones are worth using on your next Instagram post!

Have a Clear Idea of What You Want to Post
Filter-wise, it’s all about the mood you’re trying to set for your photo. Do you want to take a picture of something that is bright and vibrant? The Valencia and Lark filters are great options. These two Instagram filters feature light pastel hues with a subtle brightness throughout the image. Maybe you want a darker look? X-Pro II adds vignetting, which darkens the edges of an image, creating a more dramatic feel overall. This filter also has golden undertones that give pictures an autumnal vibe that can be perfect for fall foliage photos!
Try Out Different Instagram Filters Until You Find One that Fits Your Personal Style and the Photo
You should try out as many Instagram filters as you can until you find the one that fits. Don’t limit yourself to one filter if it doesn’t give you the look that you want! Each picture takes on a slightly different tone depending on what filter is used, so play around with all of them until you find something that looks good and feels right. The beauty of apps such as Snapseed is that they are free, so there’s nothing stopping you from downloading several and experimenting with each to see which works best for your chosen photo.
Make Sure the Filter is In Line with Your Brand or Personality

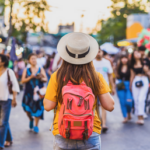
Use Instagram filters that fit the mood of your photo and are consistent with your brand or personality. If you’re a travel blogger, it’s best to go with something playful like Lark, since your photos will be of bright locales and happy people experiencing awesome things! If you’re more of a serious photographer, going for something dark like X-Pro II is a good option. Your audience will know what to expect from you when they see that filter on your posts. Not sure which filter matches your style? Browse through other users’ feeds and take note of which ones you seem to gravitate toward most!
Experiment with Instagram Filters – Some Can Make an Image Look More Dramatic, While Others Might Be Better for Portraits
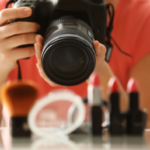
As mentioned before, each filter has a slightly different look to it. This should be taken into consideration when choosing your photo and how you want it to be presented. For example, the Juno filter is great for selfies because it brightens up the skin as well as the rest of the picture! If you are thinking of posting an image of yourself on Instagram, this might be just what you’re looking for. The C7 filter features soft pastel colors with slight vignetting at the corners, giving pictures a vintage feel that fits perfectly with lifestyle bloggers who love sharing images from their travels or food snaps from delicious restaurants!
The Best Instagram Filters to Use
To Make Your Photos Look More Professional, Use the Filter “Lark”
“Lark,” the less-is-more filter for portraits, is a good choice if you want to give the impression that you’ve used more than one filter. Lark features light hues with a slight warmth throughout the image and also brightens up your face! This is another perfect option for selfies – just make sure your photo looks great as is before adding any effects.
Don’t forget about contrast: playing around with contrast in your pictures can have a huge effect on how it turns out. Make sure to not only adjust the brightness but also shadows and highlights (both are found under “exposure”).
If You Want to Have a Vintage Feel to Your Photos, Use the Filter “Hefe”
The Hefe filter gives images an aged or vintage feel. Use it if your content has a retro vibe, or want to evoke one in your audience. Because of its golden tones and the way it darkens the edges, this filter is perfect for those who love sharing older pictures of themselves like high school or college yearbook photos!
To Give Your Images a Sharp and Crisp Look, Try Using the Filter “Valencia”
Images with the Valencia filter tend to look sharp and clear. The “Valencia” filter is great for those who love taking photos of food, close-ups, or images of themselves because this effect gives it a professional shine! If you want your pictures to look like they belong in an editorial spread, this might be the one that will do just that.
If you want a more vintage feel on your photos, use the filter “X-Pro II”
The “X-Pro II” filter brings up highlights and shadows for a deeper and moodier look that also gives off an illusion of sharpness. This kind of photo tends to give off the appearance that it was taken with a professional camera, so this is good for those looking to pull off a sincere, documentary style.
The Instagram Filters “Gingham” and “Juno” are Great for Adding an Artistic Touch to Any Photo
“Gingham” and “Juno” are really great for those who want to add an artistic touch to their photos. These Instagram filters not only make your images look brighter but also add a vintage tone that makes it look like they were taken in the 1920s or 1950s!
For Those Who Like Bright Colors in Their Pictures, Try Using the Instagram Filters “Toaster” or “Slumber”
“Toaster,” the super-saturated filter, is perfect for those who want their images to have a crisp pop. It’s great for users who love bright colors and taking photos of food or landscapes! “Slumber” creates an ethereal tone that makes images look like they were taken mid-day! This can be used if you are looking for a softer look on your pictures – just be careful not to overdo it (unless that is what you’re going for).
Want More of a Sepia Tone in Your Images Instead of Traditional Black-and-White Shots?” Try Out the “Lo-Fi” Filter!
The “Lo-Fi” filter is one to consider if you’re looking for a sepia tone option. It’s great for those who want their pictures to look like it was taken on an old school camera with the square format! If you are also looking to give your images more of a vintage feel, this could be a good choice as well!

Conclusion
We hope this article has helped you understand how to make your photos look more professional with the use of Instagram filters. By following these tips and experimenting with different Instagram filters, you should be able to find one that works for you! If not, don’t worry – we have a team full of experts ready to help out in any way they can. Just remember to add a watermark with WaterMarquee before posting your photos so they don’t get used without your permission and it helps you get more exposure by letting people know who took the photo. Let us know if there is anything else we can do to lend our expertise as well!