5 Best Things to Know About Street Photography

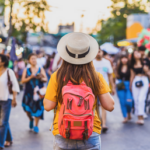
Street Photography Explained

Street photography is interesting. Street photography at night is even more stunning, and capturing photos of people as they go about their daily lives is a fantastic way to get dramatic photos. Nevertheless, it could be controversial and might land you a big fat lawsuit. Here is a guide on what you have to know:

You Don’t Need Permission for Street Photography

A lot of people are going to find it offensive if you start snapping photos of them, even in a public place, if you don’t ask for their consent first. There is just something that feels off about knowing that some guy now has your face to do with what he pleases. It also seems like an invasion of privacy.

However, due to the fact is that you’re in a public place, you could actually take any photographs you want.

Privacy is referred to as “the condition or state of being free from being watched or disturbed by others.” Clearly, it would be logically unreasonable to presume privacy on the street or in a crowded subway train. If anyone argues that everyone can take pictures of anything they want while they are in a public location, another way of suggesting that a person’s right to privacy does not extend because that person has a fair expectation of privacy.

This is mainly the reason why when in a public location, a street photographer could take a photo of everything he or she could see from that point of view, even subjects on private property, as long as they are in public view. For instance, a photographer would be free to take pictures of a couple sitting in a cafe, or even inside the establishment through a window, as long as the photographer is on public property.


When Is It Illegal?

It is illegal to take photos of individuals who have fair standards of privacy. If you’re in a public bathroom stall with the doors closed, there is a strong assumption of privacy so that no one could stick a camera over the toilet and take a picture of you.

Furthermore, if you are in a private hotel with a massive window, and the photographer can see you from the street, then there is no presumption of privacy, even though a telephoto lens is required to see you more clearly.

Though fair minds can vary as to whether the act crosses an ethical line, it isn’t illegal. Absent any law that specifically provides for privacy; the photographer can take photos of you without your consent.

This is another street photography point on which people seem to be trapped. If you have the right to photograph a subject or event, generally speaking, you would have the right to show a photograph as an example of art or news – and that involves showing such photographs on your blog, in print, in news media, and in your photographic portfolio (printed or online).

Can You Sell Those Photographs?

You can also sell prints or digital copies of your street photography. Things begin to get more complicated when “private use” (usually related to advertising) comes into play, which is why stock agencies that license photographs for both personal and commercial use continue to demand a model release for any photos that they decide to handle that include a publicly identifiable individual.

If you are in company, this could even become important to you by putting together your own advertising materials, in which case you may need to ask yourself if your picture of a recognizable topic indicates any kind of advocacy, support, or sponsorship of your work.— or whether the addition of the subject is just a matter of demonstrating your art.


You May Need Permission to Publish the Photo

As long as you do not intrude on an individual’s privacy and do not use a picture for commercial purposes, you do not need permission to publish it. If you take pictures for an ad, you need permission, no question about it.

If you take an image that goes up in a gallery where your art is on display, the line is hazier. In that case, the question is-is the intent of your street photography, artistic or commercial? In this scenario, if you are allowed to do so, even if you have to do so after the fact. If you can’t get consent, you might want to show a different picture instead.

Just because the area is open to the public, it does not make it public. Remember that places frequently deemed as “public,” such as theme parks, airplanes, shopping malls, performance arenas, and theatres, can be subjected to restrictions imposed by property owners once you reach their property.

Bear in mind that you’re legally bound to comply with the demands of landowners (or their subordinates, such as staff or security guards) to avoid street photography or even to leave the premises.


Crime scenes, military bases, energy installations, airports, museums, public hospitals, courthouses, and several government departments — while technically owned by the taxpayers — may likewise be off-limits to photographers or subject to pertinent limitations for privacy, security, or logistical reasons.

While there are common signs present advising on whether street photography is permitted in these locations, if you aren’t absolutely sure, do your homework or ask for approval right before you plan to have a photoshoot there.

If you are told that your street photography (or use of equipment) is forbidden, please feel free to inquire for clarity on the applicable policy, law, or legislation and its terms and conditions. Bear in mind that private citizens should not be detained unless they have observed a crime, and law enforcement officers may be detained if they have reasonable suspicions of illegal activity afoot.

Photos of Police

It’s perfectly legal to shoot a photo of a police officer doing their duties, provided that they are in a public area. Nevertheless, the officers might interrupt your street photography if you interfere with their duties or if your safety is on the line.

Carlos Miller has an amazing blog on the subject of individuals being harassed for taking photographs of police.


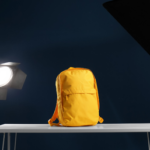
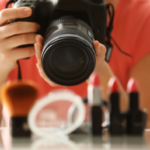
Protect your Online Photos

No matter what part of street photography you enjoy, your online photos can be protected from theft by using watermarks. You can create watermarks easily with Watermarquee. For unlimited watermarks, sign up to the pro version today.


Photography Project: 4 of the Best and Most Awesome Projects Online

What are some of the best photography projects online?

There are plenty of amazing and spectacular photography projects out there. However, these four photography projects stand out as being among the most creative and unique.

Afghan Box Camera Project

The Afghan Box Project is a Kickstarter project that aims to offer a detailed record of Afghanistan’s dying art of instant photography. The individuals behind the photography project completed their first trip to Afghanistan in 2011 and brought all of the material and resources from that journey to their website. They’re planning to come back and are aiming to procure at least $9,800 to make it possible.

During their journey back in 2011, they met some wonderful photographers utilizing the most primitive, hand-built cameras you could ever imagine.


The Afghan Box Camera

This box camera’s hallmark is the kamra-e-faoree, or also referred to as “instant camera.” At first glance, the kamra-e-faoree looks like a huge basic camera–a big wooden box placed on a stable tripod–but inner gears are very much different.

The wooden casing serves as both a darkroom and a camera: the focusing is adjusted by hand through a wooden sliding dowel, and a couple of little trays of photosensitive paper and chemical solutions are contained inside the wooden box itself. Once the photo is shot, the photographer then utilizes a light-tightened sleeve and slips it through their wrist, where they manually process the image prints.

Afghan Box Camera Photographers

“What transpired seriously took us by surprise. We met so many Afghans who believed that analog photography was their way of life and a skilled art form. They were practising this industry with basic box cameras, but they were still able to produce very sophisticated images of the world away from the depictions of war and chaos for which their nation is unfortunately known.”

These Afghan box camera photographers could show you the kind of art that can be achieved even if you don’t have the top of the line and most advanced equipment.

Night Zero Photography Project

Night Zero is a continuing photo-novel that gravitates around a zombie apocalypse theme.
Conceptualized as a “neo-noir style graphic novel with photography” in 2007, it involves several storylines about Seattle’s people during and after the first zombie infection. The cast consists of drama students and local actors, and the entire photography project shot in an HDR style that creates images that lie between real photos and illustrations.

It has been going on online since late 2008 and still continues to update thrice a week. You could read it online for free or pay for complete volumes from Amazon.


What is Night Zero All About?

The Night Zero project site provides a deeper insight into the entire process, though, from post-production bubbles to script cards and a lot and more–all enlightening stuff. This whole process is by no means less meticulous than the production of a graphic novel, with each complex detail mapped out beforehand.

The disparities are evidently vast as well; the whole process needed a large number of people, right down to extras, and a long string of technical and logistics issues that you just would not see with a large pad of paper and a packet of pens.

Yes, similarities and differences could be tossed back and forth all day; humans and primates are pretty much the same, but still so different. They have their strong points, primates could climb trees, but humans make use of ladders. That idea evokes the same kind of feeling; the Night Zero project is fascinating, surreal, and utterly exciting.

4 am Project

A global collaborative effort, the 4 am Project endeavours to bring together photos from around the globe “during the magical 4 am hour”.

It is super easy to get involved. You just need to post your photos to the Flickr website and tag them with “4amproject”. More than 5,000 images have been collected for the photography project to date.
This project aims to unite professional and novice photographers, as well as non-photographers, together to make a worldwide community that showcases how spectacular our surrounding landscapes could be.

“Streets that are oftentimes teeming with traffic and activities are deserted and empty, shopping malls are silent and hillsides serene and peaceful, the best time to get your camera and capture the fleeting moments.”

Taking so many shots during the time we are typically sleeping, and carrying it over three years, is just pretty incredible. The power and influence of social media are really outstanding.


Focused

This photography project aims to discover what art professional photojournalists could produce if they had only one chance to shoot a photo.

“Five manual 35mm cameras would be pre-loaded with just one single roll of film and stuffed into five distinct camera bags. Then, these bags would be shipped throughout the globe from one photojournalist to the next one – a photojournalist residing in a small town in the heart of the United States, another working on relief efforts in a natural disaster zone halfway across the country, or one who’s working the White House press pool.

Every photojournalist would only be given just one click of the shutter.”

The Benefit

It is an unparalleled opportunity for hundreds and hundreds of photojournalists to work together. Additionally, all the funds raised through print sales, book sales, and even unused donations would be allotted to fund youth photography projects and programs worldwide.

The Focused Project has partnered with AjA Project in San Diego, Fundacion Ph15 in Argentina, Critical Exposure in Washington DC, and Through the Eyes of Hope in Rwanda to help develop their wonderful programs to teach underprivileged youth the magic of photography.

The Future

Supporting the completion of these cameras’ interesting journey, hundreds of images would be curated into limited edition print sales, a website, and galleries to archive the initial project. The photography project would then be marketed and advertised as a book sold globally to help organizations that uphold a fruitful photojournalism foundation.

Did you like the projects on our list? If you know more noteworthy photography projects, tell us all about it in the comments.


Drone Photography: 7 Best Tips for Turning Your Drone Hobby into a Professional Photography Career

What is drone photography and how can you make a career out of it?

Have you ever considered making a professional business by taking spectacular pictures from hundreds of miles in the air? Drone enthusiasts and hobbyists have started taking their skills of piloting a small aircraft camera into the realm of professional photography, producing stunning artwork. Drone piloting is quickly becoming one of the quickest growing hobbies, with tens of thousands signed up and more to come. As this trend expands, let us take a glimpse at what you should know to turn your drone hobby into a pro photography business.

Why Drone Photography?

Many people wonder why this is a growing trend. Drone photography is an unbelievably dynamic approach to photography that hugely differs from traditional and conventional photography. The rules of focus and lighting in photography change when the lens is hundreds of feet up in the air. This technologically advanced photography niche enables novice professional photographers to produce unique and spectacular photos that might not be attainable through conventional photography.

The drones’ mobile nature also works to its advantage when it comes to videography, for photographers who also wish to test the waters in video production.


What You’ll Need

It’s a no-brainer that you will need a drone with camera functionalities, but how do you know which gear to choose? The key is to lay out a comfortable budget that you are willing to allocate to your professional business and act accordingly. You’d be glad to know that many top-notch drones are equipped with quality cameras, so do your research to narrow down on drones that fit your needs.

Even budding professionals, depending on their experience piloting drones, might find it helpful to buy an inexpensive drone that they can hone and practise their skills on. This could help reduce the chance of accidents while maneuvering the camera drone that you plan to build your professional photography business around.

Much of the gear needed in drone photography is the same as for conventional photography. While you might not need a tripod, professional photographers still use different lenses, lighting, cameras, and photo editing applications and software. Ensure that you include these in your budget as well, since they are just as essential to your drone photography business as the drone itself.

Make Sure You are Licensed

Depending on what gear you are using and where your location is, there is a big chance you would need to have a license to operate your drone photography business. Although it is most likely that you already have this as a drone hobbyist, you might still need to invest in the best and high-end camera for your drone photography needs.

Over the last decade, the USFAA (United States Federal Aviation Administration) started to add to the policies and regulations that drone operators must follow. It is important to ensure that your gear and usage conforms to these regulations, or your drone photography business would not make it off the ground.


Practice Aerial Photography Techniques

There are several techniques and approaches that apply to conventional photography that’s rendered useless as soon as the camera is airborne. For instance, using a camera’s zoom capability is a quick way to ruin a photo captured with a drone. The propellers’ vibration is exponentially magnified the more the camera is zoomed, making zooming basically useless.

Many differences lie between conventional and drone photography, so put effort towards practising which new styles and techniques work and which ones won’t. If you haven’t practised on drone photography enough before, use this period to practice and hone your skills on some basic maneuvers until you are comfortable with your abilities. We strongly advise against attaching cameras until you fully know how to maneuver the drone alone to prevent accidents.

Work Towards a Portfolio

The biggest part of any creative adventure like drone photography is to own an interesting and compelling online portfolio. If you plan to build your photography business around a particular genre, like landscape or drone photography, make sure to fill your online drone photography portfolio with the best images you have captured that highlight your ability in that genre. Likewise, if you want to be a general photographer without a particular specialty, make sure your photography portfolio is as diverse as it could be.

It is advantageous to have a huge portfolio, but don’t make it too large that prospective clients get bored looking through dozens upon dozens of photos. Professional photographers should also take special care to ensure that each image in the photography portfolio serves as a strong representation of their skills and talent, so refrain from putting in any images that are not high-quality. Many experts suggest having a dozen photographs maximum, so go over and select your absolute best photos for your portfolio.


Build Your Platform

Once you have built your portfolio for drone photography, you could use it to build a social media platform. In today’s age, social media is among the quickest and most efficient ways to attract an audience and build a following. An estimated 77% of businesses all over the globe utilize social media channels, like Facebook and Instagram, to market and promote their services. Your flourishing professional drone photography would do best by following the same route.

Keep in mind that you should not limit yourself to just one social media platform, so put an effort towards creating an account or a business page on everything from Facebook to LinkedIn. Instagram is also extremely popular for freelance professional photographers because of the photo-heavy base of the platform.

From Hobby to Professional Drone Photography

Establishing a business takes an enormous amount of patience and effort, so don’t expect a sizable following over a few days. Treat the customers that trust your abilities with the utmost respect and a professional decorum to establish a professional reputation that keeps prospective clients returning and your drone photography business growing.

Most importantly, never give up-ever! Creative endeavours could take a lot, and professional drone photography entails a lot of time, practice, and patience in shooting and editing. You would be adding in the talent and skill required to pilot a drone-operated camera, too, so you can expect to spend a lot of time and effort practising and improving your skills. Nevertheless, you could turn your drone hobby into a professional drone photography business with sufficient practice and proper work.

Remember to watermark your professional drone photographs to protect them online. Start watermarking here today


Looking for somewhere to fly? Our guide to Photography in Australia highlights the Whitsundays, Cape Byron, the Twelve Apostles, and other locations that consistently produce frame-worthy drone footage.

10 Best Kept Secrets of a Professional Photographer: How to Win in the Industry

How does a professional photographer become successful in his field?

Professional photographers can make a living by doing something they love and actually enjoy, which is something a lot of people could only dream about. Nevertheless, it is hard work, and they still have their awesome days and days when they just want to give up–just like most of us.

Becoming a professional could take some time, but here are our tips to help quicken your pace.

Spectacular Images are Made, not Just Captured

A lot of stunning photos appear to perfectly shoot a moment in time that couldn’t be recreated again and leaves other professional photographers dreaming they also had that stroke of luck.

But have you ever noticed how amazingly lucky other professional photographers appear to get?

The truth is that those photographers aren’t any luckier than anybody else. Brilliant photographers do not just walk around wishing for the perfect scene to shoot – they make the perfect scene to shoot.

Choose in advance what you want to capture, work out the sequence of events needed to make it happen, and then set them in motion. You would be amazed at what people would agree to do if you ask them to.

You may not always end up with precisely what planned for, but that is exactly why photography is a form of art and not science. You would need to leave a bit of room for the delightfully unexpected.


Less is Still More

Every picture tells a story, so minimize any forms of distraction. Ask yourself before pressing that shutter button, “What is my goal for taking this photo?”

Your answer to this question would guide you in concentrating on the aspects of the scene that matter most.

Focus on those aspects and components that would make your photograph unforgettable, and ditch trying to put everything together into one shot.

You Can’t Fix a Bad Shot in Photoshop

“If only I could somehow rectify this shot.”
“If only I had captured this picture a second earlier.”
“If only he had not turned his head.”

If, unfortunately, you missed that golden shot, don’t try to fix everything during post-processing.

One of the most usual feelings that even professional photographers experience is regret. There are too many images out there where they have wasted time and effort trying to turn coal into a diamond. You just have to live with it and keep in mind the next rule.

A Lot of the Photos a Professional Photographer Takes Are Crap

Professional photographers shoot a lot of pictures and toss the majority of them away. They actually take so much more bad photographs than you do – because they shoot more photographs, period.

Keep in mind that photography is also a numbers game. The more photographs you capture, the more excellent image you would take. You do not have to tell or show anybody your bad shots.

The Best Way to Zoom is with Your Feet

Taking intriguing pictures is going to need you to travel to exciting locations. Just to be clear, however, by intriguing, I meant off the beaten track, into unconventional situations, and mostly out of your comfort zone. The prize would be obvious in the photographs you will end up with.


Brush Off Bad Days

It is a challenge to foresee when and where a memorable photo opportunity will happen. It is only by regularly going out with your camera would your chance of ‘keepers’ increases. Perfection is not the goal; it is doing your best that really counts.
Instead of settling for the conventional formula and routine, challenge yourself. You could try new techniques and approaches. Free yourself from the idea that professional photographers don’t experience lousy days or take bad pictures. It is all an important aspect of the artistic process.

Being Curious Pays

The way you see the world could impact how you shoot your photos. If you are experiencing trouble changing your vision, you could adjust your approach. Instead of thinking like a professional photographer, imagine yourself a visual detective.
This could compel you to study the space around it while still focusing your attention to details. Through our inquisitive and curious nature, we could discover moments in photographs that most photographers would just let pass by.

Let curiosity drive your compositions, and you’ll begin to see the world in a different light.


Question Everything

When you are first learning about photography, it is recommended to search for truth and facts. The internet has democratized learning with a myriad of information right at our fingertips.

Nevertheless, creating good art is usually more about the questions than it is about the answers. Overlook this, and you could end up going along a formulaic process, achieving only outcomes that look like everybody else’s results.

To create your personal visual signature, you need to see from the inside looking out.

What type of pictures do you view in your mind’s eye? Try to recreate that image. Use this method to direct your photographic efforts, and you will soon be creating pictures that go beyond your expectations.

Always Bring a Tripod

Although a lot of cameras nowadays feature stabilization controls, nothing substitutes for a stable tripod. As a matter of fact, this is arguably the first tip that any professional photographer would tell you.

Tripods are important when capturing subjects with lots of movement.

You could up your odds of taking good photographs with the help of a tripod because you avoid one of the reasons of crappy photography – your movements. Less shaky shots would give you more chances of achieving a crisp, clear image.

Professional Photographers Know Their Equipment Well

As tedious as it is to go over an instruction manual, you really need to know every single detail about the gear and equipment you are working with. Capturing with a $5,000 camera will not do you any good and your subject any justice if you do not know how to use it.

Becoming a professional photographer means that you will need to know what aperture is, what an f-stop is, and a hundred other technical terms and details. Moreover, professionals likewise know which camera captures best in low light, as well as which shoots best at a distance.

Professional photographers protect their online photos against theft. The best way to do that is with a watermark containing your logo, name, contact details. Being a professional photographer means loads of photos so the ability watermark unlimited photos online is perfect.

If your goal is to become a professional photographer, always keep these secrets in mind. Nonetheless, you should still keep things in perspective. Being a professional photographer takes time and calls for perseverance, and there is absolutely no shortcut for those.

Protecting your


Making Money from Stock Photography: 10 Best Tips to Prep Your Photos

How could you make money through stock photography?

If you are interested in making a living with your camera, the realm of stock photography could be rather profitable. A stock photographer could pick the subjects and niches he captures and the schedule he works, and it is a more flexible choice than becoming a wedding or portrait photographer. Stock photography is a cutthroat industry, and you need to produce high-quality photos with a creative and unique approach.

Photos look different when seen on the internet, and there are a few steps you need to take to ensure that they look as bright and sharp as when you view them on an external monitor or a camera screen. The photographer likewise needs to be careful in protecting his photos and mitigate the risk of copyright infringement. Here is a process that could help you make sure that your stock photography images have the best chance of selling:


Get It Right in the Camera

You can avoid making basic oversights when snapping stock images. Make sure that every picture is composed and captured for maximum effect, and pay close attention to exposure and focus. You could create minor modifications in Photoshop or other photo editing tools and software later, but it would be better to do it right the first time.

You could rely on your camera’s automatic shooting modes if you are working with a more advanced digital SLR camera. Nevertheless, don’t be lax in your work and expect flawless results each and every time. Tricky lighting conditions could confuse a camera’s metering capabilities, and spectacular images could be spoilt by under or overexposure. Capturing photographs with a tripod could help ensure the highest sharpness and could draw the line between a neophyte and a seasoned photographer.

If your professional camera has the functionality, always shoot in RAW mode instead of the more popular JPEG. Shooting in RAW format offers you more flexibility to rectify exposure, sharpness, and color balance of photographs. If you are committed to making a living with your camera, you have to learn how to shoot and process in RAW mode to create the best quality photos possible.


Adjust Contrast, Brightness, and Exposure

Even the most seasoned stock photographer does not get it right each time, and stock libraries and websites would only accept impeccably exposed photos. Adobe Photoshop or Lightroom is excellent for making the essential adjustments, and it doesn’t take too much time to adjust and correct contrast, exposure, and brightness. Know how to utilize the levels readings to recognize the best way to adjust and modify an image.

Sharpen Your  Stock Photography Images

Photo editing software and tools offer various capabilities to sharpen pictures, and this is also an important step in prepping them before submitting them to stock photography websites and libraries. If you have captured in RAW mode, it is then very easy to enhance sharpness and clarity with the help of the filter options.

Go Big or Go Home

Advertisers would typically need large versions of your images so they could edit and use them as they need to. Ensure to shoot your images at the highest resolution possible, and upload those high-resolution pictures to the stock photography library or site you are working with. Your prospective clients would be glad to have the option of purchasing different quality levels of the image, and this small touch might even end up helping you boost more sales.

Lose the Clutter

When you set your scene, ensure that your focus subject stands out. Trivial matters such as a speck of dust to a scratch on furniture might be okay in some other kinds of photography but will stand out in stock photography. Make sure to declutter your photos and take away anything from the shot you think could be distracting, or move the attention away from the subject.

Adjust White Balance and Color

Color casts are among the major reasons images are rejected by stock photography websites and libraries. You could depend on your camera to always automatically regulate white balance, but it is still necessary to get involved manually in some circumstances. If capturing photos indoors, take note of the artificial lighting color and how it mixes with the light from open windows. If you couldn’t find an appropriate camera calibration, consider processing the photos in the digital darkroom to rectify and fix unsightly color casts.


Look for Imperfections

Your photographs might look amazing when browsing through your photo album, but enlarge them to full size, and you would see a lot more. Before uploading any images on a stock photography library or site, scrutinize your photos first to ensure that there aren’t any problems with them. Even the most negligible issues could make a potential client decline from purchasing your photo.

Choose a Focus Topic

While it could be tempting to post a lot of different types of images to stock photography libraries and sites, your best course of action is to concentrate on shooting stock photos of a specific subject. Concentrating on a specified type of image could help you attract potential customers on the site and could turn single image purchasers into repeat customers.

Think Like an Advertiser

Stock photography is usually used in advertising. It means advertisers may want some space on the side of the image subject to add texts or logos. They might also be unhappy if there was another brand name shown in the shot. Review your photo, consider how the photo might be used, and tailor what is in front of your camera to satisfy that specific need.

Take a Few Different Shots

Take a similar photo from several different angles and with several variations. A promoter could really love an image you captured of an elderly man reading the newspaper but actually wants the focal point to be on the coffee mug beside him instead of the paper itself. If you have a scene with many different elements to it, try taking as many photos as you can. The more variation you could get, the better.

A lot of stock photography websites and libraries would apply their copyright protection to your photographs, but make it a point to always confirm this before submitting or uploading your photos. If the rules and regulations aren’t clear, you could add a watermark using Watermarquee to make sure your photos are not copied and used without attribution.


Watermark Location Matters – 7 Watermarking Tips for the Best Results

Watermark Location Matters 

The location of a watermark on a photo significantly affects both its intrusiveness and effectiveness. If you are trying to consider where to put a watermark on your photographs, here are a few usual methods photographers do and how their approaches affect photographs.

The Bottom Right is a Common Choice

The standard spot to put your watermarks is on the bottom right corner of the photograph. A watermark in the bottom right corner is visible enough, but it does not drastically detract the viewer’s attention from a photograph.

When watermarks are put in the bottom right, it is often kept relatively small. The watermark definitely should not cover a huge portion of your photos since the primary reason to put it in the bottom right corner is that it isn’t too distracting, and it doesn’t ruin the essence of the photos.

Nevertheless, the drawback of watermarking in the bottom right corner is that it could be easily cropped out of your photos. With any simple photo editing software or tool, your logo, name, and details could be deleted in just a few minutes.


A Border Beneath Your Photo Can be Easily Cropped

Other photographers do not like how much a watermarking a corner could intrude in their photo, so they make a border below their photographs and put their watermark logo on it. However, a border is actually more easily cropped than a corner.

The Prominent Center

Photographers who are worried about photo theft put their watermark in the center of their photos. A watermark is tougher to delete from a photograph if it is placed in the center. It could still be omitted with more advanced photo editing software, but removing the watermark without modifying the original quality of the images is no easy feat, and some photo theft would rather just look for a photo with no watermark than spend time and effort removing it.

When a watermark is put in the center, it is normally fairly huge. Keeping the watermark large helps make sure that it is enough to cover the focal point of each photo it is used on, even if the focus subject is not really in the middle of the photograph.

The disadvantage of watermarking in the middle of your photos is that it could be too distracting. Its significant impact on your photographs could be lessened by minimizing your watermark opacity. Nevertheless, any visible watermarking in the center of a photo will detract from the image at least a tiny bit.


Forget About the Rule of Thirds

The rule of thirds is tested and true in the photography industry but for your watermark, it might be best that you disregard it.

This rule of thirds theory states that if you break your photograph into even thirds vertically and horizontally–imagining your image as a tic-tac-toe board, divided into nine even boxes–the focal point of your photo should fall on the lines of separation or at the intersections.

Keep in mind, however, that what’s noteworthy is that this theory is used to accurately stage and capture your scene’s action. It helps your photo become more dramatic and pulls attention to the landscape, people, or object that you were trying to focus on.

However, if you try to put your watermark aligned with the rule of thirds theory–putting it on an intersection point or a line of separation–you will be drawing the viewer’s attention to your signature instead of the subject of the photograph.

Rather than using the rule of thirds theory, just avoid these lines of the intersection like the plague, so you are not subconsciously diverting your viewers off of the magic of the image.

Avoid the Action

If you are aware of what you are doing, there is going to be a portion of each photograph where you want to pull the audience’s focus. Once you discover where that area of the photo is, steer clear away from it.

You don’t want to spoil the magic of the special moment that you have so beautifully captured by placing your name right dab smack in the middle of it. You can find a section or corner of your photo that is off to the side, an area that’s supposed to be in the background. This area is almost certainly in the corner that’s opposite of your photo subject.


The advantage of shying away from the action is that it does not pull attention from anything that’s supposed to be focused on. By putting your watermark away from your photo’s subjects, you would be sure that you are not diverting the focus of whoever is viewing your photos.

You want your audience to be aware that every single one of your photographs was taken by you. If your watermark is placed away and separates from everything else in the photo, it would be much easier to see who shot the picture. However, if your watermark was laid directly on top of the subject(s), it would be tougher to decipher.

Individual Watermarking Takes a While

Some photographers alter the location of their watermark with every photograph they upload. They search for a visually complex spot that is not the focal point of the photo and place their watermark logo on there.

In such an area, a watermark is much more difficult to remove, and it does not particularly interfere with the photo.

Modifying the watermark on each photo takes a lot of time, though. Hence, only a handful of photographers do this method. You might want to use your best and most valuable photographs and use a faster online watermarking tool, like Watermarquee, for the majority of your shots.

Put Your Watermark Anywhere with Water Marquee

If you want an easy and straightforward watermarking solution, you can opt to use Watermarquee. This platform allows you to put your watermark anywhere you would prefer on your photos. You can also have unlimited waters marks with the pro version.

Final Words on Where to Put Watermark

Your watermark needs to strike a balance between being seen without drawing the focus away from the centre of attention. We hope that through our tips, you can easily claim ownership of your work while avoiding a confusing and cluttered image. You could use all of them, or just one—whichever you prefer, really. Eventually, you would find a delicate way to create a statement and a brand with your signature.


Best Tips to Make Your Home Photos Stand Out Against Competitors

Make your home photos stand out

One of the many vital tasks that realtors should perform during a home’s sale is taking home photos. Some believe that the entire process of shooting home photos is the most challenging yet also the most gratifying.

Photographs are the initial contact that a lot of prospective clients would have with a home for sale, and first impressions could really make or break a deal. Hence, realtors should not underrate the significance of capturing really impressive images of each house they are listing for sale.

Nevertheless, they’re not required to turn into home staging experts overnight just to make their listings stand out on a very competitive and cutthroat real estate market. Fortunately, you only need to learn and apply a few important tips to shoot some spectacular home photos and attract packs of potential customers. Success is, indeed, just around the curb!


Home Staging? Hire a Professional

Photos of empty rooms will not really do that much to attract a prospective client in for more (although some realtors would say that you need to snap these “blank canvases” and leave them available for potential clients who want to envision and imagine how their furniture may look in each room).

Nonetheless, even simple furnishings and adornment placed before shooting photos for a real estate listing would create a better atmosphere than shooting a series of empty rooms impossible to differentiate from one another and distinguished only by blank walls.

A professional home stager could help you prep any home for an amazing home photo session.

Mind the Perspective and Angles

Strike a balance between creating exciting perspective home photos and shooting from odd angles that would only make prospective customers confused about the house’s interior. While experimenting is encouraged (and usually necessary to have a perfect shot), ensure that you’re shooting straight-on whilst discovering various angles all through each room. Unintentionally tipping your camera slightly would warp the vertical lines of doorways and walls, thus building a perspective that is a bit more than off-putting or dizzying.


Make Sure the Colors Pop

Even the very best warm natural lighting might not always do justice to the rich tones of a hardwood floor or a trendy fresh wallpaper. Fortunately, a plethora of digital tools enable users to quickly and easily edit home photos—adjusting contrast, color intensity, and brightness could ensure that your images’ colors show as richly as they do in actual. Avoid over-editing, though!

If there are not many hues to work with, don’t hesitate to add your own. We recommend putting a touch of color with some vibrant artworks or funky throw pillows.

Correct the Orientation

Some digital tools could automatically re-orient a photo, so it looks nicer, but some won’t. Before walking away from the computer, try previewing your home photos to ensure that nobody needs to bend their neck and tilt their head to see the living room. Some prospective buyers wouldn’t have the patience to work out home photos that are just too difficult to look at.

Atmosphere is Everything

Are you selling a house in the mountains? Capture the best aspects of the home that mountaineers would like. Near a beach? Shoot bright and open photos. Usually, your potential clients would consider buying a home because of the surrounding area’s appeal, so utilize this to your advantage! You could also consult with your home stager regarding this matter—they could have a lot of ideas for décors and other personal touches that could further add to a house’s personality and selling factor.


Use Natural Light

If you could, take home photos on a sunny day and use natural light to showcase the home and make it homier. The front yard would look cheerier, and the home’s interior would appear bigger, cleaner, and more open. You likewise wouldn’t have to depend on your flash too much, as it could cast odd shadows and alter the look of the floor, furniture, and walls.

Take Clutter-Free Images

Some sellers might provide you the house photographs, but sometimes you just have to take the home photos yourself. Nevertheless, before clicking the shutter button, ensure that a home is neat and orderly, and clear of clutter and people.


Pay Attention to Details

Potential clients are expected to be critical with every detail when it comes to dealing with their future home, so you should get on the same page with them. Include that beautiful crown molding in the scene, shoot unique aspects of the house that add up to its personality and charm, and don’t forget to neaten up. Keep in mind that you are aiming to capture the house’s best features, not small details of the current homeowners’ living conditions.

Remove appliances from tables and counters, and keep personal bits like family photographs or personal trinkets out of your photos.

Feature the Outdoors as Well

Realtors do not need to be retold that a home is much more than its interior. Prospective clients would want to be informed of what is outside their potential home. Be it a porch, a lawn, or some acres of woods. The key is never to forget the view. Take a panorama shot while on the porch, or try to snap photos of the house from afar to capture it within the context of its environment.

Watermark Your Home Photos for a Professional Finish

Once you have the perfect shot, don’t forget this last but very important step. Watermarking is an easy way to add a last touch of professionalism to your real estate photo shoot. Not only would it help prospective clients to associate a home to your name, but watermarking would also deter photo thieves and could improve your advertising and marketing impact as well.

Not fully convinced? Believe us when we tell you that a lot more potential clients would notice and appreciate thoughtfully-staged and professional-looking photographs. Unlike cluttered, dull, or bland home photos that soon-to-be homeowners would only overlook during their search, these tips would guarantee that their eyes light up when browsing through your home listings.


Wedding Photography Portfolio: 5 Tips for Choosing Your Best Photos


Perfecting your online photography portfolio makes sense

You need to be sure that you feature the best photographs you have in your online photography portfolio, especially if you are a wedding photographer—or if you’re aspiring to be one. It could seem quite daunting and demanding –

as a matter of fact, other photographers feel that having an impressive online photography portfolio is actually more challenging than capturing wedding photos in the first place.

Nevertheless, before you panic and put every picture you have ever taken in your online photography portfolio, slow down and take a deep breath. Making sure that you’re featuring your best images is important and could take a little bit of time, but it is not so tricky.

Let us help you figure out which images you should feature in your wedding photography portfolio, through the help of our tips:


Why Your Wedding Photography Portfolio Matters

It’s common knowledge that you need an online photography portfolio, but do you really know why? There’s really no excuse for not banking in on this powerful advertising and marketing tool in today’s age of quick and easy to create online photography portfolios and readymade templates. Coupled with your Instagram efforts, it is the most efficient way to show people what you are all about.

In any case, not every wedding photography is the same, and you are not exactly going to be the best photographer for every photography job.

Moreover, your online photography portfolio would be the primary example of your photography skills. It would also be ideal for potential clients to see what you are like as a wedding photographer. Keep in mind that you are capturing your clients on the most special and the tensest and anxious days of their entire lives.

Hence, take the chance to show potential clients what you could do, who you have already worked with, and principally, why they would be silly not to work with you.


Keep Your Target Audience In Mind

The heart of a good online photography portfolio is that it knows who would be looking at it. Before you even think of uploading each and every single one of your photos, it’s best to take time and figure out who you want to sell your photography services to, and what value you can offer them.

If your answer is, “well, brides,” then you are absolutely correct. There, you have your target market. However, keep in mind that a bride might have a different opinion, say, the bride’s mother. It’s worth noting that somebody who wants to hire your services to shoot her wedding dresses could have a basically different set of preferences and needs than a bride or a wedding planner.

This likewise applies to the kind of images that you prefer to shoot more of. If you have a certain photography style or genre—like venue weddings or black and white photography— then ensure that you highlight your expertise. It helps to present yourself as one of the best in your particular photography niche, so it helps to inform your clients beforehand.

It is likewise critical to make sure that all your pictures appear to be taken by you. Although you might have different photography styles, it is essential to show potential clients that your work is always consistent, and your skills are dependable, rather than looking like your best shots were somehow accidental.

Show Your Best Always

Although it might appear helpful to you to put a lot of different photographs in your online photography portfolio, it is likewise vital to exercise your creative eye. Why? Because your online photography portfolio, in general, is more likely going to be assessed on your worst photo than your best.

When it comes to your online photography portfolio, more is definitely not better. You would want to show that you are consistent in the kind and quality of your shots. Rather than trying to feature everything you have ever done, your online photography portfolio should only show 15-20 photos.


Show What You Do

It is also important to ensure that you aren’t overpromising on a project that you can’t completely and satisfactorily deliver on. For example, if you take gorgeous black and white photography on film, but you haven’t really explored the niche digitally, ensure that you don’t promise your clients bright color digital photographs.

It could look like you are casting a wider net, but it could set you up for a huge disappointment.

Moreover, be careful of the photos that you highlight in your online photography portfolio. If you know that an impressive photo involved a specific combination of elements that you may not likely be able to recreate, do not use this to promote your business and services, regardless of how great the picture might look.

Maximize Your Online Photography Portfolio on Social Media

In the social-media-driven society that we all live in, it is crucial to understand that the internet is powerful enough to boost your brand awareness and help you reach out to more brides-to-be. So, it’s also advantageous to use social media platforms to your benefit.

For instance, Instagram is an excellent way to charm people into visiting your online photography portfolio and, finally, hire you as their wedding photographer. Showing off your wedding portfolio a wonderful way to give potential clients a taste of what they could expect from your services, as well as to display your personality in a relaxed and casual way.

Therefore, choose your photographs wisely, and make sure to curate your Instagram posts with the same level of attention that you use to build your online photography portfolio. Moreover, it is a convenient way to feature your other good shots, which might not have been your favourites, but still, showcase your taste and skill.

Bottomline

People say that you might never get another chance after a first impression, so it is crucial to understand that your online photography portfolio goes a long way to introduce you to potential clients. Instead of displaying a weak online photography portfolio, elevate it and give your work the respect it deserves.

Most importantly, don’t forget to protect your photos before uploading them online with unlimited watermarks from Watermarquee.


8 Best Ways to Secure Photography Customers

How can you turn your hobby into a career and secure paying photography customers? 

You have the proper equipment and a creative eye. You have refined your skills and took the time to learn photography techniques. You are more than ready to kick your photography hobby to up a notch by having your first paying client. So, how can you move your photography interest from a hobby to a career? Here are a few steps to lay the groundwork for your photography business and secure a paying client:

Create Your Portfolio

Carefully look at the images you have captured so far and imagine yourself as a client. Would you pay your hard-earned money for any of those photos? You are your most stringent critic in creating your photography portfolio. Review your work with an impartial eye and choose which shots highlight your skills.

Afterwards, ask your family and friends to do the same. It is vital, however, to allow your impromptu photography critics the liberty to express their insights and opinions about your photos. You can also use their comments as constructive criticisms.

As you identify which photographs they like best, you should likewise begin to recognize and determine where your weaknesses and strengths lie as a photographer. Is food photography your forte? Are you best in landscape photography? Commercial scenes? Objective opinions (from friends, family, and even yourself) would guide you in discovering your niche and helping you create your best (and first) portfolio.

Work Pro Bono

After asking your friends and family to critique the photographs you have previously taken, you could also ask them to pose for you free of charge. Moreover, you could ask local events and non-profit organizations if you could extend your services for them, for free.

Although your time and effort are absolutely valuable, you can think of this free work as a good investment in your business. Remember that every great photographer starts his career journey with a collection of impressive work to show potential photography customers.


Ask for Referrals

As you capture photos of your family and friends, don’t forget to offer them several copies of the photos you took to show off in their offices or homes. Oftentimes, paying photography customers are a referral from a family member or friends. Don’t hesitate to ask your friends or family for a referral on your social media page or website.

When your shoots are of high-quality, you won’t find it hard to develop a loyal following, and the ensuing snowball effect is the quickest path to paying photography customers you could find.

Show Your Work

One of the simplest ways to spread the word about your art is to display your images at a local art gallery. Pick a few of your best and most creative photographs that really show your personal style, then show them off for potential photography customers to see and appreciate. You may sell a couple of photographs. Then again, and you may not.

Nonetheless, bear in mind that the reward for all your effort is in the exposure and the publicity, as well as in the free marketing and advertising for your photography business.

Another channel to show your work is to go to local festivals and sporting events and take photographs to upload online. Bring your business cards with you and give them out to let people know where the photos would be posted and to grab the interest of potential paying photography customers.

Offer some photos for free, but also make some photos available online for download for a fee. And there you go:


Shadow a Professional

Look for a reputable professional photographer in the niche you want to engage in and ask them if you could shadow them during their shoots. If you are into family portraits, volunteer to help with the venue and lighting. If you want to work on wedding photography, look for an established wedding photographer and offer your help as a second shooter.

Not only would you be able to gain more skills, but your mentor could likewise give your details to paying photography customers they couldn’t accommodate because of conflicts in schedule.

Setup a Website & Social Media Accounts

After you have put a small photography portfolio together, you can start displaying them to a realm of potential paying customers. You don’t need to start off with a complicated website with a bunch of confusing plugins. Building a straightforward yet nice-looking website through Squarespace with their customizable and pre-built templates wouldn’t take a few days—probably one or two is enough.

Signing up to social media platforms is as simple as entering your details and getting started. We recommend setting up Facebook and Instagram accounts first since these sites have the most potential photography customers.


Advertise Yourself

Now that you already have a lot of quality photos to display, and you also have an online portfolio that you can direct potential photography customers to, it is about time to begin advertising and promoting your photography services. The goal, at this point, is to secure paying photography customers.

It is worth noting that the purpose of your online photography portfolio is to convert potential clients into paying photography customers. Nevertheless, keep in mind that your online portfolio won’t bring clients for you from the get-go. You would need to exert some effort promoting and advertising your photography services and send people to your portfolio to see your art.

Don’t expect your online portfolio to generate you some leads without proactively promoting your services.

Invest in Your Business

When you are ready to take your photography career and business to the next level, you will need to invest more money, time, and effort in it to help with its success. However, before you start putting money into it, scour the world wide web for free services and websites to protect and promote your work.

Ensure that your photos are watermarked to prevent photo thieves and opportunists from downloading and using your photos without your consent. Then, focus on developing a strong online presence for your services through your social media accounts and online photography portfolio. Ask other photography blogs or sites to feature your images.

Although you might need to pay some amount upfront for digital marketing, the brand exposure for your business will indeed be worth it in the end.

Similar to other businesses and industries, professional photography can take time. Have patience while you identify your niche, create your online portfolio, and gather the referrals you need to advertise your skills and secure paying photography customers. Lastly, have faith in yourself and don’t lose your personal style in the process.


6 Helpful Watermark Generator Tips

How can a Watermark Generator protect your photos from theft?

No photographer could overlook the marketing efficiency of the world wide web. Nonetheless, it comes, potentially, with a price. While uploading your pictures online is an excellent way to gain exposure and expand your reach, it likewise means you are making yourself vulnerable to the possibility of someone downloading and using your work without your consent. In a lot of circumstances, people would do it out of ignorance, others would do it for profit, but for whatever reason, if you do not want your photos stolen, you need to protect them vigilantly.

The easiest way to do this is to put a watermark on every picture you upload online. A watermark guarantees that everyone who sees the photos knows who captured them and recognizes your skills it took to shoot such stunning photos.

You have a few options to think over when making a watermark, and those choices should be aligned with the reason you are uploading your photographs online.


Why are Watermarks Important?

Generally, watermarks are for protecting content and claiming ownership of intellectual property. Without watermarks, important digital materials and assets, like images, could be vulnerable to photo theft or even unauthorized use.

Photo Theft

When uploading your digital content, like photographs, to websites or public servers, a quick right-click and save lets someone download and save your file in their computer. How, when, and where they use it is their discretion.

With no proper protection like watermarking, organizations, and companies that invest resources, time, and effort into producing original digital materials risk their content being downloaded and used by others, possibly affecting business opportunities as well as revenues. Watermarking could deter this kind of digital theft or prevent it completely (when executed well).

Unauthorized Use and Distributions

Digital materials could also be vulnerable to internal misuse even when stored in a shared cloud drive or private media library. If it is vague, if the content is already approved, still in production, or intended only for internal use, staff could use the content in error.


While commonly unintentional, the unapproved use of digital content could be detrimental to your brand, spread fake news and misinformation, or even have dire legal consequences and implications. Watermarking could offer clarity when assets are only meant to be viewed, not shared. Here are a few key pointers to remember when watermarking your images:

1  Text vs. Image Watermarks

The fastest way to watermark your photographs is to put your name and/or the name of your business. Nevertheless, be careful of the position and size of your watermark, since the viewer’s eye will automatically be drawn to text in a photo, which could sometimes be distracting. A text watermark is an ideal approach if you are only uploading images occasionally, and you are not aiming to establish and develop a brand identity.

2  How to Watermark Your Photos

However, if you are a professional photographer or upload a lot of photos online, you should consider making or having someone make an image watermark for you. Image watermarks provide a more professional look, and they are an essential aspect of branding. If you choose to go with an image watermark, ensure that it scales well; they could be tougher to place than simple text watermarks because they typically take up more space in the photos.

3  Where to Place Your Watermark

Where you place your watermark, text, or image watermark on your photographs relies on why you are watermarking in the first place. If it is just to get due credits for your photos, you could place your watermark outside of the photo’s focal point – while still considering the possibility that if the watermark was poorly placed, it might still get cropped out of the image easily.

To minimize that risk, you could place the watermark in a portion of high contrast, like in the bottom right corner of the photo.

A watermark that is placed away from the focal point reduces the impact it could have on the general look of the photo.
Suppose you are a professional photographer whose photography niche is based on capturing photos for a particular client, like children or wedding photography. In that case, you need a more obvious watermark to photo theft. You should also consider putting a bigger watermark in the center of the photos or tiling your watermark. However, do not go overboard – you still need the customer to like the photos enough to pay for the non-watermarked versions.

4  Watermark Generator Tips

Are you concerned that the pictures you upload on the internet are being used without your permission? Watermarking photos is an ideal way to protect your original content against people passing who pass others’ work and art as their own. Also, it helps expand your marketing reach and build brand awareness.

Ideally, watermarking should be a way to reach out to other photographers and clients to inform them who took this spectacular shot, and not be suspicious of everybody trying to steal your photographs and thus pull their attention away from your excellent composition.


5  Try a Semi-Transparent Watermark

You can try a semi-transparent watermark– it would still protect your images, but the watermark would look less intrusive. Using the right watermark generator tool like Watermarquee, it’s quick and easy to adjust your watermark transparency.

6  Let Them Know Where To Find You!

It is a great idea to include your website address or other contact information in your text watermark. This could help promote your work and amp up your marketing efforts without actually lifting a finger. Your potential clients should know where and how to find you!

When folks share your photos online, they rarely mention where they got it. Hence, your name and contact details would help potential clients to find you.

Summing Up the Watermark Generator

Ultimately, the major advantages of putting a watermark on your photos are brand recognition and copyright notice. It lets people know that your photos are copyrighted, and it likewise identifies you as the owner. Also, if your photos are watermarked, other people would have a way to find you or contact you should they wish to hire your services or ask for permission to use your images.

If you have precious images you’d like to protect online, it’s easy, just start watermarking for free with WaterMarquee today.


7 Best Tips to Do Amazing Landscape Photography

You can do amazing landscape photography

Whether you love snapping travel shots on vacations or wandering around charming spots near your house, landscape photography is so much more than just pointing and shooting. As with other photography niches, a lot of practice (and a little bit of knowledge) can make your landscape photography a lot better. We can also help through this article that will give several tips for kicking your landscape photography up a notch.

1  Learn About Depth of Field and Focal Points

Landscape photography mostly covers a lot of space from near the photographer to the far distance. There could also be an array of subjects in the scene, like trees, mountains, architecture, people, etc. You first need to decide what would be the subject of your photos or your focal point. It would be best if you learned how to take the focal point of your subject or scene and ensure that the primary subject is in sharp focus.

Meanwhile, the depth of field concerns how much of the main subject is in focus. For landscape photography, this would be nearly the whole thing in sight. For you to achieve this, you would have to shoot a small aperture. Nevertheless, this would cause you to slow the shutter speed lower than what could be done hand-held in a lot of circumstances.


2  Use the Histogram

Histograms are arguably an indispensable tool in landscape photography. As a photographer, you should try to learn how to understand and use the findings to enhance your photographs. A histogram refers to a simple graph that displays the various tonal distribution in the photos. The right side of the graph denotes bright tones, while the left side is for dark tones.

For example, if the majority of the histogram finding is heavier on one side, this could mean that your image is too dark or light (underexposed or overexposed). This is not necessarily a bad thing, and a lot of other images work ideally well either way. Nonetheless, if you see that the graph ranges beyond the right or left edge, it means that you have portions of the image with lost detail. You should avoid this from happening, and by seeing the histogram findings, you can now rectify it by either compensating for the exposure or recomposing the photo.

3  Use a Tripod

You’ll never see a professional photographer shoot landscape photography that they would feature in their online photography portfolio without a tripod. A tripod is much more than an expensive toy. This piece of equipment serves one primary purpose and offers another benefit that you may not be aware of. The key advantage most people know about is that the tripod significantly reduces camera shake from your hand holding the camera. A tripod is especially crucial with the small aperture required for the depth of field you want in your landscape photography shots.

Another benefit of using the tripod is it compels you to contemplate about the shot a more. It is relatively easy to just walk around, raise your camera, shoot a few scenes, and then proceed to the next one.  Setting up and getting the tripod in the right spot takes some time. This would slow you down and oblige you to study and analyze what you can see in the viewfinder. It will also allow you to make the necessary adjustments in the scene before you capture it.


4  Use the Best Light

Lighting is one of the most crucial factors in any type of photography niche, but it’s even more important in landscape photography. Keep in mind that it doesn’t really matter how spectacular the location is or how well you compose your image – if the lighting does not do the scene justice, you can be sure that the image will not come out as excellent as you expected it to. The best lighting for landscape photography is late afternoon or early morning, while the midday sun offers the harshest light.

Part of the landscape photography challenge is your ability to cope and adapt to various lighting conditions; for instance, breathtaking landscape photos could be taken even on cloudy or stormy days. The important point is to use the best possible lighting and influence your images’ overall look and feel with it.

5  Think About the Composition

As you analyze the frame through the viewfinder, ponder the elements that are there and not in the frame. Are there objects in the scene you don’t like that a few inches to the right will remove? Are there objects that are not in the scene that but a little backing up a bit will include? Find where your main subject is. Refrain from placing the main subject in the centre of the scene. Putting it a bit off-centre adds more intrigue to the image.

Don’t forget about the angle, too! If you have a gorgeous sky, you could tilt your camera up a little bit to include more in the frame. However, if it is blown out or dull, maybe you could tilt the shot down slightly and lessen the visible sky. Always walk around and consider the landscape from various angles, elevations, and positions.


6  Shoot in RAW Format

If your camera can shoot photos in RAW format, we recommend that you always shoot photos in RAW format. They show more detail and give you more room to work within post-production without diminishing the image’s quality. Keep in mind that you can always save RAW files in whichever formats you or your client needs, but you wouldn’t be able to save JPEGs as RAW files.

7  Experiment with Landscape Photography

One of the many good things about landscape photography is that even though there are many rules and techniques that exist to aid composition and improve the process of capturing the images, there is and there will always be room to test and experiment.

In digital photography, taking a photo is not wasting a negative (and money), so there are enough chances to use your own style and sometimes break the rules. Even though it doesn’t work most of the time, and the image doesn’t always look great, you might capture a gem every now and then.

One of the most typical genres that both amateur and professional photographers work on is landscape photography. With enough practice, hard work, patience, and dedication to your art, you could shoot striking landscape photographs that you can highlight in your online portfolio. These simple tricks and tips can help you master this photography niche. Now get out there and practice. It wouldn’t be long before you bring home magnificent landscape photos.


Your amazing landscape photography needs to be protected so be sure to add your watermark for free with WaterMarquee.

Heading down under? Our guide to Photography in Australia: 12 Iconic Locations Every Photographer Should Shoot covers Uluru, the Twelve Apostles, the Whitsundays, Cradle Mountain and more — when to go, what gear to pack, and how to nail the shot.

11 Tips for Spectacular Fashion Photography


Why is fashion photography a lucrative business?

We always see them anywhere and everywhere: on the runway, in advertisements on television, and in magazines. They are the beautiful and slender women showing their stuff or stunning looks. They are the models flashing their dazzling smiles while donning the freshest styles from the hottest brands and designers.

We’re talking about none other than the fashion supermodels of today and tomorrow. They are ubiquitous, and everywhere we look, which sometimes makes us wonder, who are the talented shutterbugs who make their photos stand out from ordinary pictures? The models’ images are captured with precision and care, patience, as well as that special eye for style, lighting composition, and different hues. I am, of course, referring to fashion photographers.

What are the Stakes in Fashion Photography?

Glamorous lifestyle, big paychecks, and elbow-rubbing with the rich and famous may be the ultimate dream of a lot of budding fashion photographers. Nevertheless, it isn’t that simple to climb up and reach the much-coveted golden Staircases of famous magazines and fashion houses. For each talented fashion photographer, hundreds are left waiting at the sidewalk, merely dreaming about the day their photos get chosen.

How to Do Fashion Photography

Here are some tips for the novice photographer in carving his or her own niche in fashion photography:

Study the Industry

Keep this in mind: you shouldn’t stop learning. Keep reading and looking at fashion Magazines you could lay your hands on. You could also look into excellent books on fashion and fashion photography. Amazon.com has a fountain of knowledge—if you look hard enough.

Equipment

This is a no-brainer, but still worth noting: you would need a kickass camera and another one as back up. You would also need a quality tripod and an excellent lighting system. Ensure that you always have a lot of batteries and memory space available. Digital cameras take different pictures, so you need to make sure that you have the best kind of camera suited for fashion photography.

Show Off Your Portfolio

When you submit your photographs, make sure you have your portfolio on hand. You’ll never know if the fashion magazine editor wants to see other samples of your fashion photography. The best photos to include are the ones with sharp, bright images. Ensure that you have at least twenty photographs in your portfolio, preferably shot in different styles. You would want to display your fashion photography skills in full figures or partial body parts.


Accessorize!

Fashion includes accessories and jewelry. Sometimes a stunning necklace around the neck of a model or an expensive watch on a beautiful woman’s slender wrist is workable enough for a good fashion shoot.

Let Yourself Shine

Since the internet has opened doors for more opportunities in the digital realm, it is good to exhibit your skills as a fashion photographer online too. Create a fashion website; enter fashion photography contests. Submit your photos to a fashion gallery site online. This could help people to see what kind of work you do and could do for them.

Show Your Personality

A lot of fashion magazine editors are searching for a touch of your personality in the photographs you shoot. Every photographer captures the essence of the model and fashion in general, differently. Let a bit of your personality shine through your photos and add a little personal touch to them, too, with your client’s consent, of course.

Lighting is Key

When capturing photos in low light, you might need an extra light source. However, if flash is all you have, it would be better to use a nearby reflector, like the wall or ceiling, to bounce the light rather than shoot straight on.

Test with different angles to create different effects and see what fits your standard and what would work best for the scene you are shooting. Be mindful of unwanted shadows that could unflatteringly fall across the model’s face and body.

Pose Well

Posing could be tricky to master, but you could browse through the latest fashion magazines to get inspiration, as well as to get a grip on what is currently trendy and chic. Nevertheless, using classic poses that call for angular body shapes or “broken down” poses could add intrigue and interest to the scene. It could also help to elongate your model’s body.


Props

Props are useful for telling a story within a fashion photography shoot. Mirrors are a great example of those props to incorporate in your fashion photography. It could be used to tell a story and serve as a dual-purpose tool that lets the photographer show the front and back of the model.

Focus On the Model, Not the Fashion

This concept might seem counterintuitive, but in reality, fashion photography is as much about the narrative as it is about, well, fashion and clothing. The clothes of your models will speak for themselves, particularly with a well-directed model. However, you would need to focus on the human element for the audience to connect with your photos.

Now, what this means is always focusing your attention on the model’s face and body, the idea or message that they are trying to convey, as well as how their presentation of the clothes shifts the tone of your photos.

Some of your greatest work might even be captured from those in-between seconds, being sidetracked by an off-camera event or shifting from one pose to another. Don’t miss these opportunities.

Break the Rules *Gasp!*

Yes, this fashion photography tip might seem conflicting, but it is crucial to recognize when not to do things by the book and break the rules. When it comes to lighting and poses, there are many rules, and it is essential to know them all by heart to get the right shots.

Nevertheless, when you begin to break those fashion photography rules, you just might discover how your creativity pays off. Capture your safe shots, but also try to experiment. Unless you don’t have a lot of time on your hands, there is absolutely no reason not to test new techniques or setups.

There is a lot of room for creativity and resourcefulness when it comes to fashion photography. And in the Instagram era, there is undoubtedly a greater interest in fashion now than at any other time in history.

Spectacular fashion photography does not only take place in posh and high-end studios. Likewise, it is not just seen in between the glossy pages of Vogue and Elle magazines. It is something even budding shutterbugs could do. Explore the world of fashion photography and give it your best shot. 

Before you publish your fashion photography online, remember to protect against theft with watermarks. Watermarquee provides unlimited watermarking for the low one-off fee of $19 – start watermarking today.

Copyright Infringement: 2 Effective Things You Can Do If Your Images Get Stolen

Protect your photographs through copyright

The dawn of the internet has paved the way for photographers to display their masterpieces in ways they previously thought was impossible. However, the advent of the new technological era also brought allowed people to steal photographs and not credit the owners or photographers for their usage.

It is understandably a big rain on any photographer’s parade to learn that hundreds of people and potential clients have seen their photographs and their display of skills, but they may never know who originally took those photos. While the entire experience could make you feel helpless, there are actions you can take to assert your intellectual property rights and protect your photos.

How Do Copyrights Work for Photos?

The first step you need to take in protecting your photos is to know just how copyrights work for online photographs and images. Knowledge is, indeed, power, and being aware of your rights under the law would help you fight for your property.
The law states that as long as your works are protected by copyright, anyone who wants to display, sell, reproduce, or distribute your photograph needs to have your consent to do so. However, if you were under a work for hire contract, the person or company who hired your services would own the photos.


Should You Register Your Photos Formally with the Copyright Office?

Technically, you don’t have to do this, but it is a great idea anyway. It provides solid proof that the images and photos are really yours. This peace of mind is absolutely worth the minimal cost of registering your works with your local copyright office.

For only $55 you are allowed register up to 750 images, and you could avoid being deceived not only by photo thieves but also by people and companies who partner with you. Richard Reinsdorf learned this lesson the hard way when he sued Sketchers for using his images outside their contract. However, his claim for damages totalling to $250 million was denied because he didn’t register his art with the copyright office. Bummer, I know.

What Should You Do When Your Images Are Stolen?

Seeing your work stolen is really unfortunate, but if you know who is using, distributing, or selling your photographs without your consent, you can easily make it right. Here are some actions you can take to assert your ownership:


Emailing the Website

If you have spotted a website that uses your works without your consent, the first step should be to write them an email. You can ask them to take down the stolen images unless they credit you or pay you a licensing fee. In some instances, the webmaster may not even know that the photos are stolen. It’s possible that the photos were bought from someone else claiming the images as their own!

In this case, then you will also discover some valuable information on who’s distributing your photographs and stealing the money that should’ve been yours! Give the site owner at least a week to respond and take action, and if he or she didn’t, then it’s high time to proceed to step two in our copyrights protection plan for photographers.

Nevertheless, if you don’t mind how your photos are being used, then you can ask them to at least credit you for the photos and have them add a link to your website—which could actually benefit you. When they credit you, and a lot of people see your photos, it could result in more traffic, higher sales and better search engine rankings for your online photography portfolio.

Filing a DMCA Takedown Notice

If you have given the website owner or webmaster ample time to respond, but they have still not rectified the situation, the next step is to file a DMCA takedown notice. Websites have a web hosting company. Those said companies don’t want illegal content uploaded on their servers. Illegal content includes videos, images, music, or any material which are uploaded and used without the owner’s permission. So, if the website owner has ignored you, you can contact their host instead. Here’s how you do it:

Get Evidence of the Copyright infringement

The first step is to get viable evidence of copyright infringement. All you will need here is just a screenshot of the website that uses your photographs. Don’t forget to keep backup copies of those screenshots, just in case you would need to pursue more serious actions later.

Find the Website’s Host

You would need to submit the DMCA notice promptly to the web site’s server or host. But before that, you need to find out who the host is. A lot of websites use services like Cloudflare, and that conceals who their host is. Nevertheless, you could still send an abuse notice to Cloudflare, so they can attempt to notify the webmaster or the host.

Find the Copyright Agent

As soon as you find out who the web host is, you would also need to look for the copyright agent. He or she handles infringement cases and issues for the host. While you can usually find the agent by going through their terms and conditions pages, the quickest and easiest way is perhaps to look into the directory of copyright.gov agents.

Write Your Takedown Notice

Your letter needs to have these information and pertinent data to be a valid takedown notice:

  • Affix your signature to recognize you as the copyright owner
  • Include your work that has been infringed upon
  • Provide screenshots, the webpage and any information pertinent to the copyright infringement
  • Include your contact details
  • Lastly, add in a statement that the data and information you have submitted are accurate and true.

How Can You Prevent Copyright Infringement on Your Photos?

If you would like to avoid infringement or unauthorized usage easily, then a watermark is a great strategy to try. A lot of photo thieves would not want to grab a photo with a large and noticeable watermark since they would be compelled to pay a fee for the image so they can use it for a variety of purposes. Watermarking is an easy and cost-effective strategy that needs to be a part of each photographer’s arsenal in protecting their intellectual property.

WaterMarquee is a fantastic and easy to use online image watermarking tool try it out today.

15 Best Tips on Still Life Photography: Ultimate Guide

Ultimate Guide to Still Life Photography

When we think of fine art photography, we see still life photos in our mind. Still, life photos come in different forms, from the tedious art school bowl of fruit to the enticing and creative digital creations you see on the internet today. Still, life photographs could fall into any genre or niche of photography, and it’s an essential skill that all photographers should try to learn.

Here’s a complete guide to getting started on still life photography.

What is Still Life?

Still, life photos are a substantial part of photography for a lot of reasons. It is a kind of fine art photography, more similar to an oil painting than to what a lot of people think of as shooting a photo. The subjects of the photos are inanimate everyday objects. The composition is essential here, and you can take the time you need perfect your shot. You could arrange the objects in any way you prefer, and you have absolute control over every element of the composition.

Here are 15 tips on how you can master still life photography:

1  Learn to Love It

For some photographers, still, life images bring up ideas of school art class homework. True, still life composition is usually a homework given by photography teachers and instructors. However, there is a great reason for that. No other photography niche or form is as accessible to everybody, and no other kind of art compels the photographer to accept full responsibility for each and every aspect of still life photography. Mastering still life composition does indeed make you a much better photographer.

Spend a few moments searching the internet for some of the spectacular still life photography images coming from photographers all over the globe. It does not take too long to see inspiration, and once you begin, your creative juices start flowing as well.


2  Paint the Image

It sometimes helps to think of still life photos like a painting instead of a photograph. A lot of people, although hopefully not too many photographers, see a photograph as something that’s shot in a fraction of a second. However, everybody knows that paintings take quite a long while to create. Everybody appreciates that painters can control exactly what they put on their white canvas. Keep in mind that is also defines what still life photography is.

3  Take Your Sweet Time

Snapping the image could take a second, but take your sweet time! Consider the artistic aspects of the image. Take time to determine the lighting you’d prefer, to check out what other artists have created, to reassemble the objects, to put or omit props, and to tinker with the other elements in your still life composition.

4  Low-Key versus High-Key Lighting

Don’t limit yourself into one look. Like all artists, photographers can get into ruts. An ideal way to mix and spice things up is to capture the same scene as both a low-key and a high-key photo.

High-key images are evenly lit and even bright. Shadows, however, are softer, and the light is usually diffused beautifully. High-key images are likely to focus on details and colors.

On the other hand, low-key images are very much contrasted. Opt for low-key lighting for one-of-a-kind looks. With only one light source matched with fast shutter speed, you could make objects appear to float on black backgrounds. Low ISO, high f-stop, and quick shutter speed could all be used to achieve the same effect. It’s also an ideal way to emphasize forms, textures, and shapes.

5  Control the Amount of Your Lighting

One of the wonderful things about shooting still life photography is the ability to set the scene things to your liking. You can move the fruits around in the bowl, or you can also spend all day perfecting the light. It’s up to you, really. 

Try using the light to guide the audience’s eyes through the photo. Light sources that come from the left are likely to make the viewer’s vision walk through the picture as though they are reading a book. Nevertheless, if the shadows are harsh, you can diffuse the one you already have or add another light source.

6  Control the Temperature and Color of Your Lighting

Light has many features that you can control. Moreover, the distinctive opportunity offered by shooting still life photography gives us a perfect chance to practice. Use reflectors for added color and more light.


7  Keep it Steady

Look around for the best tripod that offers the most features. A lot of people use their tripods for different forms of photography, so it really pays to consider how you can use your tripod beyond still life photography. Portability is one of the essential criteria, but it’s likewise a difficult one to become proficient at.

8  Use a Remote Shutter Release

A remote shutter release is one of the things that can significantly improve your mobility around the shoot. If you search online, you can find a ton of affordable and budget-wise options for most DSLR models. In general, a remote shutter release device works great, but sometimes the quicker to set up option is much better. The technology could be quite finicky, so if you are having issues with your remote app, an old-school option can fix the problem just as well.

9  Shiny Objects

Shiny items can make fantastic props and even subjects, but they can make your life a tad bit harder. Reflective things—well, reflect everything nearby, even the items you don’t want. Your lights, camera, and even yourself tend to make unexpected and unwanted cameos in your final photos. Try to move your objects around to prevent future issues.

10  Simple vs Complex

As you arrange your still life scene, you are faced with a plethora of choices. What camera settings are best? What kind of background to use? What props should you put in the scene? Here the KISS (Keep It Simple, Silly) principle applies. While you can make an intricate composition, try to keep it simple if you are in doubt.

11  Focus and Depth of Field

Consider the focal length. Play around with depth of field, and use a zoom lens or a prime lens to mix things up. Emphasizing on one small point instead of having the whole frame in focus could change your still life composition dramatically. A lot of cameras are built to focus on the human face, however, so you can try using manual focus instead.


12  Camera Angle

Try moving your DSLR and see how the still life composition changes. Shoot both with a tripod and with the camera in your hand. You could just find a much better angle than the one you had imagined. When shooting handheld, however, ensure that your shutter speed is fast enough to prevent camera shake.

13  Add Movement

Although, traditionally a still life is “still” you could add elements of motion to your still life photography. Reach your hand into the frame and arrange something mid-photo. Or you can also slow down your shutter speed and capture motion blur with a twirling ballerina in a music box. It’s your call.

14  Black and White Still Life Photography

When you remove colors from still life photography, other aspects tend to fill in the gaps that color left. Textures, tones, contrasts, and shapes become more prominent. 

Keep in mind that it’s always better to decide on black and white still life photography from the start. It’ll guide all of the creative choices you make from the start to the end of your photoshoot.

15  Post-Production

If there aren’t any rules for still life photography, post-production isn’t the place to impose them. Your editing is up to you. Most photography purists try to do as little editing as possible, while others digitally modify the entire photo.

Conclusion

The internet is overflowing with still life photography styles and ideas. You can find inspiration from there while you master this photography niche. Keep in mind that your online photography portfolio will always be the heart of your marketing techniques to expand your photography business. It is an ideal way to establish your presence and expand your audience reach in the market. With potential clients constantly looking for photographers who offer specific services, having a strong presence online can bring you to the front and help more clients discover you.

Remember your still life photography needs protecting online with watermarks. Start unlimited watermarking today.


Impressive Food Photography For Beginners: 7 Food Blogger Tips


How can you improve your food photography skills?

Check your Facebook or Instagram feed and you will, most likely, see a barrage of food photos being shared, like images in a slot machine. Everybody – and I mean everybody – seems to be into food photography, sharing snapshots of the latest, most delicious treats they’re about to enjoy.

What are the Best Food Photos?

Brilliant food photography makes your tummy growl and your mouth salivate–the kind that you want to grab off your computer screen. The best food photos are the ones that push you to run for the kitchen, fingers crossed that you’ve got everything you need to whip up the dish that you saw online.

You need not be a seasoned photographer to take mouthwatering photos of food, but you would still need a little practice. Here are some of our food photography suggestions that can help you develop your food photography skills:


7  Finding the Hero Angle

The Hero Angle should be able to show the ingredients and layers of your food. It will tell the audience all there’s to know how it was prepared. The best way to find the dish’s hero angle is by taking the three most common angles and then comparing them side by side.

The photo that look best should be placed at the top of your article. You’ll want to see this as the image Google uses to boost your blog post.

The other angles and photos can be placed further down the article to help your audience visualize and imagine your food.

Whichever photos you pick, do stay away from angles that can make your food flat or blurred. For instance, a pizza doesn’t look scrumptious being shot straight on because it is a flat subject.

With flat foods like pizza, the safest angle to shoot from is overhead. Nevertheless, it wouldn’t work with other dishes like a hamburger—we don’t want to miss those juicy layers of meat, cheese, and veggies. We’re better off snapping a hamburger straight on.

6  Shooting a Food Story Your Viewers Can Relate To

One of the most wonderful things about food photography is the food story that readers and viewers can connect with.

The internet could feature a thousand chocolate cake recipes. What would make your readers want to try your cake over the thousand others on Pinterest? Your food story.

How you choose to style your food and shoot the photos can support your food story. Having a compelling story encourages readers to relate to your recipe. It evokes memories, emotions, and nostalgia.

So, how do you tap into your audience’s emotions through food photography? Well, you’d want to shoot the process of your recipe. Show the audience how it’s prepared, where the ingredients are sourced. Once the reader connects with your food story, they are more likely to check out your other recipes.


5  Getting Your Food Photography On Tastespotting or FoodGawker

You need not have the world’s greatest food photography style to have a flourishing food blog. Nevertheless, you need to shoot your subjects spectacularly.

This is mostly true if you want to get your photos on food photography sharing sites such as Tastespotting and FoodGawker. This is the aim of most food photographers.

Exposing your images properly is the first step to having professional-looking shots. If you’re shooting on manual, use your exposure meter to check whether your photos are under or overexposed.

Too dark, your audience won’t relate to your food photography and story. Too bright, you might miss capturing important details. To see if your pictures are too light or dark, take a look at your histogram.

4  Shooting Professional-looking Photos

Yes, most professional photographers have access to tons of pricey camera equipment and props that help them improve their photography. However, keep in mind that you don’t really need equipment that cost an arm and a leg when it comes to food photography.

Instead, maximize your quality textured backgrounds and dynamic light.

When you could invest in a couple of professional backgrounds, it will greatly elevate your food photography to a whole new level. The best backgrounds are those with texture, a few different hues, and a ‘blue’ feel. These hues and textured backgrounds also help improve your food story and have a touch of “luxury.”

The best food pictures have great lighting. It allows us to see colors, colors, texture, and scale.

3  Using Neutral Props to Make the Subject Stand Out

Props are a vital part of food photography and your food story. You wouldn’t need too many props to take good images, but props help make photos more interesting.

However, there is a catch: props can also take the viewer’s attention and focus away from the food. Hence, use props that are neutral and not overly striking.

Props with bright colors, bold designs, or unusual shapes will capture the eye of your audience. As food photographers, our aim is to make our dish catch attention first. We are driving the viewer to focus on our food by sticking to neutral props.


2  Recipe Testing to Improve Food Styling

Styling food is essential in food photography. Knowing how each ingredient reacts when being cooked and prepared is the most important step towards making it drool-worthy.

Watch how the food looks as you cut and cook it when you’re trying to create your dish. You want to stop brown or discolored food, go limp, sink, or dry out for the photos. If this does happen, you can use some tricks to stop it.

Use your testing stage for the recipe to make sure the food looks best when you film it. Use stand-in food if you have a specific dish that would melt, discolor, or dry out. Knowing how your food will behave will improve the quality of your food photography.

1  Color Correcting Your Food Images

In food photography, color is important; it is the key connection that brings us and the food together. We want to make sure that the colors in our pictures are as true to life as possible for your food blog. This would mean ensuring our photos are color corrected before we upload them to the site.

It can be achieved during post-processing, but the best approach is to ensure that the white balance is right on. You can adjust your shot’s in-camera white balance. Choose the sort of scenario that you fire with.

Food Photography Conclusion

For your food blog, the best food photography is the one that showcases your food story. It’s important to be consistent in branding and image quality. Ensure that your pictures are well lit, catching various angles that display the food in its best light.

 While updating this post, we found another great resource on food photography. It would be best to use all these tips and techniques to improve your food photography skills for your food blog.
Before you publish your food photography online, make sure you add watermarks to protect them from theft.  It’s easy with Watermarquee – you can create them right on your browser. Start watermarking today.


Black and White Photography: 10 Useful Tips and Complete Guide

Black and White Photography – A Popular Classic

Black and white photography is just enchanting, don’t you agree? The classic beauty of the photographs, the various lighting contrasts that come to life, and the emotions and feelings they evoke. Black and white photography has been the sole medium available in film photography for the longest time.

Although color photography has likewise been around since time immemorial, it wasn’t until the 60s when color really started to take over the globe, and it’s been that way since then. Most people may think that black and white photography is antiquated and has no use in the contemporary world. Nevertheless, black and white photography is still widely popular for a reason.

While capturing images in color is fantastic, black and white photos could bring a fresh perspective and a touch of class to your photographs that couldn’t be expressed through color use. Here are some tips that could make your black and white photography much better.

10  Find an Inspiration

Here’s an obvious tip that a lot of people overlook. If you’d want to excel in black and white photography, you need to look at old black and white photos for inspiration. Look at photos taken back when people were very limited with their coloring that they had to produce some striking shots to attract people. Check out some vintage photos and films to get your creative juices flowing. You can also look at modern photos in black and white and find inspiration from there.

Find an image that catches your attention. Why does it attract you? The texture? The contrast? Find those reasons and take notes.


9  Focus on the Contrast

Because black and white photography involves only limited shades like black, white, and grays, always highlight the contrast in the photographs you take. When capturing a scene, consider how it would look like in black and white. Bright backgrounds would look fascinating when contrasted with darker objects. Shooting a silhouette of an object or person in front of a bright background can create some striking contrast. The opportunities for creative experimentation are endless. Shoot a few photographs and find the contrasting elements. It could help you discover how you can take the perfect black and white photography shot.


8  Always Shoot in RAW

Your go-to format should be RAW if you’re shooting black and white photography. With RAW, you can tweak the photographs to your liking and change it back to color if the photos don’t look good in black and white.

7  Play Around With Exposure

With photography, you wouldn’t want to use “normal” exposure for all of eternity; black and white photography is a good niche to play around with exposure. Sometimes over or underexposure can add dramatic and stunning effects to your photos. This is also true with black and white landscape photography. Always try out with different levels of exposure and take note of which one produces the best images.

6  Black can Highlight White

When shooting black and white photography, the dark shades could never be too dark in a lot of cases. If you snap some dark dark’s, be it on your professional camera, or tweaking them in post-production, you can make the whites pop out more. As a matter of fact, the whites and the grays will stick out even if they are weak.

Making your photos stick out is crucial. You would want your audience to see a subject that sticks out, and then scan at the rest of the image for other details they might have missed. Black and white photos are good at popping, but you would need to take extra precautions.


5  Look for Patterns

A good photo usually has some patterns to it. It’s something that makes the audience’s eyes follow the pattern and look for more. Those patterns could be blades of grass, cars going from right to left, rocks and pebbles on the ground, and any other repetitive texture, objects, or even design. For instance, shooting patterns in black and white street photography could make your images well-defined and make the subject attract attention. Patterns work wonderfully in black and white photography since there are no other colors to distract the viewers.

When shooting a photo, look for a pattern. If your eyes follow a pattern, this could be a good sign that you click the shutter button.

4  Experiment With Filters

With filters, you could limit the amount of light that enters your camera. This could be a brilliant asset to apply in black and white photography to make the photos a little darker or put even more contrast. For instance, I use a polarizer on the camera and capture a black and white photo, the bright shades will become a tad bit darker, and this can emphasize contrast even better.

Your camera’s partial fillers can help out as well. If a corner of the image is too bright, you can try darkening it a bit with a filter. See what kind of photos you can produce with the filter on and without it. This would let you see what photographs would look much better with a filter and which wouldn’t. A skilled photographer couldn’t succeed without a bit of experimentation, so just do it.


3  Enhance Your Photos with Software

When doing black and white photography, you’d also need to consider post-production. Lightroom and Photoshop can help make your black and white photos much better, although there are actually tools and programs designed particularly for black and white photography.

2  Black and White Photography is about Conveying Your Emotions

There are photographs that you might think would look stunning in black and white because they lack color from the beginning, like a close up of a zebra. Or a photograph of a black and white tiled floor. Even a dark, grey sky can fit the bill. You might agree that these kinds of photos can benefit from a black and white filter. However, in reality, impressive black and white photography is about highlighting a subject, relating a story, and expressing feelings and emotions, without the interference of colors. It isn’t really about snapping subjects that don’t have colors to start with.

1  Don’t Be Afraid to Use Flash

Flash is kind of a taboo when capturing natural photos, yes? Nevertheless, in black and white photography, using a flash may even be game-changing. Flash allows for more contrast by varying shades of greys when you turn those photos into black and white. Give it a try and see what you can produce.

To summarize what black and white photography is, it’s about looking for a fresh perspective and producing a visual that is better told without colors.

Conclusion

Black and white photography enthusiasts have produced visuals that extend over various photography niches, be it black and white landscape photography, black and white portrait photography, or even black and white pet photography. These niches have been fortified by photographers capturing from a different perspective and conveying their viewpoint without the use of colors.

Remember to protect your awesome black and white online photos with a watermark. Start watermarking today.


Watermark Protection: 2 Ways Watermarking Can Help Avoid Vacation Rental Photo Theft

How can a watermark protect your vacation rental photos? 

Guest post from Vacation. Rentals – a premier website designed for homeowners and property managers to list their homes for nightly rent.

The rise of social media, e-commerce, and the internet paved the way for con artists looking to scam unsuspecting online customers of their money. One area where scammers have achieved success in is hunting for property rentals. As the owner of the property, securing your photos using watermark protection is vital to prevent the exploitation of your property online. One of the most replicated, successful, and continuing scams going around nowadays is the vacation rental fraud.

The process is basic enough – scammers look for a home on a listing website like Zillow, create an account on Craigslist, write some text, copy the images, and upload a counterfeit contact. To innocent travellers looking to cash in on a too good to be true opportunity, they ignorantly send wire transfers, cashiers checks, perform a PayPal transaction, and in some worse cases, even their personal checks. When the scammer has collected the money, they disappear like a Nigerian bank record of your long lost family member.

Craigslist is An Excellent Tool – For Products

If you type in “Vacation Rental Scams” in Google, you will get somewhere around 3 million-plus results. The scammers are unrelenting and will stalk every single detail available to them to list “their” vacation properties. Craigslist is the perfect venue for this kind of thing. No cost, no identification, no problems. Accessed by literally millions and millions of people daily, Craigslist is the perfect setting for scammers.

To be fair, Craigslist also has legitimate postings, and that is why Craigslist is apprehensive to throw the baby out with the bathwater. Taking reasonable measures by ensuring watermark protection for your property photos is one approach that could frustrate and thwart scammers from targeting your holiday home.

What is a Watermark?

Watermarks are digital imprints overlapped on existing images. Usually, a watermark is normally and unobtrusive transparent (to not obstruct the overall photo) Here is a sample of a plain photo without watermark protection.

Here is the same photo with a watermark and no transparency. And this is a watermark with 20% transparency.

You could see from the 3 images above, the last two of them have an indelible mark that is easily detected and nearly impossible to remove. In other words, you have made it quite clear to everyone who sees this image that you’re really the owner and that you could easily flag and identify the content that is yours.

Ensure Watermark Protection

When we set out to build our website, the very first thing we did was to ensure watermark protection through automatic watermarks. We did this by coding on the site and would ensure that the photos uploaded to our server were digitally engraved with our marketed logo and provided some genuineness to the photos shown on our site. Craigslist does not have this feature, and fraudsters know and love it.

If they could get their listings past the flagged bots, they will be halfway through their task. Now all that is left is to persuade the unsuspecting Joe Traveler that this is a bargain they can’t miss. When watermarking your vacation home for rent photos, you provide a sense of “ownership” to them and provide credibility to yourself and to your customers.

Work Smarter – Not Harder

There are numerous methods of ensuring watermark protection. If you are familiar with Photoshop, you could even go so far as to write a script to automate the process a little. For us, the easiest way by far that we found was Watermarquee.com. Instead of going through all the difficulties of setting up watermark scripts, location, scale, etc., Water Marquee has made watermark protection smooth and efficient all in one session.

The best aspect of the process is that their batch execution manages everything regardless of the size of the image you upload. Only point the logo (Ours is in PNG format) to the photo section you want, resize, set the transparency you want, and click Save. It takes about 2 minutes to take 15 pictures. Upon completion, Water Marquee will even merge everything into a zip file for you for easy transfer on to your hard drive.

Watermark as Theft Deterrence

Frankly, it is so easy for someone to steal an image these days. We’ve all heard horror stories about people stealing pictures of photographers and claiming that they were their own. I saw the images of friends stolen and sold for revenue or used to sell generic products. Some photographers choose whether to upload images in a higher resolution so that they fit the size specifications and are of greater quality for viewing. Honestly, I would like to resize to the lowest possible resolution to help avoid the reproduction of unlawful online prints.

If someone really tries to steal your photos online, they could, but do not give them an easy time. I see watermark protection as a form of basic theft deterrence.

Branding and Watermarking

Watermark protection not just to deter thieves; it is likewise important for recognition and identification from a business perspective. Even if you post at a lower resolution to prevent pictures from being printed, you would like the general public to know that you have taken a picture.

It’s your hard work, and you deserve credit for that. Considering how simple it is for photos to be shared and then gets viral, you want your brand and name to be linked to your images so that people could trace you as the owner. People and pages re-shared my photos without giving me credit. Without watermark protection, the world would not know I took those.

Ruin a Scammers Day

Scammers search for easy pickings. For what amounts to 5 minutes of effort on your part, you could prevent and thwart a scammer from an obvious target. Because Watermarquee is so affordable and simple to use, you owe it to yourself to try them out and take preventive steps to ensure watermark protection for your vacation rental photos.