Instagram Marketing for Photographers


11 Tips for Successful Instagram Marketing for Photographers

Social media advertising is now seen as a very effective way to win new customers and build trust and loyalty to existing ones. Many experts refer to visual marketing as one of the most important business trends in the coming years. Social media sites like Instagram are the perfect tool for this.

Pictures appeal to human emotions and are a powerful way of promoting products and services and developing a brand.

Instagram marketing may not be something you’ve considered for your photography. Still, the increasing popularity of this social media platform means that it could be an excellent opportunity to reach more audiences.

If you’re currently taking photos for a hobby, living, or just starting out as a photographer, and you’re not on Instagram, you might be missing out on a ton of potential exposure. Lack of familiarity with this platform could mean that you’re not sure where to start, so we’ve crafted a simple guide to help photographers, novice or seasoned, get ready on Instagram Marketing.

The following questions and answers would help you decide whether Instagram marketing is a productive activity that will give you a return for your time and effort:

1. What is Instagram Marketing?

Instagram is an online photo-sharing platform. It integrates with Facebook, Tumblr, Twitter, and other networks. It also allows users to share images instantly.


Publish or Perish!

The more you publish on Instagram, the more you can increase your brand awareness. Yes, you’re not just an artist; you’re also a brand. The channel is packed with thousands of curators, potential clients, and agencies looking for new talent like yours.

Having an Instagram photo account will help you build an enthusiast community that will hopefully be associated with your imagery. This platform allows for a one-on-one engagement that can give you precious feedback on your work.

The Best Part

The greatest part of Instagram marketing is that you need not even be a professional photographer. It is all about snapping and sharing the moment and making your audience feel close to you.

The quality of photos captured by most smartphones is very good, so there’s no need to worry about technical skills. If you want to share and promote photos of your physical products, you just have to ensure that they in a well-lit environment. If your photos look too professional, you might lose the impact of sharing images that seem to have been taken at the moment.

2. Do I Need to Have a Product?

Visual advertising is recommended for marketing physical products, but you can likewise use the same strategies and techniques for the services you offer. Nevertheless, if your business is in the fashion retail niche, it’s easy to see how sharing your clothing photographs can raise brand awareness and lead to revenue.

However, an industry like dental hygiene may need to think more creatively when it comes to Instagram marketing, like sharing abstract images of confidence and freshness.

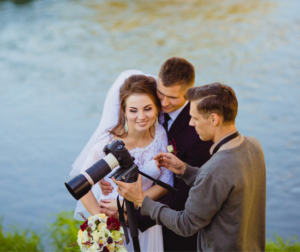
A lot of the most successful case studies of Instagram marketing include sharing photos of satisfied customers with raving testimonials.

3. What Should I Post?

Instagram is not really supposed to be a carbon copy of your website or portfolio; think about it more to show the world your own unique personality and style. Try to strike a balance between excellent shots that show your ability and some ad-hoc phone photos that give you a glimpse of your business – more like a visual diary!

You can also use Instagram marketing to experiment with different styles and get feedback from your followers.

4. To Filter or Not to Filter?

Instagram’s wide range of filters is perfectly suited for a lot of users. Being able to change the level of the filters makes it easy to modify your images until you’re satisfied and happy.

However, as a serious photographer, you are likely to already have your own style and technique. Using filters is fine (after all, it’s your Instagram account, and you can do whatever you want). You can achieve the style you are looking for by experimenting with the various editing apps on offer or using your preferred computer software until you find one that fits your preferences.

5. What is the Ideal Time for Posting on Instagram?

Posting content at different times of the day will affect how your audience responds and engages. You want to post your content when most of your audience is online, and your engagement may be high, so the Instagram algorithm identifies your content as accessible. This way, you’re going to get a much better shot at landing a spot on the Explore tab–this is where you can get a lot of new followers. Once you know the time that will work best for your chosen audience, schedule all future posts.

So how can you ensure that you’re posting at your best time? Post, experiment, learn, rehearse.

Trial and Error

Like a lot of things in life, the only way to discover what works for you is to try out many different options–the same is true with Instagram marketing. Before you decide to post a specific day or time on your Instagram photo account, play with different posting schedules. Keep in mind that the important thing is to be consistent. There’s no point in finding the best time to post on Instagram if you do it only once in a blue moon.


6. What Caption Should I Put?

You do not have to write that much on Instagram. However, always make sure to add a description or caption to each of the images you post. It may be short, but it should still be rich with valuable information for your audience.

7. How Can User-Generated Content Help My Brand?

A lot of marketing experts believe that UGC is probably the best form of digital marketing. Word of mouth recommendation is considered incredibly powerful, and business has been thriving on it for decades. In the online realm, customers can be actively involved in how their brand is perceived by others.

Promote Authenticity

Satisfied customers can share photos of themselves enjoying your services and products, and this is a powerful marketing tool. UGC builds trust and promotes awareness. Many business owners nowadays are encouraging their customers to take pictures of Instagram, which will ultimately lead to positive reviews and further sales.

It also promotes authenticity. Consumers are twice as likely to view user-generated content as authentic compared to brand-generated content. This gives brands an important boost in credibility. Most people say that less than half of all brands produce authentic content.

8. Growing Your Audience with Instagram Marketing

Instagram marketing works only if you already have an audience and followers. There are several ways to develop a follow-up. Strategies are like those used to build audiences on other social media platforms like Twitter and Facebook. Engaging potential customers by following them and enjoying their photos is a great place to start.

Great way to Attract attention

Once you’re comfortable with Instagram, it’s a good idea to focus on expanding your reach – especially if your photography business is your bread and butter. Keep in mind that more followers = more potential customers.

9. How Can You Make Sure You’re Getting Real Engagement?

Follow individuals whose Instagram accounts inspire you, and do not just restrict this to the most popular posters. By searching for hashtags yourself, you can find other photographers interested in the same subjects, techniques, and technology.

Once you start tapping into Instagram to interact with other photo accounts, the app will begin to understand your interests and, as a result, populate the Explore tab with photos you think you’ll like. This is another good way to find new accounts to follow and engage with.

Getting involved with your creative fellows by commenting on their images and starting a conversation will introduce more people to your work. You might even make a lot of friends in the process! You can also find a local community that you can become part of, for the benefit of everyone involved.

10. How Can I Attract More Attention?

This is a fun and easy way to engage in the culture of social media. To be successful in Instagram marketing, you need to be up-to-date with current trends and relevant hashtags. Then you need to shape some of your work to fit current trends. This is an effective way to get your photograph in front of millions of new audiences.

Use Hashtags

But with millions of images published every minute, there’s little chance that a random user will stumble across your photos unless they’re one of your followers. That’s why we’re using hashtags: to allow new curious eyes to see our images without paying for a promoted post. A hashtag is a text that follows a # symbol that is linked to a specific subject. Social media users can search the hashtag to discover content that would be most interesting to them, allowing them to discover exciting new artists.

To boost your Instagram marketing game, you can attach hashtags to each description of your posts. Thus, you will multiply your chances of being discovered and attract more followers, likes, and comments.

11. How Can I Protect My Images on Instagram?

Watermarking your photos is extremely important in Instagram marketing because the images on Instagram are meant to be shared. Without a watermark, the source of the photo can be lost quickly. Make sure your watermark is visible, without affecting too much of the image itself. Check out our Watermarks The Importance of Location – 6 Points to ConWhere to Put Your Watermark guide for ideas.

Digital Watermarks: Surprising Ways the 2 Types of Watermarking Improve Your Photography

What can digital watermarks do for you?

Digital watermarks became increasingly popular when sharing information on the world wide web became a usual activity. When sharing files like images online, there’s no way for you to know if someone uses them without your permission. To avoid unauthorized use of your files, you can post in the worst quality or not publish anything valuable at all. It isn’t really an excellent way to solve the problem of an unauthorized use, is it? Hence, it would be best if you were on the lookout for more effective ways to protect your copyright, such as digital watermarks (like what these realtors are doing.)


Digital watermarks refer to a pattern of bits embedded into a digital file – audio, image, or video. These messages usually have the copyright information of the file.

Digital watermarking is named after the watermarking of money or paper. But the key difference between them is that digital watermarks are intended to be invisible, or at least not to change the perception of the main file, not like paper watermarks, which are designed to be quite visible.

Types of Digital Watermarks and Their Uses

Digital watermarks help photographers to secure their photographs in today’s digital world. There are many different ways to watermark an image digitally, and each one has its own advantages and disadvantages. Here is a look at every form of digital watermark used in today’s images.

Types of Digital Watermarks

Digital watermarks can be divided into two specific categories: visible watermarks and invisible watermarks. As the descriptions suggest, visible watermarks can be clearly seen, and invisible watermarks are hidden. Visible watermarks are also known as transparent watermarks, and invisible watermarks are often referred to as hidden or covert watermarks.


Visible Watermarks

Visible watermarks typically take the form of a semi-transparent image overlaid on the initial image. The image typically includes the company or name of the photographer holding the copyright for the image. Still, it may consist of additional information, such as the year or the copyright mark. Because the image is semi-transparent, it is visible, but it still lets the viewer see the original image.

Digital watermarks can also promote your work.

When superimposing a logo or image as a visible watermark, it’s vital to ensure the superimposed image can’t be easily cropped from the photo. The semi-transparent logo or image that’s superimposed should cover most of the photo or an important part of it, such as wildlife in a nature shot or a person’s face in a portrait.

Invisible Watermarks

Invisible watermarks are embedded in the image and are meant to remain invisible under regular viewing. They are only accessible through specialized applications. There are different types of invisible watermarks:

  • superimposing a logo or image but keeping it really transparent so that it is not recognizable.
  • flipping the lowest-order bit of specific pixels, which would only work if the photo is not modified and, even then, is usually too basic to be useful
  • Spatial watermarking, which uses a watermark to a specific color band so that the watermark is only visible when the colors are separated, like for printing.
  • Frequency watermarking uses a watermark to a particular frequency, so it is visible only when that frequency is separated.

Among these on the list, frequency and spatial watermarking are the most frequently-used invisible watermarks.

When doing frequency watermarking, the digital watermark is best placed on either a low frequency or a frequency critical to the photograph. High frequencies are usually lost in scaling and compression, and the digital watermark would likewise be lost if the frequency it was applied to is lost.

The Uses of Visible Watermarks

The strength and effectivity of visible watermarks lie in their instant claim of ownership. The ideal visible watermarks clearly tag the image with the copyright holder’s name and, thus, destroy any commercial value for people who would use the image illegally. Because the watermarks state the copyright owner’s name, they could also be used for marketing and promotional purposes.

The Uses of Invisible Watermarks

Invisible watermarks are used to prove the validity of the image and recognize the copyright owner’s rightful ownership. Since they are more challenging to locate and erase than visible watermarks, invisible watermarks are notably useful when searching for and prosecuting unauthorized image use. They can serve as proof that an individual has violated copyright claims, which will make it easier to pursue copyright litigation and obtain royalties.

Invisible watermarks may also be used to track an image and identify the source of each publishing. The copyright holder, distributor, and user name of the photographer can all be embedded in the invisible watermark of the image. 

What are the Characteristics of Digital Watermarking? 

Digital watermarking will usually have the following key features:

It Can Be Proven

Digital watermarking should be able to provide accurate and credible proof of ownership of protected information items. The digital watermark can recognize the embedded relevant information (such as a number of registered customers, product branding or significant text, etc.) of the owners and, where possible, extract the information. Digital watermarking can differentiate between the security of objects and the ability to track the transmission of protected data, the authority and the control of unauthorized copies. This is the primary driving force behind the creation of digital watermark technology.

Not Easily Removed

The digital watermarking on the images should not be easily removed by any means or software.

Permanence

Permanence is a critical aspect of digital watermarks. Digital watermarking should still be identifiable and still provide enough evidence of copyright even after several various geometric and physical distortion, including intentional or unintentional (such as image compression, copying and scanning, changes in size, and so on).

Photographers always needed to take steps to safeguard their work. In today’s digital age, digital watermarking, even free watermarking using Watermarquee, gives protection for photographers. It gives them a lot of ways to identify, prevent, and prosecute the unauthorized use of their images.

Start watermarking today to protect your online images from being used without your permission.


Companion piece: Children’s Photos: 3 Surprising Reasons for Parents to Start Watermarking Them Now!.

How 1 Wedding Photographer Almost Got Sued: Effective Ways to Avoid a Lawsuit


Is choosing a wedding photographer really as hard as people think? What’s the worst that could happen?

Choosing the right wedding photographer is a tough choice for a soon-to-be-wed couple. If the photographer slips up, there is no second opportunity to re-create the event-not to mention the thousands of dollars lost.

Once my wife and I got engaged, we were in the same situation as other couples-we didn’t know whether to pick a wedding photographer. None of our mates is married yet, and we had no practical support to focus on.

We ended up discovering a list of candidates through Google (see SEO for Photographers) and walking around the nearby expo wedding show. We met with a number of candidates and ended up choosing one whose photo style we liked and who seemed to be a nice guy. His name was Tom.

Tom was the same age as us and ran his own company out of his house, but it was all right because he showed us around, and his basement was set up like a commercial workshop. In retrospect, we should have known that something was not right when he mentioned how he’d moved his workshop to his separate garage that he’d been constructing by hand “for the last couple of years.” Sadly, like a lot of other items to worry about, that statement did not even register.

Before the wedding, Tom replied instantly to all of our emails and phone calls, and we were all on the same page. He specifically set out our options and prices, signed a signature, and went on to the other 1,000 choices that we needed to make.


Wedding Day

If you read this and you’re married, you know that the last thing you would like to be concerned about on your big day is your wedding photographer. I kept going through a checklist of what I had to do, don’t forget the ring, don’t forget the ring, don’t forget the ring-and the wedding photographer was not on the list. It was not until 15 minutes before the wedding when one of my fiancée’s bride’s maidens told me when Tom had not turned up yet that I began to worry.

I took a sheet of paper with the vendor’s phone numbers and held it in my car. I called Tom to figure out what had happened, and he told me not to panic that he was “about 10 minutes away.”

At this point, there’s nothing I can do but wait. I told my wife’s bridesmaid that he was driving into the parking lot right now. Sure, I lied to her, and she can tell my fiancée that it was all right. For all of us, there no point in worrying.

He did so in time and took pictures as my fiancée started walking down the aisle. He was not a concern at the ceremony or the reception. But after that was a different story.

The Wedding Book

Tom had told us that after our reception, our pictures would be available for viewing within a week and that after we made our picks, we would have our picture bookin two months. Although the pictures were available within a week, the picture book’s completion and delivery ended up taking almost two years.

Tom slipped out of the face of the world for a couple of months, so he wouldn’t respond to emails or phone calls. Here’s the response I received to an email about six months after our wedding: “Thanks for your email to XXXX Photography. 

By then, I am focusing on the needs of existing clients, and I’m not trying to take on any new projects. I hate to say so in such an impersonal manner, but I have slipped behind and felt compelled to keep up with my new customers.

I know I am in the midst of a lot of major projects — please don’t stress. And I’m still at the forefront of my upcoming planned shoots. One of the reasons for this auto-response is to provide you with improved support in the future.”

His concept for a more suitable service was an auto-responder.

It went on like this for nearly 18 months. 

I cannot explain why I did not press hard, just to say that while we needed our wedding book, it wasn’t the biggest concern on our minds. Jobs, beginning a family, moving to a new home–the wedding book and the wedding photographer were never the number one concern.

It sort of gnawing at me-the pictures had already cost a huge amount of money. Plus, Tom was not going to get the balance paid until we had the script. How could he not have been in a rush to deliver and get his money?


When I was able to get him on the phone, Tom has always been extremely apologetic, and he did promise to get our book fixed soon. Eventually, about 18 months after our wedding, depressed and only having that nightmare behind me, I wrote a letter in legal (or my best imitation of it) threatening to sue.

Two months later, we got our wedding book.

My wife’s name was misspelled on the cover.

Seriously.

Tom also criticized the company that he outsourced the production of the book. And because they no longer edited the cover of the wedding book, he had to remove the nameplate by hand (it turned out to be ok).

Around a year later, we received a hotplate note from him to all his former employers, thanking all of them for recommending him to their colleagues, but that he had wanted to go back to the regular 9-to-5.

I think that was for the best.

Is Wedding Photography that Tough?

Wedding photography takes an incredible amount of research to do. Yes, I know that your mind flows directly to editing, and yes, that can be extremely time consuming, but I’m not just referring to post-production. I’m referring to the booking process, email communication, request facilitation, standards management, recording, editing, picture distribution, and other things.

You are committed to being entirely open to your customer for MONTHS leading up to the case and months following the big day. Make sure you are not over-committing because you are not open to your customers. Note, this is a relationship-based business. The more you take care of your new customers, the more likely they are to recommend you to their peers.

Customer Service for Wedding Photographers 

Wedding photography is a partnership based — referral based. You just have to over-deliver at any single event. This refers to the distribution of self (more on that to come), pictures, communications, and finished goods. You’re carrying the Holy Grail for these people: Photos! You need to do the best you can to have happy and satisfied customers because they’re the ones who will spread the word about your brand and services.

Share, Give, Collaborate

Bear in mind to support, honour, and do whatever you can to please a planner. They have worked for months and months (sometimes a year or LONGER) to put together all these wonderful details. Offer them the love they deserve. They’re great people (and they have the potential to be great partners for you as your growth as a wedding photographer).

Part of having clearly established standards, and working successfully with your clients is ensuring you have a clearly defined style — a clearly defined creative expression.

This is a creative endeavour and that you’re continually evolving and improving yourself artistically, but your customers deserve to have reasonable perceptions of what they’re going to get from you. If you wish to make regular bookings from fans who are able to pay you equally, you need to show yourself to them regularly and efficiently.

Be Your Own Brand of Wedding Photographer

This industry does not need the zillion photographers simply to regurgitate each other’s work. The wedding photography industry wants your creative spirit, your special vision. You’re now a precious asset, rather than just another wedding photographer, which makes you worth more. Make sure you protect your online photos with a watermark. You can use your own brand and contact details to ensure your photos remain yours. Watermarquee offers unlimited watermarking for a low, one-off fee of $19. Start watermarking today.

Portrait Photography: 13 Powerful Ways to Improve Your Skills

Why you should practice your portrait photography skills

People love to look at people, which is why portrait photography is one of the most fascinating types of photography. The best portrait triggers the viewer’s emotional response to the subject. As a photographer, your task is to elicit the right kind of emotion from your viewers. You have to decide beforehand what kind of emotion you want to evoke and then set up a portrait to accomplish that result.

13  Know Your Subject

If you are paid to take a portrait photography shot, you will need to speak to your client regarding what kind of effect they want to get. A high-profile businessperson will want to feel respected, while an actress may need to look seductive or beautiful.

12  Emotional Subjects Lead to the Creation of Emotional Photographs

The simplest way to elicit the viewer’s right emotion is to have the subject show that emotion. When we see someone smiling, it makes us want to smile; when we see someone laughing, it makes us happy. But barely seen emotions, like anger and misery, make more dramatic photographs.

11  Put the Subject in Context

In a portrait, everything in the photo should attract the viewer’s eyes to the topic. Furthermore, you can use an interesting prop or background to add a context to the image and tell the viewer something regarding the subject.

10  Try a New Angle

Portrait taken straight on is the most common, but taking a photo from a different perspective can make it more appealing. Rotating your camera to an unusual angle could add a feeling of motion to a shot.

9  Tell a Story in a Look

The subject’s eyes will always be the most significant aspect of portrait photography. Having your subject look right into the camera will generate an association between them and the observer. A subject looking outside of the frame causes the viewer to become interested in what they are viewing.

8  Use Natural Light through a Screen or Window

Portrait photography in direct sunlight may be unforgiving on the skin. Natural lighting through a screen, windows shutter blinds, or can soften the harshness of the light and help with a stunning portrait shot. Not to mention, it is cheaper compared to studio portrait lighting.

Shoot from the right height. To capture your eye-to-eye subject, take an extra step. Use equipment or physically get down to lower or raise your camera for the finest shot possible.

7  Shoot Flash from an Angle

On-camera flash gives a deer-in-the-headlight look, and while flat lighting might be a look you are looking for, it is more likely than not to be the look you usually want. Try flashing from an angle by having a friend hold it or using a light stand setup.

6  Experiment with Overexposure 

Generally speaking, overexposure is something that photographers are trying to avoid. However, an overexposed picture, something unique to portrait photography, can genuinely help achieve a polished and clean look. This is because some contents, like flaws, are lost in overexposure. The trick here is to use it with moderation, so you are not overdoing it.

5  Shoot Candidly

Yes, you are standing in front of your subject with a camera in your hand, but that does not mean you cannot get a candid shot. Try to distract your subject by talking to you or a colleague of theirs. You can offer them a task or a photograph from afar, as well.

4  Get Closer

While this may sound stupid, this is one of the most important aspects of capturing great portrait photography. There are also several reasons to get closer to your subject, no matter who you shoot. Keep in mind, because the face is of primary importance to your photograph, it will take up most of the frame. Getting close will allow you to complete a frame, even if you’re shooting with a small point-and-shoot camera that doesn’t provide a telephoto capable zoom.

More importantly, when you’re close, rather than using a zoom, you’re lowering the depth of the field, which, in simpler terms, is the length between your focus point and some point in the range that is in focus. What this implies is that when you get near, you capture the face in a sharper focus, but the nearer you get, the shallower the depth of the field will become.

In effect, this blurs the backdrop, and because the lens is always looking for elements that are in focus, the facial features instantly stand out; the background is no longer distracting.


3  Use Color for Mood

Color or lack of it has a lot of power over the emotion in your photo; and hence, the quality of your portrait photography. Start by asking your model to wear a specific color or find a location ahead of time to get the scheme you are looking for. Get acquainted with the color wheel to understand what colors complement each other and which clashes.

2  Choose a Good Background for Your Portrait Photography

It is a no-brainer, but how often do we see otherwise great portraits shot against garish or distracting backgrounds? Don’t make that same mistake. While you could blur the background a bit by getting closer to your subject, a minimalistic environment doesn’t seem upsetting provides a better portrait.

Look for backgrounds of solid color. Consider a background that complements your subject’s skin tone, or if you shoot a full-body shot and a torso shoot, look for shades that enhance your subject’s clothing.

1  Stay Committed, Keep Shooting

The key to improving your portrait photography skill is to have as much experience as you can. If you are new to the game, ask your friends for photoshoots. Ask your family, friends, or associates to get the camera in your hand and offer it for free until you are a professional. Here are some more tips in setting your first online portrait photography portfolio.

Remember to watermark your portrait photography with your logo, brand, contact information to ensure it’s copyrighted and protected from use without your permission. 


Grass Photography: 8 Ways to Amazing “Greener” Grass

Grass Photography

What lies at the heart of photography, is the ability to make people see things from your perspective. Whether it be a sunset, a model or a beautiful landscape, photography is a unique medium because it allows you to showcase something you have seen, in an artistic, or personal lens, for others to understand and appreciate.

Check out other photography niches here.

As such, one of the best ways to improve your photography is to take a common, everyday object that most people would ignore, and experiment with ways to capture it in a new and interesting way. That’s right, no need for big ideas, like a wedding with a backdrop of endless beauty, all you need is something simple – it could even be a blade of grass. This is where grass photography comes in.

What Is Grass Photography and Why Should I Be Doing It?


Grass photography is a perfect exercise for photographers looking to hone their skills, as the ability to create something impressive and beautiful out of an item as mundane as a blade of grass is a real show of skill. Given that we are almost always surrounded by it, grass is one of the most easily accessible subjects to photograph, yet most of us would completely overlook it as a source for good ideas that could create a fascinating image.

However, if you take the time to examine it in detail, you’ll realize that grass is full of opportunities for a great shot. As grass comes in a wide array of varieties – tall and tangled, short and twisted, small, heavy, dark, light – you can showcase often overlooked beauty within the subject, and with effective use of photography techniques, you can even create unique and never before seen perspectives on the mundane topic.

So instead of watching the grass grow trying to think of your next big photography idea, how about getting out there and getting creative with small stuff. Don’t feel limited by your own back lawn, go for a stroll and see how many kinds of grass you can find. Try out some of these techniques to create some really interesting grass photography shots.

Ideas For Creating Interesting Grass Photos

Experiment With Shot Types

One of the best ways to create extraordinary images out of ordinary subjects is to utilize out of the box camera techniques that can really show an image in a new light. To start off with, try shooting from a low angle to automatically re-contextualize the subject, as grass is rarely ever viewed from below in day to day life.

Next, try experimenting with Dutch tilts or full on inversions as this will give the grass a more ambiguous appeal and engages the viewer more actively as they will not immediately be able to identify the subject of your photo for what it is. Feel free to continue experimenting with grass photography to your heart’s content. 

From shallow and deep focus to high and low shutter speed, your camera has more than enough settings. It’s almost guaranteed that you can create interesting photos or videos by playing around with these settings to make your viewers see your subject from a new and exciting perspective.


Play Around With Color

Color is another that is benefitted by experimentation and can be used to create eye catching images that stand out from the crowd. Like nature photography, color is crucial in grass photography. With the depth that accompanies grass in its lush greens to blazing reds, there is so much potential for experimentation and the creation of interesting grass photography that can hone your skills.

One such idea for experimentation would be to create contrast within your photograph. While most people assume grass to simply be green on green, you can subvert expectations by using contrasting colors to create a beautiful image. For example, if you contrast an orange field of tall grass with the purple tips of flowering wild grasses, then your image will have an aesthetically appealing color contrast and will provide your viewers with a perspective on grass that they will have never even thought of.


Of course, you must be aware of lighting and environmental factors if you’re aiming to create any color-related effect. While a bright, sunny day will give you vibrant and high contrast green, a duller, overcast day will provide you with softer greens and darker tones. It also important to keep in mind that, as grass photography is an outdoor activity, the biggest rule of outdoor photography applies; Shoot during the golden hours – early morning and early evening – to make your pictures look that much better.

Avoid Glare and Reflections

A common mistake in grass and landscape photography, is having images washed out due to glare and reflection. Due to the glossy nature of grass and color reflections, glare created by grass will throw off the color of a photographer’s frame if they don’t adjust accordingly, making their lawn appear much brighter than is aesthetically pleasing.

A good way to minimize glare is to invest in polarized lens, known as ND filters. Just as polarized sunglasses can be used to minimize glare, there are polarized filters for camera lenses that can do the same, and they are known as natural density, or ND filters. These filters screw onto the front of your lens and have a front element that rotates to help fine tune glare mitigation.


All you need to do to fix glare using these filters, is attach one to your camera, and then rotate the filter to the best position to avoid glare.

When using these types of filters, it is important to remember that the polarizing decreases the amount of light that is allowed flowing through the lens. This will affect your exposure, so it is essential to test your gray balance and white balance and adjust accordingly so you’re not inadvertently altering your images without knowing it.

Create Some Contrast

Another good technique to consider with your photography is to not just photograph grass alone. Having multiple objects of interest helps generate a focal point for your grass photography. Whether it be the dew on leaves, insects among the blades of grass, or even a beautiful sky behind the grass, the options of what you can add to your image are infinite.

Regardless of what style of grass photography you end up experimenting with, the important heart of this exercise is to view the ordinary parts of life in new ways and develop your photographer’s eye. Once you’ve honed your eye and taken some incredible pieces of grass photography, the next step is to protect them.

Digital image watermarking

Digital image watermarking is one of the popular ways to protect online photos and watermark makers, like Watermarquee, allow easy application of watermarks on your photos. Next time, when you choose to protect your online grass photographs or photography of any kind, choose Watermarquee and start watermarking today with our unlimited plan

Pet Photography: 8 Tips in Photographing Pets


Should pet photography be something that you invest your time in?

Pet photography is, indeed, a growing business with about 35% of US households own at least one cat, and 39% own a dog. It is tens of millions of pet owners, most of whom consider their pet as a member of the family. 

Our relationship with our pets has transformed over the last few decades; it is not unusual to find people referring to their cats or dogs as their “babies.” Whether you think these people crazy or not, that kind of passionate, growing demand is a great opportunity–or op-paw-tunity–for photographers (but first, check this out to find out if you have the right equipment).

(Actually, if you think they are crazy, pet photography might not be for you.)

Photographing pets is much like photographing children. You cannot expect them to move in the direction very well, or to stay still for a long time. Here are some tips to help you perfect that furry shot:


Talk to the Owner First

In pet photography, you have to realize that each pet has its own character, and you are going to need the owner to help you figure it out. Is this cat strung high? Is this dog playful? Knowing this ahead of time will make it possible for you to set the scene properly. 

Also, the pet owner probably already has a distinct idea of the kind of picture they want. The best approach a photographer can do in any situation is to understand what the client wants to achieve.

Choose the Right Setting

The best setting for each pet depends on its personality. A playful puppy is best to shoot outdoors; however, the owner of a house cat might want the cat to be photographed on the couch. 

Remember, you are trying to take a picture of the pet in the way the owner wants.

If you decide to do pet photography in a public place, find out if the pet is capable of resisting distractions. It is quite hard to take pictures of a dog if they are running after a squirrel.


Help the Owner Be Prepared

Pet photographers should offer a checklist to every owner whom they work with so that the owner could prepare the pet in advance. Examples of what is to be included are:

  • Has the pet been groomed in advance?
  • Bring along its chosen snack to help them relax.
  • Bring along its beloved toy, especially if the owner wants to include an action shot.

Getting the Shot

When the time finally comes to begin taking pictures, you may find that the animal is not in the mood. If the owner has followed your checklist, you should have some tools that can use to help the pet cheer up. But it helps if you bring along your own bag of treats and toys, too.

Try playing with the pet before you start taking pictures of it. Some pets, like some kids, do not like strangers, and they may be aggressive or shy. You will need to convince the animal that you are their pal before they begin to act naturally.

Take it easy and just go with the flow; animals are very sensitive to your mood. Give the pet a last-minute grooming session, just a touch-up. If you are outside, how’s the wind going? Is it too strong? Is the sun too bright? Keep in mind; overcast is a lot better for exposure. Make sure your pet would be far away from your background so you would not cast your shadows.

Eyes on the Prize

Their eyes are probably the most expressive part of a pet’s face, so if you want to produce outstanding pet photography, start concentrating on the eyes and facial expressions. A well-timed puppy whine (from you) could reel in the spotlight on a puppy or a curious dog, and have them looking straight at the camera faster than you could say “woof.”

Know to Shoot in Their World

While a couple of photos looking down at the pet while you’re standing could be cute, to create the really attractive portraits that pros make, shoot down at their level, ‘in their world.’ For the Great Dane, their world could be the height of your hips; for the Chihuahua, it could be all the way down at the level of your ankles. For a cat sitting on a cat tree, you might need to pull out a step ladder to get to their level. 


Pay Your Model

Every animal needs some kind of motivation to pay attention to you during the pet photography shoot; without it, they will wander away and be totally uninterested. Determine what motivates them (i.e., their ‘payment’) and give it to them throughout your shoot.

It could be toys or treats or for dogs, or just care and affection. For cats, it could be a feather toy, tuna fish, catnip, a paper bag, or even a favorite blanket. For pet horses, It might be their favorite food such as apples or carrots.

‘Get them to do anything you want’ comes with a model payment. Be creative when it comes to ‘rewarding’ the models, and they’re going to reward you with great shots and be more cooperative in your pet photography sessions.

Talk Like Them

No, you don’t have to meow, but there is no faster way to freak out a cat or confuse a dog than to shout commands at them repeatedly. Dogs will become confused and concerned, and cats will disengage or even leave the room.

When doing pet photography, try interacting with the pets the way they do with each other, non-verbally. Utilize hand signals or point to ask them ‘over here.’ Utilize the sit hand signal for dogs that understand it. If you do require to say’ sit,’ say it calmly and quietly, just once or twice. Avoid stating the pet’s name, because the more times they hear it during the photo shoot, the more likely they are to zone out.

Pet Photography Bottom Line:

Pet photography can mean a range of interesting pictures, from dramatic to cute. Use treats and toys to reward them if they’re doing well and let them leave if they’re bored of having their photograph taken. Feeding an animal first is always a great idea to shoot portraits as it makes them relaxed. If your pet is going outside, ensure you have someone else to help in case they break free. Align your pet photography expectations correctly. Don’t expect the perfect shot right away-it’ll just raise your anxiety and stress the animal. Be patient and have fun. If you do that, the animal will do that.  If you like pet photography, check out our tips in child photography too!

No matter which pet photography is your favorite, remember to protect your photos with a watermark before you publish online. Start unlimited watermarking today with Watermarquee.


Winter Photography: 9 Amazing Tips to Get That Perfect Shot


How can you improve your winter photography skills? 

Snow and winter landscapes make for very photogenic backgrounds, but they can be tricky to handle, especially if you’re a novice photographer. Here are a few tips and methods for shooting in the snow to take fantastic winter photography before the end of the season:

Focus on Composition

The essential principles of composition remain the same, no matter what type of photograph you take. When you take snow photos, you can get more creative with your composition because you can find interesting focal points of interest and contrast to the snowy landscape.

The contrast of white snow and dark shapes could be an excellent inspiration for composing and framing your shots. The Rule of Thirds is a tried-and-tested classic you could use for landscape shots.

As with any photography style, you can break the rules for really awesome shots from time to time. Shoot portraits from above, use snow on the ground as natural reflectors and use the details of your subject’s face against the pure white background of fresh snow.

Get down and down to shoot snow details or fallen leaves or twigs or step back and capture snow-covered rooftops with a wide lens for a new perspective.


Check Your Exposure

One of the most common issues when shooting winter photography is to end up with a back lit subject, especially if you’re shooting portraits. Experts always recommend the use of a light meter so that you can take accurate exposure readings and have a subject that is well lit all around.

Exposure Compensation is the best tool to prevent overexposed or underexposed shots, and most cameras have this feature built-in. You may need to take a few shots before getting the right exposure to a snowy setting, but this could mean the difference between great snow photos and images that you cannot use.

Aim for Accurate White Balance

Snow is very reflective and may cause the white balance settings of your camera to go haywire. This can be seen in the bluish or grayish tint that you can take with your first winter photography, especially if you have under-exposed your shots.

To get an accurate white balance, use the custom white balance feature of your camera, which allows you to measure the most accurate white balance by selecting the setting where the snow is closest to white.

Brand new camera models have a one-touch white balance feature, but you may need to adjust your white balance manually if you’re using older models.

Shoot Winter Photography in RAW

Many professional photographers shoot in RAW only and for a good reason. Shooting in the snow will often result in a few under-exposed or over-exposed photos, especially if you’re new to photography or if this is your first time shooting in an all-white landscape.

To make sure that you can still work with these images, save your photos in RAW format to retrieve more detail in post-processing.


The RAW file format lets you make corrections that would otherwise be impossible to correct if you were using JPEG files. RAW files will take up a ton of space on your memory card, so make sure you pack an extra one or two cards when you are out to shoot.

Take Advantage of Contrasts

Contrasts could easily be seen with winter photography, where you have light snow and dark subjects and details. You can direct the eye ‘s attention to a row of trees in the background, for example, if the trees are dark and sharply sketched, making them stand out against the foreground’s snowy whiteness.

Use white snow to act as a stage for shooting important objects and to make sure that the color, texture, and other details are in contrast to the white surface.

Overexpose

After all that talk about overexposure, a lot of people would think twice about overexposing their shots. However, you can overexpose one or two stops to make your photos feel brighter, without blowing away the details. Working with RAW also helps keep details visible even if you intentionally overexpose your shots.

When you’re overexposing your snow photos, you can get whiter snow and better contrast, allowing you to capture that bright, wintery feeling that snow tends to evoke.

Use Reflected Light

While every light reflected by the snow could affect how your camera projects the light and dark areas, you can also take advantage of snow’s ability to reflect light to shoot your subjects in the correct light.

Angle the subjects so that they are surrounded by white, mostly coming from the snow to get light areas where the necessary details, like the body or face, should be. The most helpful thing about reflected light is that it is a diffused, soft, kind of light that you won’t get with the camera’s built-in flash.

Choose Your Colors

If you are doing winter photography in the snow, dress up subjects in pastel and other light colors. White outfits are going to reflect more light and give you more highlights than you care about. Light and soft shades look more attractive against a white background because intense, deep colors tend to pop out of the picture and dominate the whole picture.

Try to add colors to the landscape shots too. Gradations and shades from light to dark will serve as an impressive contrast points in any winter photo.

More Stable Shots with a Tripod

A tripod will stabilize the camera and allow you to take pictures at slow shutter speeds. If you need to capture snow with city lights in the background or a winter sunset, a tripod will capture sharp images even as the light fades.

These are just a few established techniques that may help you take your winter photography to the next level. While you know a few basic photos, they can help you nail some great shots.

Learning about techniques suited explicitly to snow and winter photography can help you capture the season in all its winter glory. Once you have your perfect winter photography and you’re ready to publish online, remember to add protection with Watermarquee easy to create watermark creator. Start watermarking today.

7 Impressive Camera Apps to Keep Your Smartphone Photography Game Strong


Camera apps to enhance your smartphone photography

Studies show that 80% of the over one trillion photographs taken every year were shot using a smartphone camera. If you look at your camera roll, you are likely to see that you contribute a decent amount to this trend. Thanks to constantly improving technology, the majority of cameras embedded in your smartphones take high-quality images (just don’t make these mistakes that make you look amateur). If you want to make these images look even better, there are seven camera apps to try.

The following camera apps let you do more with your smartphone camera so that you can get better pictures from each shot.

7  Moment Pro Camera App

If you like DSLR-like capabilities with your smartphone, the Moment Pro Camera App is the right way to go. With camera apps like this, you may shoot photos in RAW with complete manual controls. This lets you adjust ISO, shutter speed, exposure, image format, focus, and white balance as you would on a DSLR camera. Shooting in RAW lets you get better results from photo editing. It also has an anamorphic lens feature, so you can de-squeeze your images. It is available for iOS (free with in-app purchase) and every Android phone.

6  Halide

This application is currently only available on iOS devices (and the company warned of rip-off camera apps on Android devices in early 2018). It turns your phone camera into a premium piece of technology. You could shoot in manual or automatic mode. All images are captured as RAW files to give you full control of editing. With a recent update, you could shoot pets and other objects in portrait mode, and the Focus Peeking feature lets you see where your image is in focus.

5  Open Camera

This Android camera app is available free of charge, without any in-app purchases required. It is loaded with features even though this free app is not as modern as some other newer apps. Your images will not contain metadata, but you can set the app to capture time stamps and geotags. You could choose between auto-stabilizing and adjusting color effects, modes, ISO, exposure, and more. The app also has a smart option to take images with a voice command remotely.


4  Focus

Another one of those DSLR-quality camera apps, focus, is available free of charge with in-app purchases on iOS phones. Highlights of this app usually involve large opening, real Bokeh, 3D lighting, and more. This app leverages computational photography technology to edit your photo, including focusing adjustments, opening shapes, and adding lights – after taking a photo. This free app is simple to use and is a great replacement if you do not have an iPhone XS or an XS max.

Camera Apps that Enhance Your Photos

A lot of camera apps have been developed to aid in the photo editing process. They range from being free to a subscription-based. Still, you do not have to pay a lot for satisfactory editing capabilities.

3  Snapseed

Snapseed is said to be one of the best free photo editing apps available on iOS and Android platforms. You could use any of the 29 tools to edit JPG or RAW files. Beyond the basic functions included in most editing apps, this program also includes functionality such as:

Lens blur: Adds Bokeh

Healing: Removes photo-bombers and other unwanted objects

Double Exposure: Blend two photos

Face Enhance: Improve portraits.

HDR Scrape: Produce the effect of multiple exposures

The application also has a unique “Control Point” or Selective features where you could select up to eight points on your images to assign enhancements. Then the app’s enhanced technology does the rest.

2  Afterlight 2

This app is being billed as an all-in-one photo editor for iOS devices. Note, only the original Afterlight is currently available on Android devices. Its simplistic user interface underlies a wide range of editing capabilities. From basic edits such as exposure, color, and sharpness to advanced changes such as curves, selective shade/saturation, brightening, and tone, this app will help you quickly upgrade your photography skills. They have added and updated dust and light leak overlays and are continually providing new filter packs from skilled photographers.

Dual-Purpose

If you want smartphone camera apps that will help you take great photos and make them look better during editing, here’s our pick:

1  Adobe Lightroom CC

Anyone who knows a little bit about photo editing knows that Adobe Lightroom is one of the main photo editing tools used by professionals. You can now appreciate some of these capabilities on your iOS or Android mobile phone. Lightroom provides a powerful camera and photo editor in one app. You could even shoot in RAW, adjust shutter speed, white balance, and ISO. Comprehensive editing capabilities include one-touch presets and advanced editing capabilities.

Lastly, keep in mind that once you’re satisfied with the photos you have taken with your smartphone camera apps, it would be best if you make sure to watermark them first before uploading them online. Watermarquee.com is a free online image watermarking tool that can do that and so much more. Here is some more watermarking information to guide you.


Why Watermark: 5 Effective Ways to Protect Your Photos from Theft


Can a watermark really prevent photo theft?

Technology has brought a myriad of advances in the photography industry. The digital era lets photographers see their photos as soon as they are captured. Some adjustments can be made with the camera, while others can be made in a digital darkroom, such as Adobe Photoshop.

The worldwide web has opened up lucrative opportunities for photographers to present and sell their work on websites that can be viewed from smartphones, computers, and tablets. Moreover, the internet also opens opportunities for intellectual property thieves. Every day, photos and images are stolen from websites.

Those stolen images are used to make a profit for someone other than the owner. Watermarking photographs uploaded online is the most reliable way to prevent photo theft.

Why Are Images Getting Stolen?

Some people assume that every image uploaded online is open game, but the rest know better. Photo thieves are always searching for means to make some extra money and use other people’s images to claim as their own or to create products in print shops on request.

How can you protect your work?


Use a Watermark

Don’t get frustrated with the stolen pictures. Resist the urge to stop posting your photo online. You’re going to lose your sales opportunities and the chance to build your brand name. Watermarking the image is a straightforward and effective approach that is becoming popular with photographers.


You can create a personalized watermark template that is saved and could be used for all your images. Nevertheless, if you have never used a graphics system other than your computer and camera software, online watermark programs, like Watermarquee, can still protect your images.

You could choose your theme, colour, and font from a wide variety of templates, or you can follow the instructions to build your own. It’s simple, it’s quick, and it’s cheap. You can protect your prized images in just a few minutes.

1  Use Scale and Resolution

One of the first and easiest steps that any photographer can take when it comes to protecting images from thieves is to reduce the size and resolution of their images when posting online.

A good start is to post your photos in an aspect ratio and resolution other than Full HD if you are looking for an easy way to dissuade potential photo thieves. Photographers can also use semi-transparent or opaque watermarks to protect their work. The last thing most thieves would want to do is take time and energy to erase watermarks instead of just finding a different, unmarked file.

If you are watermarking your pictures, it is important to ensure that your watermarks are sufficiently prominent that they are not easy to remove.


2  Make It Painstakingly Evident that Your Work is Copyrighted

Another common approach is to make it loud and clear throughout your site that states that every photo posted is copyrighted. If you need an exceptional license to use your images, make sure that they are displayed so that every online user can see that they are not allowed to take your photos without purchasing a license.

It may be helpful to add a clear warning that says you will be chasing down the illegal use of your photo — and that it may result in serious fines for the guilty party. The starting point for penalties in some countries is the cost of the initial license per file — and, in some cases, additional fees may be added.

For instance, if someone were to use one of the photos on a business website, you might argue that the business owner was taking advantage of the advertisement and trying to add a proportion of those earnings to the fine, plus legal and court costs.

3  Disable Right-click

The most common way people steal your images is to access them online, right-click them, and save them to their own devices, and use them as they wish. But one way to hinder the process is to delete the images of your pages by right-clicking.
How to disable right-clicking?

There are some options to do that, but the quickest way to do that is through a WordPress plugin like No Right Click Photos App. This plugin uses JavaScript to deactivate a right-click action on a picture.


On the downside, this move does not exclude the possibility that your photographs may be stolen, but it does act as protection against data thieves. Casual offenders are likely to move to a location with easier video access.

Do not take chances with your photos, because no one else but you should profit from your work. Build a prominent watermark that will protect your photos from intellectual property theft.

4  Removal Request

It’s often as easy to solve the problem as asking somebody else or organization to delete your images. Guarding your content is a time-consuming activity, but it is a way out of other ways to get your job done.

5  Take-away

As any photographer probably knows, posting photos without compromising the quality at one point or another could be just as difficult. That is why one of the most notable things you could do to secure your job is to ensure that you have an action plan when you become a victim of online image theft.

Unfortunately, when it comes to preventing photo theft, there is still no ‘one-size-fits-all’ approach. The sad reality of the internet world is that images and other content can be used or stolen without their respective owners’ consent.

Nothing is ever going to protect your material from being hacked by committed photo thieves; you can only discourage it.

By incorporating all of the strategies mentioned above, however, it would be much harder for thieves to download and edit images. It will also stop and prevent thieves from stealing your pictures in fear of potential penalties. Start watermarking today!

Here are some more watermarking tips.


Etsy Product Photos: 7 Secret Tips to Sell More and Attract Customers


Why are product photos important to an Etsy seller?

Great product photos are essential for Etsy entrepreneurs. They say, ‘Do not judge a book by its cover,’ but when was the last time you bought an online product with awful pictures? You may offer the best quality items, but if you are serious about growing your business, you shouldn’t underestimate the power of good images; it can take a photo or break a sale.

Creating the perfect product photos might seem a bit overwhelming to those just starting out. Here are seven tips for some great Etsy photos:

7  Consider the Purpose of Your Product Photos

You want your product photos to attract attention, present a clear view of the product, and highlight your brand’s image. It is useful to remember the purpose of the final result when planning your next shot.

The product photo is the first impression that your potential client gets. It needs to attract enough attention to make customers click and find out more. If the overall quality of your product photos is low, people are likely to just ignore your products and move on to the next one with better product photos.


These photos also give the visitor a good sense of the product. You can’t have the same perception online as holding the physical item. Suffice it to say, your product photos need to convey all the details. They must clearly show the texture, color, size so that your potential clients can make an informed choice.

There are many styles of product photos, and you need to match your product, brand image, and industry. Would you like a minimalist aesthetic? A vintage one? Bohemian, yes? Spend some time looking for motivation and figure out what kind of vibe you want for your photos.

6  Lighting

For a great image, lighting is probably one of the most vital aspects. It can completely change the product’s appearance and enhance it in a variety of ways. While investing in professional lighting equipment can make a difference, you could make the most of your existing equipment by using a variety of techniques.

Make sure you look at the appropriate lighting conditions for your preferred photo aesthetics. For a clean, clear, minimalist look, natural light is a great tool.

If you take a shot outside, the ‘golden hour’ can create warmer, softer tones. Take your pictures right after sunrise or before sunset.

5  Close-ups and Details

Offer a better sense of the texture and details of the products, including close-up shots. Details of complex items, such as handcrafted jewellery, could only be captured by a close-up photo.

Close-ups also help you be accurate and transparent when it comes to scratches or flaws in vintage or handmade items. It is better to create realistic expectations than to obscure these details and risk deceiving your client.

4  Backgrounds and Props

The type of your brand image and your product will be reflected in your photo style. For this reason, the product itself is not the only aspect that matters. Complete the picture with your background and props in mind.

You might want to make a cozy scene if you’re selling colorful ceramic mugs. You could add some of the natural ingredients used right next to the item for a natural makeup product.


3  Scale

Potential customers need to know the exact sizes of your products. For some products, the dimensions are not always clear in the pictures. Some objects might appear smaller or bigger in actuality, and that might disappoint your customers.

It is vital to offer a sense of scale for products such as art pieces, toys, bowls, candles, etc. by placing the product next to an object with a standard dimension.

2  Optimizing & Editing 

After you take your product photos, editing is an excellent way to take it to the next level. You could adjust the lighting, contrast, or remove any imperfections like dirt. You could crop the image and, if necessary, rotate it slightly.

Nevertheless, please be careful not to overdo it. Too much editing could give an unrealistic image of your product, which could lead to unhappy clients.

Today, a significant amount of traffic is mobile, which should not be overlooked. Make sure your product photos are mobile-optimized and look great on a smaller screen.

1  Watermark

When you finally have amazing and high-quality product photos, you might want to consider watermarking before uploading them.

Watermarking is an excellent way to protect your product photos and prevent others from using and claiming to be their own. It can also help you increase the recognition of your brand.

By adding a digital signature form, your products and images will become more identifiable with your brand.

Be imaginative and match the watermark to your image for efficient watermarking. Avoid watermarks that make a different focal point. The product, not the watermark, should be taken into consideration.

Watermarquee offers a free, high-quality watermarking service. Watermarks are fully customizable, providing multiple templates and allowing you to choose your fonts, colors, logos, and more.

Also, if you want to save time and effort, Watermarquee allows bulk watermarking, where you can watermark a bunch of product photos in one go. Sign up to the pro version to start unlimited watermarking today.


Amazing Bird Photography: 11 Great Ways to Wing It

Why is bird photography worth a try?

Due to their graceful and beautiful movements, birds are great subjects for photographers. In bird photography, it can be difficult to capture photos of birds but it does add a tremendous visual impact on any image.

Finding your first subject is easy because you can find birds almost anywhere on the planet. You can begin at your own backyard or in a park nearby. Bird feeders are a wonderful way to lure them wherever you need them to be.

Use Proper Equipment

Birds are shy animals, so be sure to bring in at least a 200 mm lens and a tripod. If you like to capture them in flight, you will need a camera with FPS (Frames Per Second) and high ISO results. You’re probably not going to need or even be able to use a flash. Nevertheless, you are definitely going to need perseverance. Remember, that you are hoping to capture the bird in a natural pose, against a good background, with good lighting. Wild animals like birds are not going to go out of their way to help you do all of that.

Camera Settings

Maintaining fast shutter speeds, particularly for birds in flight and smaller birds that move quite quickly, is incredibly important – you cannot fix the motion blur in post-production. In some situations, photographers shoot at slightly slower shutter speeds only to blur the wings of the bird slightly, to create a sense of movement. But in all other situations, you’re trying to stop the action. Usually, to achieve this, I set my shutter speed to between 1/1000 and 1/1600. Most digital cameras have the usual camera modes: “Manual,” “Aperture Priority,” “Shutter Priority,” and “Program.” The camera mode that I use most for my photography, including birding, is “Aperture Priority.”

You could set the minimum shutter speed, which could be set to a high number for bird photography, and the maximum ISO for detail retention. This feature is really useful, and I use it all the time, setting Auto-ISO, maximum ISO to anything like 1600, and minimum shutter speed to 1/1000 seconds.


Keep Still

You’re going to have to stay still, or even find a good hiding spot, in order not to scare away your feathered subjects. The best time of day for bird photography is morning and night when the light is the brightest, and the birds seem to be the most active.

Transport the Viewer into the Bird’s World

We view our world at the height of 5 to 6 feet, but birds see the planet within a few inches to a few feet. To get the feeling of the bird’s environment, you have to get down to their level!

Go Low and Go Slow

Always try to take pictures of birds from their eye level, except birds in flight, of course. This has greater benefits that outweigh all of the concerns like I cannot bend down, lie down, etc.

It is All in the Eye

Take a look at every video of a bird. What’s the first thing you want to see? It’s the eye, huh?

We appear to have eye contact with any living being. It’s no different from the birds. The eyes are the portals of the mind. In bird photography, when there is no light in the pupils, they appear dark or dead. Birds look brilliant when there’s light in their eyes.

This light in the eye is described as a catch light.


Fill the Frame

In bird photography, we usually take photos of an individual bird. When photographing individual birds, it’s always a good idea to fill a bird frame.

Tell a Story


The storytelling in bird photography should not be confused with the stories that run through the pages. Storytelling is a way to show the time of the day, place, mood, or movement of the bird in one photograph. Viewers should be able to portray themselves in the scenario.

Just put, a photograph with a bird and its surrounding will provide a better sense of story than just the bird filling the frame. Though it may not always be true.

Capture their Action and Behaviour

Birds are constantly in action. They hardly sit still. Capturing birds in action require more patience and effort compared to photographing perched birds.

Here are some tips to capturing birds in motion:

Photograph early in the morning or late in the afternoon while birds are highly active

Use burst shot mode to take a few images during the action watch the bird until the focus is locked before clicking the shutter. Learn to predict the action either by watching or reading about them. Birds prefer to ignore you when they are really hungry. It is very easy to take pictures of them in action during these periods. However, care should be taken not to disturb them and keep them at a considerable distance.

Capturing bird activity is much harder than any other aspect. Typically, because birds are alerted the moment you are in their range.

The alert bird is almost always trying to fly away, and you seldom see its actions. You could observe the actual nature of a bird when it is relaxed.

Capture Their Magnificent Flight

The fascinating aspect of bird photography is the recording of their majestic flight. This is a very challenging thing for beginners and pros alike. It is not easy to take pictures of the flight that will wow the viewers.

The success with these animals in bird photography largely depends on the bird as well as the method one employs. Smaller birds are usually very unstable in their flight and are often a little difficult to track as they are typically too small in the picture. But bigger birds are slightly less agile and not as hard to track.

If you want to be effective with bird photography, start with larger, slower-moving birds. Discover all the field strategies to take the perfect images of these species.


Do Not Stress Them Out

Finally, remember not to pressure your subjects when doing a bird photography shoot. Keep away from their nests and do nothing to hurt the birds.

Bird Photography Wrap Up

Focus your energy and time on learning all the basic principles outlined above. Prove yourself that you have too much motivation to go out and take pictures of birds every day, or as much as you can. Meanwhile, make sure you don’t commit these photography mistakes that make you look amateur.

Y+Now that you’ve learnt how to take the most amazing bird photographs, remember to protect them with a watermark before you publish online. Watermarquee’s easy to use watermark creator is perfect for the job. Sign up today for unlimited watermarking.


SEO for Photography Series Part 3: Surprising Ways Befriending Google Can Boost Your SEO Ranking

SEO for photography? How important are Google rankings?

At its most basic, Google Search results are popularity contests. If people like your website and connect to it, you are all set up. If they do not, then you will have to sit in the cafeteria by yourself.

Google’s famous PageRank algorithm (named after co-founder Larry Page) moves web pages up in search rankings when certain pages redirect to them.

It is pretty much as basic as that. The more pages you link to, the quicker Google thinks your page is, and the higher you will notice yourself in the search engine results.

This portion of the SEO for photography guide will focus on how to get those links from many other pages, called backlinks, so that that your own photography website will rank up in Google’s search results for the keywords you have targeted. Part 1 of this SEO for Photography Guide discussed how to identify relevant, workable keywords for your website clearly, and Part 2 discussed changes that you can make to your page to help rank certain keywords.

Building backlinks is a lot tougher than on-page SEO, but it is impossible to get ranked without it. According to some research, backlinks account for almost 50 percent of search engine rankings.

Not All Links Were Created Equal

Google ranks every web page on a 0-10 scale, and the higher it’s rated, the better you get a link from it. For example, a link from CNN.com (page 9) to your photography website is much better than a lower-ranking site.


Of course, it is also a lot harder to get a link from these kinds of sites, and you could rank rather well without it.

Start Simply

There are hundreds of photographer directories on the internet, each to provide a link to photographers. Links from directories like this do not carry a lot of juice, but if you are just starting up, every bit matters.

  • www.photographysites.com
  • photographersindex.com
  • www.photographers.com
  • www.photographypros.com

Still, check out local photo affiliations and local business directories in your location, such as your local Better Business Bureau website.

Use Flickr

It may be challenging to get people to come to your photography website, but Flickr has got you covered. Posting your best images to Flickr is a wonderful way to get attention, and you could include a link back to your website in your image description, thus improving your SEO for photography.

Vary the text around the link so often, so Google does not think it is just duplicate content. See The Ultimate Guide to Becoming Popular on Flickr for more on making the most of Flickr.

Participate in Online Photography Communities

A great way to get to know people who can add links to your site is to take part in photography forums. Adding to the discussion improves your track record in the photography community, and it may bring you to the exposure of photographers who manage their own websites.

Most of the forums let you add a signature to your posts. When they do, make sure that yours contains a link back to your website.

Another wonderful way to take part in the photographic community, and to create backlinks at the same time, is to post on blogs. Adding insightful comments is a great way to build a network of online photographer friends, and as in a forum, you can normally have a link to your own website in a comment signature.

Write a Blog

As we have seen in the second phase of this SEO for Photography Guide, photographers need to write a lot if they really want to improve their rankings. Part of this is starting a blog. This may seem like a lot of work and a major problem, but it is a great way to boost your rankings when you choose your subjects carefully.

A blog is not meant to be a person rambling about a subject that springs to mind. Your photoblog should include an emphasis on topics related to the keywords you are targeting. If you are a sporting events photographer, write about how you covered a local game, including several of your photos, and the links to your portfolio. Google rewards new content, and the original content with links to your website will make wonderful things about your SEO for photography.

Guest Blogging

Once you have got your blogging knowledge in order, you could consider writing guest blog posts to other sites. If you have been making comments on blog posts as I suggested, then you should have a pretty good idea of what blogs would be most applicable to you.

Craft an email to the blog owner and offer to write a blog post on a topic that is applicable to both you and the audience of the blog. Writing an unsolicited email like this may seem annoying, but do not worry about it. Blog writers are often looking for new content, and if you could make their workload simpler, they are likely to take you on board. In your email, be certain to have a link to your own blog, so the person you are writing can check that you are a professional writer with great subject awareness.


Facebook Fan Pages

Every photographer needs a fan page on Facebook. They are free and easy to set up. Once you have made one, be sure to post your photos daily, so people who find your page can “like” your work. This will likewise improve your SEO for photography. 

Whenever you post a blog post, please share it on Facebook. Facebook links may not get you a lot of link juice from Google, but it’s a good way to get exposure, and people who find your fan page can blog about it.

Summing Up SEO for Photography Part 3

This is to summarize the third instalment of our SEO for Photography Guide. I know it sounds like a lot of work, but the outcomes can be incredible, especially when you eventually get to work because someone has found your website. Soon, your search engine rankings may become a significant source of potential new clients.

If you are curious to read more online, I highly recommend the SEO Book of Photographers which is dedicated to teaching SEO for photography – and they really know their business!

Another important part of any photography is to protect your online photos from theft. Unlimited watermarks are available with Watermarquee‘s pro version, so start watermarking today.


For a deeper dive: SEO for Photography Series Part 2: Surprising Ways Writing Can Positively Impact Your Photography.

SEO for Photography Series Part 2: Surprising Ways Writing Can Positively Impact Your Photography

How can writing improve your SEO for photography?

Taking great photos is one thing but, as far as search engines are concerned, it is all about the written texts. Which leads us to the question, “why do photographers need to write SEO for photography? Part 1 of this SEO for Photography Guide gives you an introduction to SEO for photography and shows you how to choose keywords to target. Now it is time to see how to maximize your website for photos to show up higher in Google’s search results., (and eventually, get customers).

These types of adjustments are called SEO “on-page.” This refers to simple changes that can be made to your photography website‘s content, which will lead to a higher ranking in Google and other search engines.

These changes would not take a lot of time, but you need to keep them in mind as you update and add them to your site. SEO for photography is a continuous process, not a one-time event. This is a process because the market, competition, and the companies that set the rules (search engines) are constantly evolving and changing.

Avoid using Flash Photo Portfolio Software

Before we jump into SEO material, a short warning, many photographers use Flash on their website, because it has the benefits of very slick graphics and smooth transitions between the components. Sadly, Flash is awful for search engine optimization. Although there are ways to improve the results, and some Flash photo gallery creators claim that their software is just as great as a web page, you take more risk by using Flash.

Google cannot understand Flash, so if you are looking for a high ranking, just avoid it; it would not benefit your SEO for photography practices. (see: Why you should never use the software of the Flash Photo Gallery).

Page Titles are Key 

In Part 1 of this SEO for Photographers Guide, we went through how to choose the keywords that you want people to know you for-now it is time to put them to use. The very first element on your page, the title of the page, is very important to Google. The title of the page is the text that appears at the top of your browser window or browser when you navigate to a website. It looks like this in your HTML:

<title>Las Vegas Sports Photographer – John Benson</title>

If you are trying to rank “Las Vegas Sports Photographer,” that actual phrase deserves to be in the title of your homepage. Place the keyword you target in the title first.

Page titles tell people and search engines about the subject of the webpage. They also provide search engines with an estimate of how appropriate a page is to a searcher’s query. Hence, to improve your SEO for photography, the titles of the page should be as relevant and accurate to the content of the page as necessary.

Where to Focus

Keep in mind that Google is ranking pages, not sites. If you use the same keyword on all your pages, you will definitely make it challenging to rank for that keyword.

Your homepage title should be the keyword you are most interested in. Other keywords can be found on the subpages of your site if they make much sense. If it does not make sense to place your keywords in your page’s title, you could put them in the text of the page.

Keywords in Context

Google will read all the text on your site, so make sure you spread your keywords naturally. But do not write like a robot–Google is going to frown on your site if the keywords seem to be used unusually. The rule of thumb I have heard is that your keywords should be about 2% of your text. I have found that metric a little hard to get to nature, and generally, I am just trying to write like a normal individual.

Apart from your page title, the next most significant place to put your keywords is the main header tag on your page. The H1 tag is the highest-level header on your page, and Google weighs it appropriately. Header tags are separate parts of your page. For example, Keywords in Context is the header tag for this part of the text.

Meta Tags

Meta tags played a significant role in on-page SEO for photography a few years ago. Google has made it clear but that these tags don’t matter much anymore. The only one that you need to worry about is the meta description tag.

Meta tags are important as they impact how your site appears in the SERPs and how many people are more likely to click through your site. They will, therefore, impact your traffic and engagement rates, which may impact your SEO and rankings. Meta tags are an essential part of a strong SEO for photography strategy.

The contents of this tag will appear under the title of your page in Google Search Results, making it clear and concise. – SEOmoz says around 155 characters is the optimal length.

<meta name=”Description” content=”Your page description goes here.”>

Your SEO for Photography Need a Thousand Words

A portfolio of their work should be included on each photographer’s website. While Google can’t understand the content of your photos on its own, you can help Google out with a few simple changes-and help yourself get ranked higher in the process. Part 3 in our SEO for Photography Guide discusses Google rankings and how important they are. 

Alt Tags-Add an alt tag to each of your images to describe it briefly. Include keywords if they are relevant. Its original (and still primary) aim is to describe images to visitors who are unable to see them. This contains browsers and screen readers that block photos but also includes users who are visually impaired or otherwise cannot visually recognize a photo.

File Names-give a relevant, Google-friendly title to each image. “Andrews Wedding Photo.jpg” is a lot better rather than “IMG0026.”

Captions-like any text that surrounds your images; a caption allows Google to understand the meaning of the image. Plus, the captions under the images easily draw the eyes of the viewer. Captions could not be appropriate for some types of portfolio pages, so use them with discretion.

Keep It Fresh

Make sure you update your page frequently. Google seems to prefer fresh content over stale, so if nothing else, upload a few new images to your portfolio every couple of days. SEO for photography might be overwhelming in the beginning, but it offers a lot more benefits than you think it does. 

Remember to watermark your online photographs to protect them from theft. Adding a watermark is a great way to do this and it’s easy with Watermarquee. Sign up for the pro version for unlimited watermarks.

Children’s Photos: 3 Surprising Reasons for Parents to Start Watermarking Them Now!


Should you consider watermarking your children’s photos?

Most parents are proud to show their children’s photos, and posting online is one of the most popular ways to do this. Millions of people will see the images you post in a matter of seconds. Birthday parties, first steps, and early school days are just a few of the milestones that populate Instagram, Facebook, and several other social media sites daily.

Photographs are an excellent place to get a glimpse of someone’s life. Generally, this is a positive thing, but it’s necessary to be cautious when posting pictures online–especially if it involves your children.

Once a photo is online, it will be there forever. If you’re disturbed by the idea of someone using your children’s photos for a commercial website, or worse, for some weird online role-play, use free software to watermark every single one of your images before you upload them a photo-sharing website.

Your best option is never to share any of your children’s photos at all, but how feasible is it to live in a culture of fast-fire sharing and connecting with family and friends online?

One way to keep your family safe is to watermark photos. While most online photographs are not watermarked, there are many obvious benefits to watermarking your children’s photographs.


3 Reasons Why You Need to Watermark Your Children’s Photos

Use Personal Watermarks to Protect Your Photographs from Theft

One advantage of photo watermarking is that it helps prevent potential thieves from stealing your pictures. Images without a watermark can easily be stolen by anyone who has an internet connection. If your name is watermarked across your images, the thieves will be reminded of the consequences of stealing pictures. 

However, your photos will still carry the possibility to be distributed without your consent. Still, your watermark is going to let people know that the pictures belong to you.

When it comes to online photo theft, the reality is that it’s going to happen all the time. It can be awful to think that someone might be claiming your child’s photographs as their own. It can even ruin your life in some cases. If you are a parent, this might sound horrible, but it is not hard to prevent. Watermarking your photos will help to protect you and your family and give you peace of mind in the digital world.

Show Your Child’s Personality with Custom Watermarks

Another advantage of watermarking your images is that you could always let your creative side shine. If your child has a preferred cartoon character, you could even create a custom watermark. Turn your child’s favourite animal or character into a watermark. Have a school bus watermarked in a picture of the first day of school.

Your child will love a personal touch, but people will learn a little something more about your family.

Explain Your Photos Through Descriptive Watermarks

You could turn anything into a custom watermark. You can use a quote, a date, a description, or anything else you may come up with. Dates come handy for the first day of school’s images, the first steps, and the birthdays. Descriptions could be used to explain what is going on in the image. 

A quote might be an inspiring thought or an amusing anecdote that you can smile on. If you have a vacation photo, a watermark of the name of the city, or an attraction, you have taken pictures of your family’s field trip.

Let yourself be creative and let the world know the likes and dislikes of your child. There are endless possibilities.

Your Photo is Your Intellectual Property

I know most of us don’t take or post-professional quality images. Still, those trying to take images from a unique perspective or use clever editing should certainly get credit for it.


Using a Free Watermark Maker

Watermarquee is an online app that you could use to quickly and easily watermark your children’s photos. You don’t have to install or download a thing – you can use Watermarquee right on your web browser. With it’s user-friendly interface, you can easily change your watermark’s color, location, and font to get your favourite effect on your children’s photos. Follow the steps below to add a watermark to your children’s photographs:

  1. Go to the official website and then click “Select Photos for Watermark.”
  2. Choose your children’s photos that you want to upload.
  3. Upload them
  4. Edit the images by clicking the “Add logo,” “Add Text,” button at the bottom of the page.
  5. Once finished, hit the “Save” button at the bottom of the page to save the watermarked photos.

Bottomline

It is always great to be safe when it comes to parenting, and watermarking adds a layer of protection to your online children’s photos. If your children are old enough, let them be part of the process. Let them help you choose the designs that you use to watermark your imagesand have some fun in the process. 

If you want to do unlimited watermarking, Watermarquee has a pro version for the low, one-off fee of $19.00. Start making great memories with your children today. Enjoy!


SEO for Photography Series Part 1: A Great Intro to Search Engine Optimization

How can you make SEO for photography work for your business?

Trying to get your photography or photography business seen on the internet is amazingly difficult. You are going up against millions of other photographers, each with a similar goal. So how do you stand out?

Put yourself in the mood of someone looking for photos or a photographer. Where are they going first? Most likely, it is a search engine like Google. If you want to be noticed online, you need to show up early in the search results that will be discovered when a person is searching.

Getting to the first page of search engine results is a skill set in and of itself, and you need to learn how to do SEO for photography if you are serious about being a photographer.

This is the introduction to SEO for photography, the first of a three-part series on how to find your images and photo business online using SEO-Search Engine Optimization.

How People Search (and Why They Do Not Find You)

The phrase someone types in the Google search bar is also called the keyword (the keyword could have more than one real word). For example, if an engaged woman is preparing for her wedding, she can search for “Wedding Photographer” as a keyword.

But she is likely to get back a few million results, with wedding photographers from all over the world, so she will quickly realize that she needs to narrow it down. Maybe she can try “Wedding Photographer Seattle” to see more local results.

You will find that more than 1 million results are still available if you run the search yourself. Research has shown that users click on the first results about 40% of the time, 30% of the time they check the number 2 and 3 positions, and all other search results compete for the remaining 30%.

It is getting worse quickly. If you find your site on the second page of a Google search, only a small percentage of people will ever bother checking your site.

If you are not on page 1 of the Google search result, you might as well not have a website at all. But do not worry, this SEO for photography guide is designed to help you get there.


What Do You Want to be Known For?

The first phase of SEO for photography is figuring out which keywords you want to rank for in Google. There are a lot of strategies and ways to approach this, and the best way is to depend on what your goals are. If you just need people to look at your images and do not try to make cash out of them, I suggest you check out Flickr (see Flickr’s Ultimate Guide to Becoming Popular).

Nevertheless, if you are trying to make a living, you have to understand your ‘noise.’ A niche is a small subset of a broader market. For example, wedding photographers are a small subset of the overall wedding photographers, and the photographer market in Seattle is a lower small segment of wedding photographers.

 Every niche should have at least one keyword, and typically several similar keywords.

Keywords and SEO for Photography

To continue with our example, we might use the generic “wedding photographer Seattle,” the more geographically specific “wedding photographer Redmond,” or a more personalized touch, “fancy wedding photographer Seattle.”

If it is not already obvious that your company is based in a particular place, I highly recommend that you add the name of that place in your keywords. Do not forget to include keywords for the nearby areas, as people tend to look for their own city/county name first, and then extend the search.

Try and find a list of at least six keywords that embody your business and for which you want to be recognized. The more keywords you get at this point, the better. I keep track of more than 80 keywords for the Water Marquee and add a few more every week as I see people end up on the site.

Does Anyone Search for Those Keywords?

Now that you’ve got a list, it is time to find out whether any of the keywords on your SEO for photography sheet are worth it. We can ask Google for that. Google’s Keyword Tools is a free web app that you could use to find out how many searches will happen in an average month for any keyword.

The results will return to a table that tells you how many searches are performed each month. You will likely be most interested in the column of Global or Local Monthly Searches.

In the next section, I will show you how to check out the actual rivalry. Do not go with the most searched keywords. Preferably, you would like more than 1,000 and less than 50,000 searches per month for your keywords.

How is the Competition in SEO for Photography?

“But do not I like the keyword that has the highest searches, too many individuals are getting to my site?”

This question has a somewhat counterintuitive answer. Typically, if a keyword has more than 100,000 searches per month, the term is so specific that people are not looking for what you have to give, and it is going to be extremely difficult to see the keyword on Google’s first page.

 If you are just getting started, aim keywords with less than 20,000 searches per month, these “long tail” keywords are simpler to rank, and they are so precise that if you display the results, you are precisely what the search engine was looking for, which means they are more likely to be your customer.

Google will also help to suggest other keywords that you might want to rank for. If they seem to appeal to you, please add them to the list.

Now, you should have a great idea of what keywords you are planning to target. The next goal is to find out how hard it is going to be to get Google on page 1 for these terms.

Check out the Competitors

As far as SEO for photography is concerned, you have to know how hard it is to rank your keywords in the top 10 results. We would like to know the average PageRank for each site in the top 10 for each keyword, how hard it will be to get ranked, and how many backlinks each of those competitors has. The best tool for this is a piece of software called Traffic Travis. I use it regularly, and that is my affiliate link. There is a paid and free version, but we just want the free version right now.

After you download the free version, open it, and click the SEO tab. Click the keyword input box, and then cut and paste the keywords into the box. You can only do at least five at a time in the free version. Click the Fetch URLs button to get it to work.

Preferably, you want to concentrate on choosing keywords that have an average page rank of 3 or less and which Traffic Travis says will be Easy or Relatively Easy to rank.

Analytics

You can click the View Reports section to see the top 10 results for each keyword. You will be shown the page rank for each of the top 10 results in Google for each keyword and the number of backlinks each. A backlink is another website that links to your competitor’s page. Backlinks are the key component of SEO–the more backlinks a page has, the higher the ranking.

To choose your keywords to focus on for your SEO for photography strategy, open a new spreadsheet, and combine the results of Google Keywords with those of Traffic Travis. That way, you can see the potential search traffic, combined with the difficulty of ranking the keyword. You obviously want high search traffic and low difficulty.

For most people, SEO for photography can be a lot of things to take in, and it’s definitely a new skill set. Hopefully, this part of the guide will get you started on the right track. Check out the second part of our series. 

Remember to protect your online images using unlimited watermarking with Watermarquee.

Worth a read: SEO for Photography Series Part 3: Surprising Ways Befriending Google Can Boost Your SEO Ranking.

Worth a read: SEO for Photography Series Part 2: Surprising Ways Writing Can Positively Impact Your Photography.

How New Tech is Changing the Photography Industry

How New Tech is Changing the Photography Industry in 2020

When we think about great pictures, we usually go back and remember old photos. But, photography hasn’t lost its quality over the years — it has improved. Something we must consider is that technology has brought innovation in photography. In the past, we would have never imagined that we would have 360º photographs. Maybe this was only a science fiction dream decades ago, but it’s a reality now. 

Yet, 360º photography is not the only advancement in photography. Artificial intelligence (AI) is also playing a huge role in technology right now, and this trend is only going up. We can now add watermarks for free with software like watermarquee and we will continue to see advancement in tech photography in the next couple of years.

Because you are thinking about how new tech is changing the photography industry, we have looked into some of the most up-to-date tech trends in the photography industry, for you!


360º Photography

360º photography is a method to take pictures from all angles.

Through its use, viewers will be able to see the picture in all directions, and some of them are so high-quality that no matter how much you zoom in, you’ll still see details. 360º photography has opened a strong trend among several e-commerce platforms like Amazon.

At first, people used to think this was a temporary trend, but apparently, it is here to stay. And although it is at its early stages, the tech is expected to be implemented in more marketing efforts.

Cinemagraph

The term refers to moving images similar to a video. You’ll often come across these on social media sites such as Reddit or Instagram. Cinemagraphs are often referred to as GIFs after its format (Graphics Interchange Format). A GIF isn’t necessarily a video, it is a picture with the illusion of movement.

Some creators have added moving elements to their photographs. The trend started because internet users didn’t want to continue seeing the same type of images repeatedly. Companies have also started to implement cinemagraphs in their marketing efforts because it appeals to their target audiences. 

Cinemagraph won’t replace traditional photography but the use of GIFs and other types of cinemagraph techniques is a growing trend and more businesses have started to see the benefits.


Cloud Storage

how new tech is changing the photography industryToday everything is data-driven, from pure file storage to even photography. It is widely known that almost all devices are connected to the internet, and cameras are no exception.

By saving pictures and videos in a cloud, photographers can make sure that their files are safely stored.

If any accident happens to their devices, their data will be safe. 

But this isn’t just a matter of regular cameras, mobiles can also do this. Any picture you save on your phone could be instantly saved in the cloud. If you’re looking for a cloud service, there are some great ones like:

  • Google Photos,
  • Google Drive,
  • DropBox, 
  • iDrive

Most of them have a free limited plan, but if you’re up to something bigger, you can always subscribe for more perks. Google Drive’s 100 GB storage plan is about $2 a month, which is not much considering you’ll be able to save so many photos. 

Constant Connectivity

The fact that cameras are becoming less dependent on wires makes it easier for photographers to share files and save them in an online cloud. In the past, the only way to save and share your data was through a memory card, but this has drastically changed.

With the help of WiFi, Bluetooth, and Near-Field Connectivity (NFC), users can easily share their files in a matter of seconds, depending on the speed of your device. 

Yet, this isn’t a perfect technology because it’s still limited. You can only share JPG files and not RAW images because they’re too heavy. However, technology can still be helpful if you want to share data with a client after a long day photoshoot. This will allow clients to preview some of the results before they’re edited.


AI-Driven Cameras

You may not know it, but AI has been working in cameras for a long time.

ai driven cameras
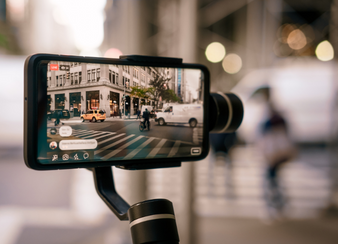
Have you ever noticed that when you use your camera in the automatic mode, it recognizes faces?

Or that when you take a picture of a landscape, it automatically changes the exposure to make it more appealing? This last part is most common on mobile cameras than in regular cameras, but it’s still part of today’s photography trends. 

AI is a great tool that can drastically enhance the look of our photographs. In the future, if we’d like to edit certain aspects of the photo, it’ll be much easier to find the spots we’d like to remove, for example. The photography editing software will automatically detect it for us, and we’ll spend time on more relevant tasks.

Smartphones Will Replace Compacts

Did you know that sales for compact cameras will fall for over 50%? And that in 2010, sales for digital cameras fell by 80%? These are some statistics by a recent report published by Cannon. The reason for this is because compact cameras don’t have anything that smartphones don’t offer. Smartphones are better than cameras by far.

They don’t only provide the same and even better photography quality, but they also have internet access, which makes it easier for users to store and share files. This will represent a significant change in the way the photography industry works, but the truth is it has been happening for years. 

Digital single-lens reflex (DSLR) cameras will stay afloat because they provide users with the capability to manually change so many values, which gives them more freedom when taking pictures.

Yet, mobile cameras are now implementing the pro mode, which allows users to change the diaphragm and the exposure time of the image, simulating DSLR camera features. So we can expect that in the future, mobiles will reach the quality of DSLR without changing lenses.

In Conclusion

how new tech is changing the photography industry in 2020
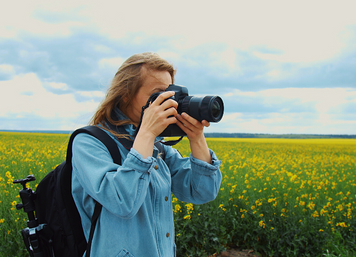
Technology has surely transformed the way we do photographs; from 360º photography to AI-driven cameras, and even animated images. And the only thing we can expect is that it’ll continue to transform this industry.  

Today, we’re also able to apply our own watermarks to our photographs with services such as WaterMarquee. This way, we can add our personal touch to every masterpiece.

Start watermarking today!

Ways You Can Monetize Photography – Boost Your Career

Monetize Photography: Ways You Can Hustle with Your Photos and Boost Your Career 

Should you monetize photography?

You don’t need to monetize photography and your images if you’re just planning to be a hobbyist photographer (or travel photographers). But still, there’s nothing wrong with making some side-income out of your photograph. I can tell you for sure that you’re not alone; a lot of people have all sorts of stunning photos that they know might be worth a few bucks, they just don’t know what to do with them.

If you’re brave and bold enough, you can try to make a full-time income from your photography skills. Frankly, we live in a bolder new world of photography. What does that mean to you? It means that we’re swimming in a sea of photos, and photographers are almost a dozen or so.

It is more and more difficult to succeed as a photographer in today’s modern world. Still, there are more and more opportunities for us to monetize photography uniquely and creatively. But how are you going to create a one-of-a-kind business where your talents could stand out?


Create A Mousepad with Your Photos and Sell It Online

All the stunning photos you have got could be turned into a mousepad. You wouldn’t believe how lucrative the market for mousepads is. If you think that mousepads aren’t too cool to sell decently, think again. Each computer out there that uses a mouse is likely to have a mouse pad. That’s a big revenue potential – if you know how to make the most of it!

You can design and sell your stunning photos to mousepads online. Who knows, you might even receive inquiries from possible customers who want to purchase your photo license. Talk about making money while advertising, right?

Create A Specialized Photo Book

Do you have a bunch of photos of a soccer (or sports) team at school? You can use these photos and make some great photo books to sell to parents. Parents love keepsakes from their children’s successes, and they are happy to pay for a photo book.

The quality of the journals or photo books you are selling will show your possible buyers what they could expect from you as a commercial photographer. Give some examples of the kind of services you ‘re supposed to provide, so give it to all of you.

Always give value to all, even those who may not yet be your customers. If they need photography services, you’d want them to think about you.

Use Your Photos to Create Phone Covers

You could use your photos to create Ipad, iPhone, and other smartphone covers, which is a heavy market right now, like mousepad making.

Phone cases are a favourite must-have for many smartphone owners. There are vastly different reasons for buying cases-some people value practicality and security. Others, on the other hand, are more interested in a case that matches their style.


Tip:

Since your images are your own — make sure they have copyright — you could provide what most suppliers cannot offer: individuality and exclusivity in the design of the cases that you will sell.

Create and Sell A Calendar

One way to generate revenue for your sidelines in photography is by making and selling calendars. Most people enjoy having a wonderful calendar on their wall or desk. Your fans might appreciate the opportunity to purchase your artwork this way.

Creating an image calendar is very simple; we ‘re using it in just about every place we ‘re going into. They’re hard to sell in stores, so make an online store and advertise your images online to drive your calendar revenue.

How Should You Set Your Prices?

Keep in mind that customers who see calendars in retail stores or calendar kiosks selling around $5.99 will challenge you. There’s no way you can compete with those prices; your best reason is to say that the pictures are hand-picked and of high quality. You can even offer them bespoke calendars if they want it.

Sell Photos as Posters

A custom poster is a great product to sell, but it’s a great way to distribute your work and get attention. Anyone who buys a poster and displays is now an advertisement for your brand and you!

You should only sell images of prints of the highest quality, so it is important to find a reliable photo printer. You can search for nearby fine art printers or take advantage of online printing service and offer your prints. The online printer could ship directly to your customers if you wish so that some of your shipping and handling costs could be minimized.

Some printers specialize in color photography, while others specialize in black and white film, so shop around to choose the option that best suits your needs.

Where Do You Sell Them?

There are a lot of online markets where you could show your artwork and monetize photography. Platforms such as eBay and Etsy are some marketplaces where hundreds or thousands of other sellers list artwork. The marketplace creates competition, but it also attracts a large number of shoppers. Such online markets are great choices if you do not have time to promote yourself or if you don’t have strong marketing capabilities.

Do some analysis and look at the various fees and options on the marketplace. Some of them have a monthly flat-rate fee, plus if your artwork sells, they take a small percentage. Typically, these charges are worth the cost with the right visibility and order frequency.


Create a Coffee Table Book

Would you like to show a solid portfolio? Maybe you’ve got a good collection of photos from your area or a specific location? If so, put them all together in a coffee table book!

Don’t worry if you’re a bad writer, there’s really no need for words to show your images in a novel! Although writing a few words about your work or a specific picture may be helpful, it is unnecessary.

Now, what are you going to do when you print a handful of books? Monetize them of course!

How Do You Sell Those Coffee Table Books?

Easier said than done, huh? But there’s are several ways to market a coffee table book. It is a great start to visit your local café, tourist office, or maybe a local studio. Keep in mind that nearby cafes and shops are most likely to prefer a book that includes photos of the city.

You could reach out online to your friends, fans, and family and let them know about your latest book. They might be interested in having a signed copy of your book because they already appreciate your work.


Create an Online Portfolio

This isn’t a way to monetize photography directly, but you can make an online portfolio that highlights all of your work and points visitors to different sites that have things you have made for sale with your photos. If nothing else, you can host your work on Flickr (after you watermark it).

water mark maker

Sell Your Photos Online

The demand for quality images continues to grow. For their content, websites need graphic designers, beautiful images, and need specific images for their layouts. Authors need book covers, and the listing goes on.

Do you have a large collection of high-quality photographs? Why don’t you send them to public photo sites? It is a good way to monetize them and make a passive revenue stream.

Become a Stock, BigStock, and ShutterStock contributor or upload your images to your Flickr account and assure you license them using Getty Images.

Selling Your Photos as Stock

Register as a seller. To confirm your identity, you’ll be expected to provide some basic information about yourself and identification documents.

Read and become familiarized with the Instructions for Submission.

Upload your images and add metadata, related keywords, and details of pictures.

Send in images of your stock for review.

Begin a Photoblog Channel on YouTube

Bloggers are making money from commercials and sponsored content. If you’re a great photographer, starting your blog is one way to monetize photography. You could make guides, share tips and tricks, or write reviews on all kinds of photo equipment and apps.

You could also monetize your skills by starting a photography channel on YouTube. It is essentially the same content, but in video form, (tutorials, reviews, etc.) Although before you could really start making money out of it, your blog or YouTube channel needs to attain a good following.

Monetize Photography by Promoting Products

Companies have begun to see amazing value in teaming up with influencers in their niche over the last few years. If you have strong online tracking and rad photography skills, you might be a good fit to become an influencer and monetize photography through that medium.

Whom Should You Work With?

Instagram has become a wonderful place, especially to monetize photography. When you see that your next online business is starting to grow, you will soon see greater interest from companies that also love to work with you.

However, I suggest that you analyze which brands or companies you want to work with because I agree that working with everyone who approaches you could harm your followers. Try to work primarily with photography related companies or brands that share your ideals.

Now that you know how to make some bucks out of your photos, make sure you avoid these photography mistakes that make you look amateur.


See also: Making Money from Stock Photography: 10 Best Tips to Prep Your Photos.

Photo Theft – 7 Watermarking Tactics to Help You Win

Photo Theft : Watermarking can help prevent your photos from being used without your permission

Watermarking your photos is a great way to protect yourself from people claiming your work as their own. Plus, it helps build awareness for your brand–so it’s a win-win, right? Hey, it can even help boost your brand in a post-COVID world. Ideally, a watermark should be a method to reach out to consumers and fellow photographers to let them know who took this astonishing shot. It is not to suspect everyone for wanting to steal your work, and thus divert their focus from your great work.
Here are some tips to remember when watermarking your images:

Choose Watermark Areas Wisely

The placement of your watermark can be tricky. You want to place it carefully and protect your image, but you don’t want the viewer to get distracted by it.

Ideally, it would help if you put it in the centre of the image, but never on a solid or smooth background. Otherwise, it’s going to be too easy for someone to remove it completely.

Unfortunately, the centred watermark will be “too much” for most of the images. Your audience will definitely point this out. Of course, unless you’re hosting a photo stock website. Oversized watermarks are usual practices in this business.

The second thing you need to acknowledge when watermarking your photos is the size of the watermark. Make sure it is large enough to protect most of the details of the picture. It would be best if your watermark could not be erased without significantly damaging the photo’s quality.

Opacity Matters

You can make the Watermark semi-transparent – it’s still going to protect your photo, but the watermark will seem less obtrusive. Using the right software, like Watermarquee, you can easily tweak the opacity when watermarking your photos.

Always Watermark Hi-Res Photos

A lot of photographers put watermarks on hi-res photos only. These photos can be used for wide-format digital printing, and thus it is very important to protect them. On the other hand, they leave low-res photos with no watermarks.

However, you can use a batch watermark maker if you want to place a watermark on a bunch of your photos at the same time. Photo editors like Photoshop do not allow you to adjust the size and position of the watermark for horizontal and vertical photos. So, you need to use a batch watermark creator, like Watermarquee.


Watermarking Protects Your Rights

Experts suggest that you put your watermark on each of your images. The official copyright notice contains three key elements:

The first part is the © (or the letter “c” in the circle), the word “Copyright” or the abbreviation “Copyright.”
The second part is the date of the first publication of the document.
The third part is the owner’s name.
The final copyright form should be as simple as: “© 2013 Your Name.”

Copyright notices in the U.S. may be used without registering your images with the U.S. Copyright Office. The removal of a watermark is a law-restricted activity with fines starting at $2,500 per image.

Let Them Know How To Find You!

It is a good idea to provide your website address and/or other contact information. It helps to promote your work. Your potential customers need to know how to locate you!

When people share your photos, they rarely bother to mention where they took it. Your contact info on your watermark will help to find you. However, don’t place everything in your watermark information. The website address or a phone number is fine.


Make Your Watermark Logo Clear

Using your business logo is a great idea. However, if the logo is too creative or the info is impossible to read, it makes no sense.


Use a Free Watermarking Tool

There are a lot of watermarking apps that will require you to download and install their software. Not only is this a waste of your precious time, but it will also take a toll on your device’s memory storage. Don’t get me started on costs too. If you want to make the most out of watermarking without breaking the bank, there’s Watermarquee.

Watermarquee is an easy-to-use online tool that lets you watermark multiple photos at once. Here’s how:

1) Open Watermarquee and click “Start Watermarking Now” to start the process.

2) Click the “Select Photos to Watermark” button and add up to 5 photos that you want to watermark. The free version of Watermarquee allows up to 5 photos at a time, but you can get the Pro version for 19USD to go unlimited. You could also drag and drop your images directly if you do not want to browse them.

3) Once you have added your main images, add your logo by clicking on the “Add Logo” button at the bottom of the page.

4) Once the watermark logo is added, you can adjust the position and change the opacity.

5) That’s all. Once done, just save them all or click on “Save as a ZIP” to download them in a ZIP file.

Summing Up

In conclusion, the key benefits of watermarking your images are copyright notice and brand recognition. It notifies people that your work is copyrighted and that it also identifies you as the author. Plus, if your images have a watermark, other people will have a way to link it back to you or contact you to request permission to use your work. Here are 5 more considerations when using a free watermarking tool like Watermarquee. For unlimited watermarking, you can sign up to WaterMarquee Pro here.


See also: Watermark Protection: 2 Ways Watermarking Can Help Avoid Vacation Rental Photo Theft.

See also: Children’s Photos: 3 Surprising Reasons for Parents to Start Watermarking Them Now!.

See also: 5 Ways a Photo Watermark Can Help in Direct Sales Success.