Australia is a photographer’s playground. Within a single country you’ll find blood-red deserts, glacier-carved alpine ridges, neon coral reefs, ancient rainforests, and beaches with sand so white it looks photoshopped. Whether you shoot landscape, wildlife, astrophotography, drone, or street, Australia gives you scenes you simply can’t get anywhere else on earth.
This guide rounds up 12 iconic locations every photographer should aim to shoot at least once — when to go, what gear to pack, and the angles that consistently win the frame. We’ve also pulled in detailed destination guides from our friends at Touring Guide for each location, so you can plan the trip end-to-end.
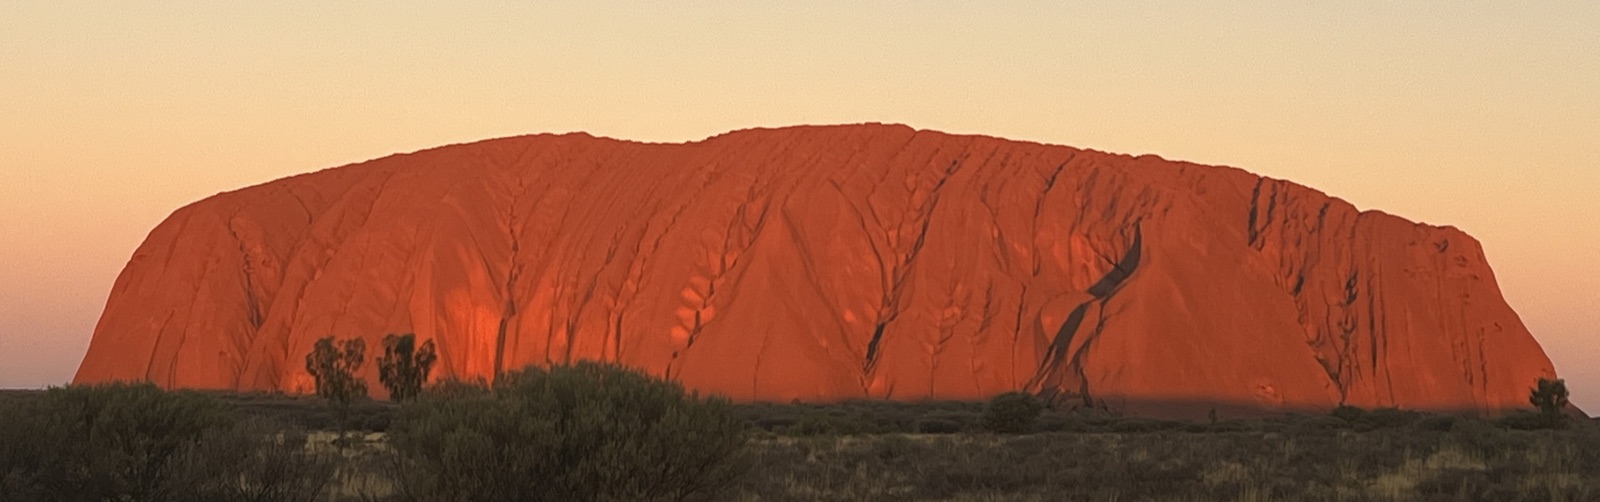
1. Uluru — the Red Centre at golden hour
Nothing else looks like Uluru. The monolith rises 348 metres out of the Northern Territory desert and shifts colour through the day — slate-grey at dawn, fire-orange at sunset, deep purple under storm light. Shoot from the dedicated sunset viewing area to the west, then return for sunrise from the eastern lookout. Pack a long lens (70-200mm) for compressed shots that isolate the rock against the sky, plus a wide angle for foreground spinifex grass.
When: May–September (dry season, cooler nights, no flies). Pro tip: the cultural site rules prohibit photography in certain areas — check signage before composing.

2. The Twelve Apostles — coastal sea stacks at sunrise
Victoria’s Twelve Apostles are the most-photographed coastline in Australia for good reason — limestone stacks rising out of the Southern Ocean, hammered by spray, glowing amber at first light. Most photographers shoot from the main viewing platform, but the lower-level Gibson Steps gives you a beach-level perspective that almost no Instagram photo captures. A circular polariser cuts through the sea spray; a 10-stop ND filter turns the surf into silk.

3. The Whitsundays — aerial heaven
The Whitsunday Islands off the Queensland coast are where drone photography earns its keep. Hill Inlet at low tide produces the swirling turquoise-and-cream patterns that dominate Australian tourism marketing, and Whitehaven Beach holds 98% pure silica sand. If you’re new to flying high above water, our drone photography tips cover the gear, settings, and legal considerations you’ll want sorted before you take off.
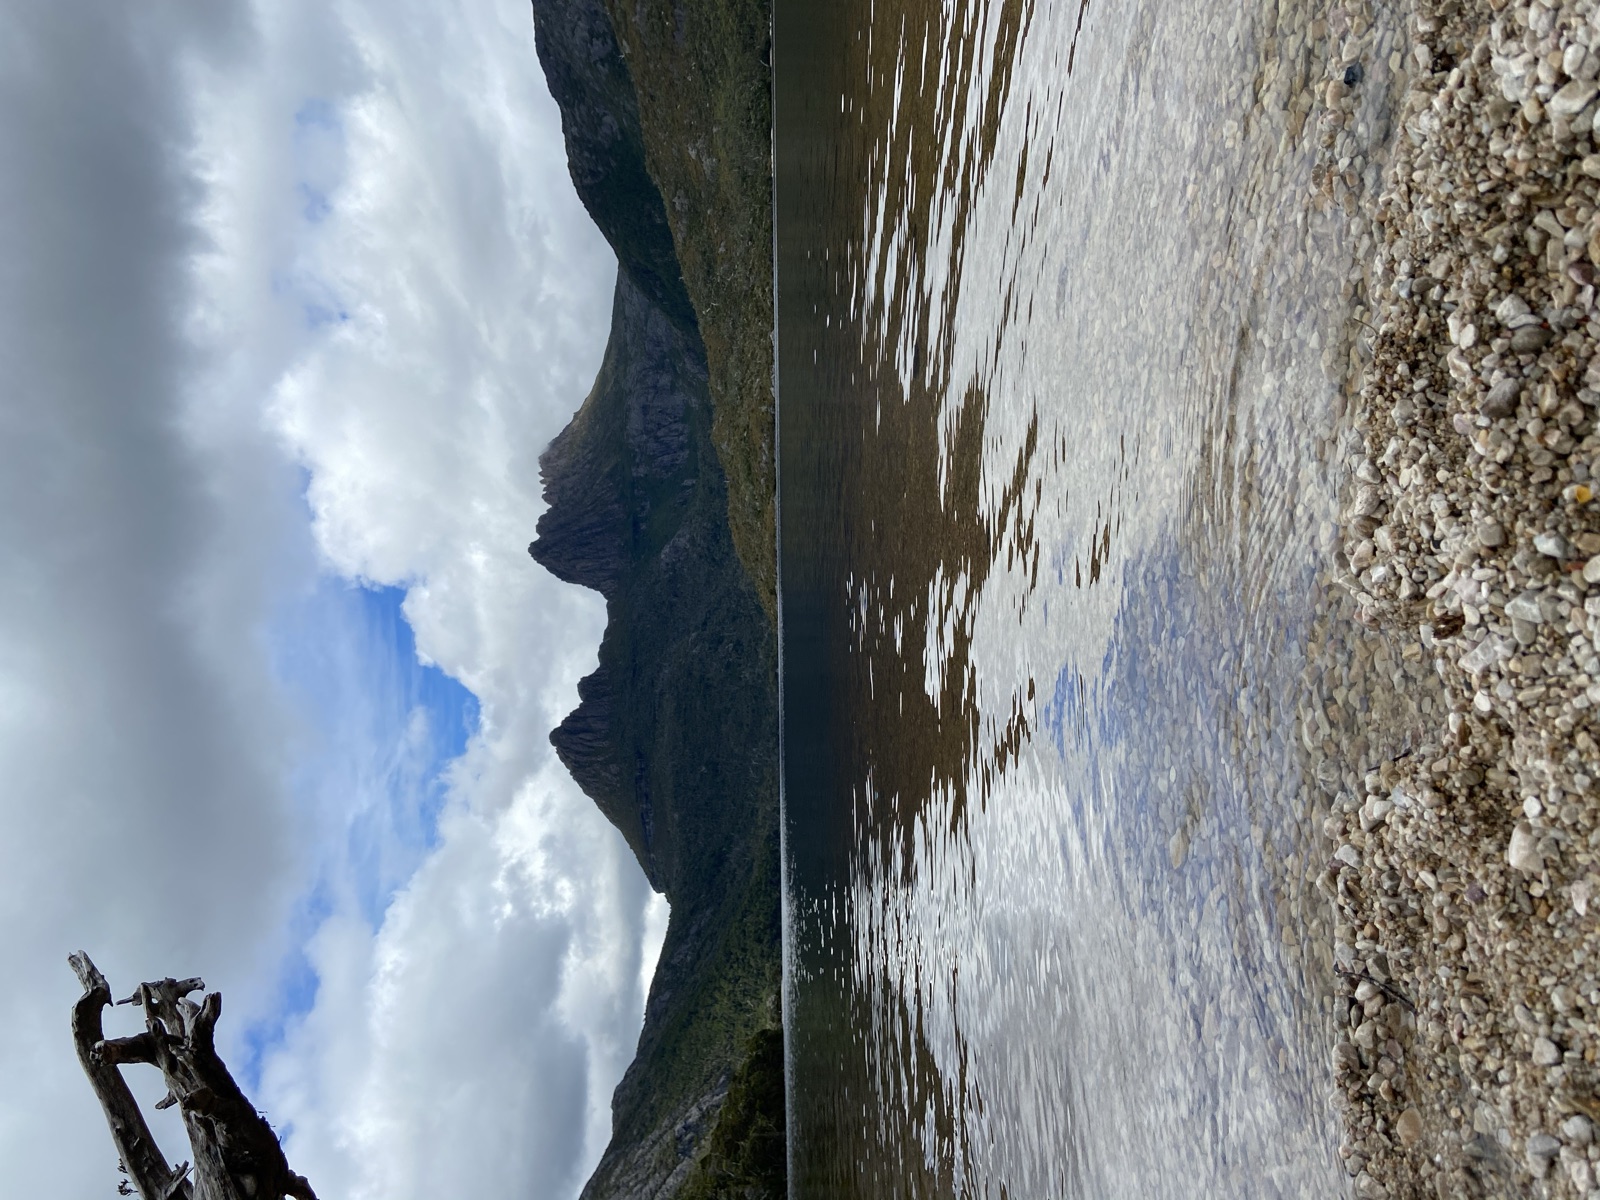
4. Cradle Mountain — Tasmania’s alpine cathedral
Dove Lake, mirror-still at dawn, with Cradle Mountain reflecting back — this is one of the most reliable landscape compositions in the country. The boardwalk loop is six kilometres of constantly-changing perspectives. Tasmania’s weather flips fast, so pack rain protection and a microfibre cloth for the front element. Sturdy boots beat aesthetics — the boardwalk is wet, slippery, and unforgiving.
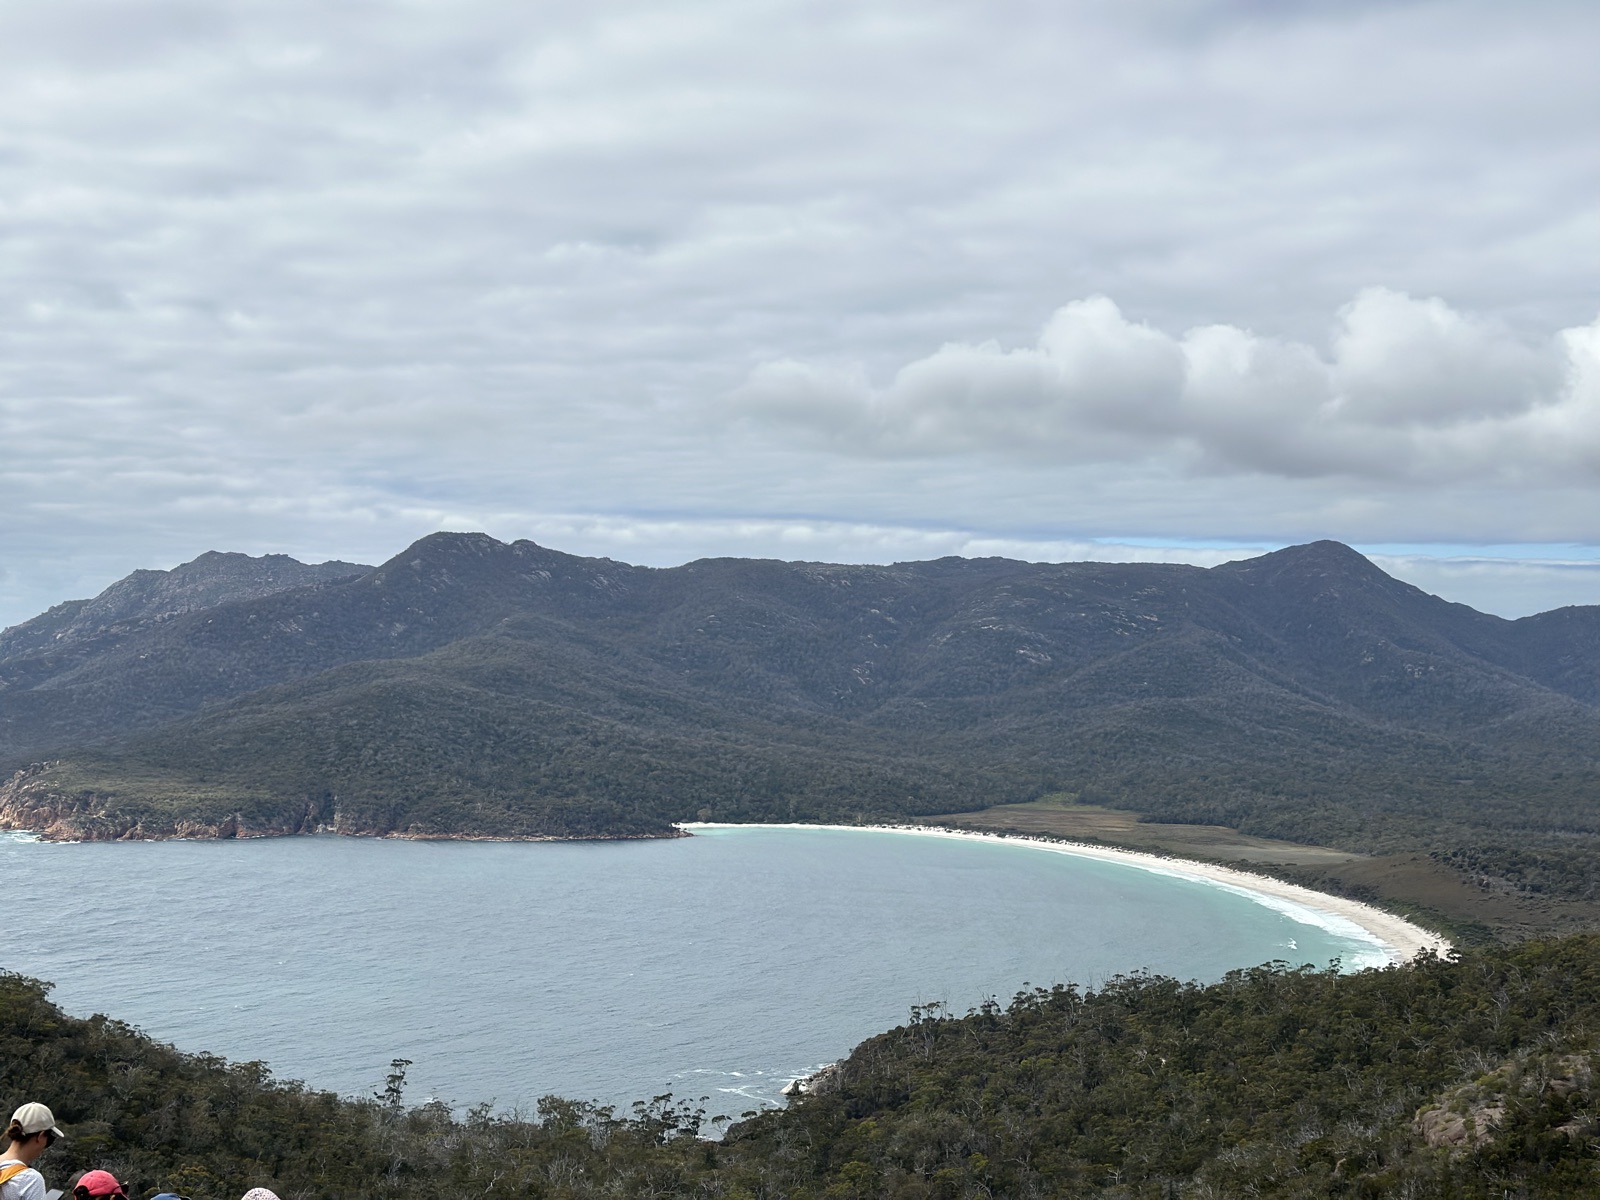
5. Wineglass Bay — the perfect curve
The classic shot of Wineglass Bay is from the lookout above — a half-hour climb up granite steps in Freycinet National Park. Mid-morning gives the cleanest water colour; late afternoon the cliffs turn pink. If you’re shooting the bay itself, drop down to the beach (another 45 minutes) and shoot the curved shoreline from the southern end with a wide lens. Our landscape photography tips walk through the composition principles that make this kind of shot work.
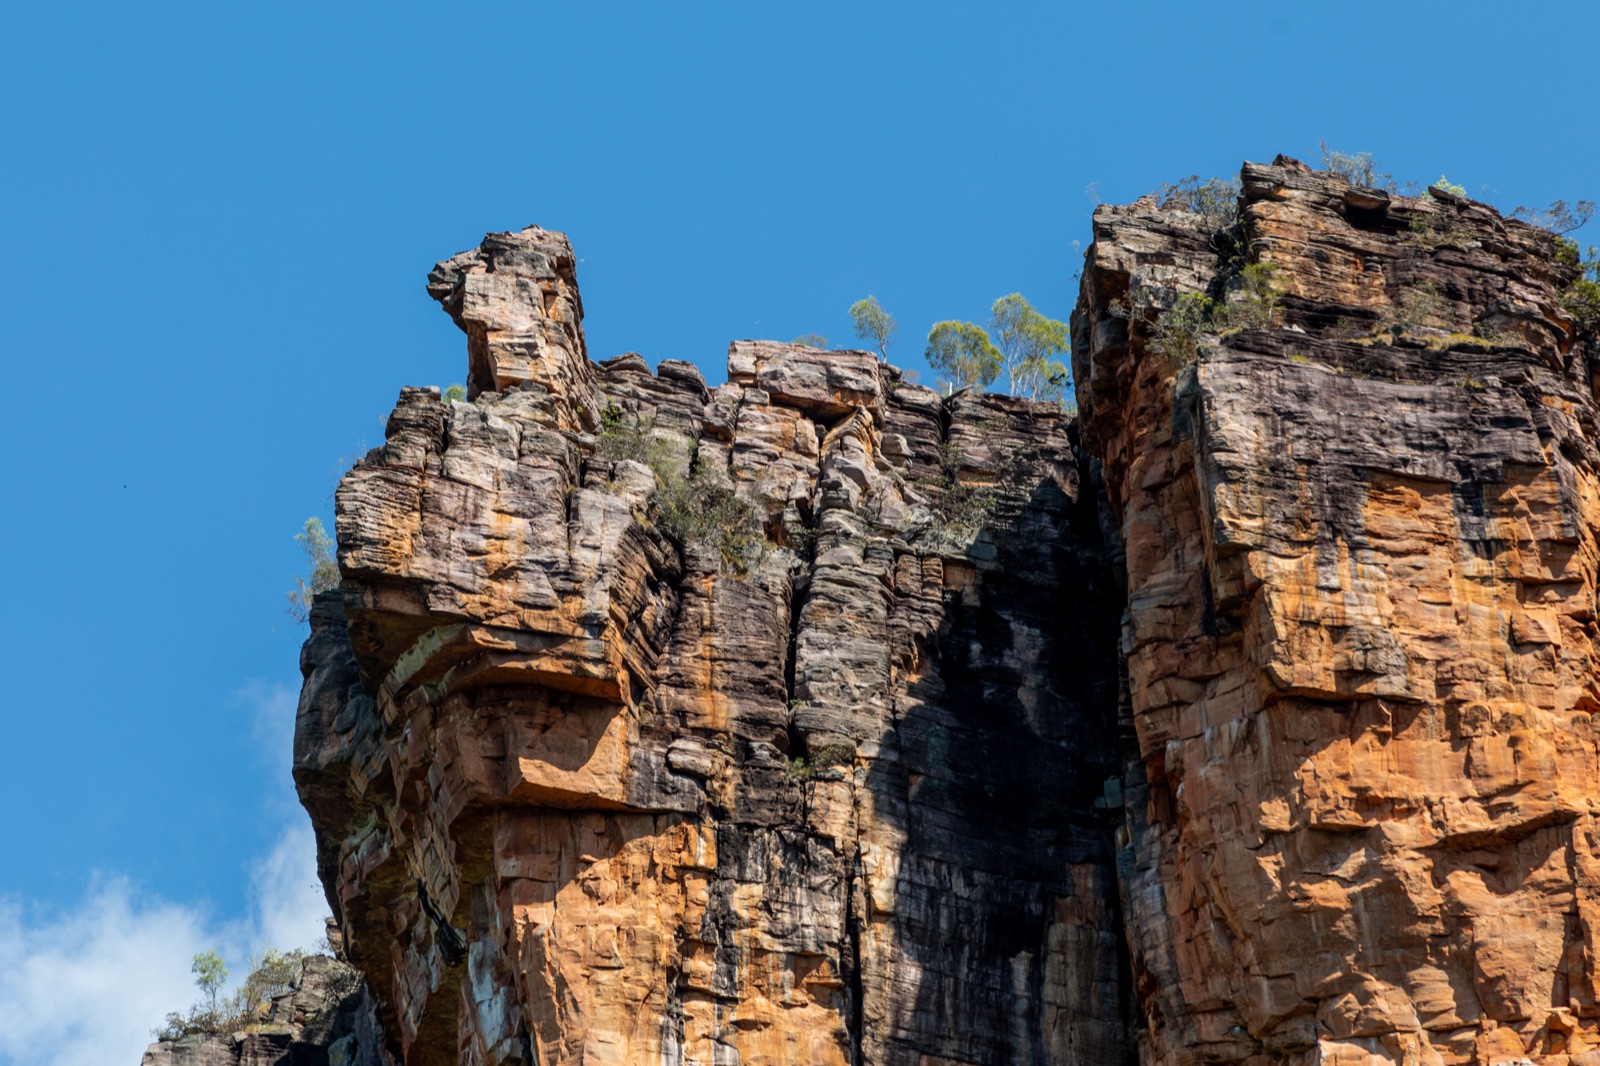
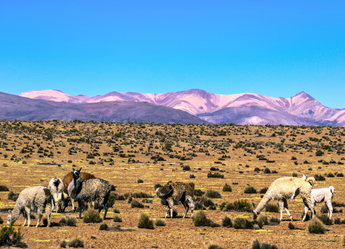
6. Kakadu — wildlife, waterfalls, and Aboriginal rock art
Kakadu National Park is twice the size of Yellowstone and four times more visually diverse. Jim Jim Falls in the wet season, Yellow Water Billabong at sunrise (saltwater crocs, jabirus, magpie geese), Ubirr’s 20,000-year-old rock paintings at sunset — all from the same base camp. A 100-400mm lens earns its keep here. Wet season (Nov–Apr) for waterfalls, dry season (May–Oct) for wildlife and access.
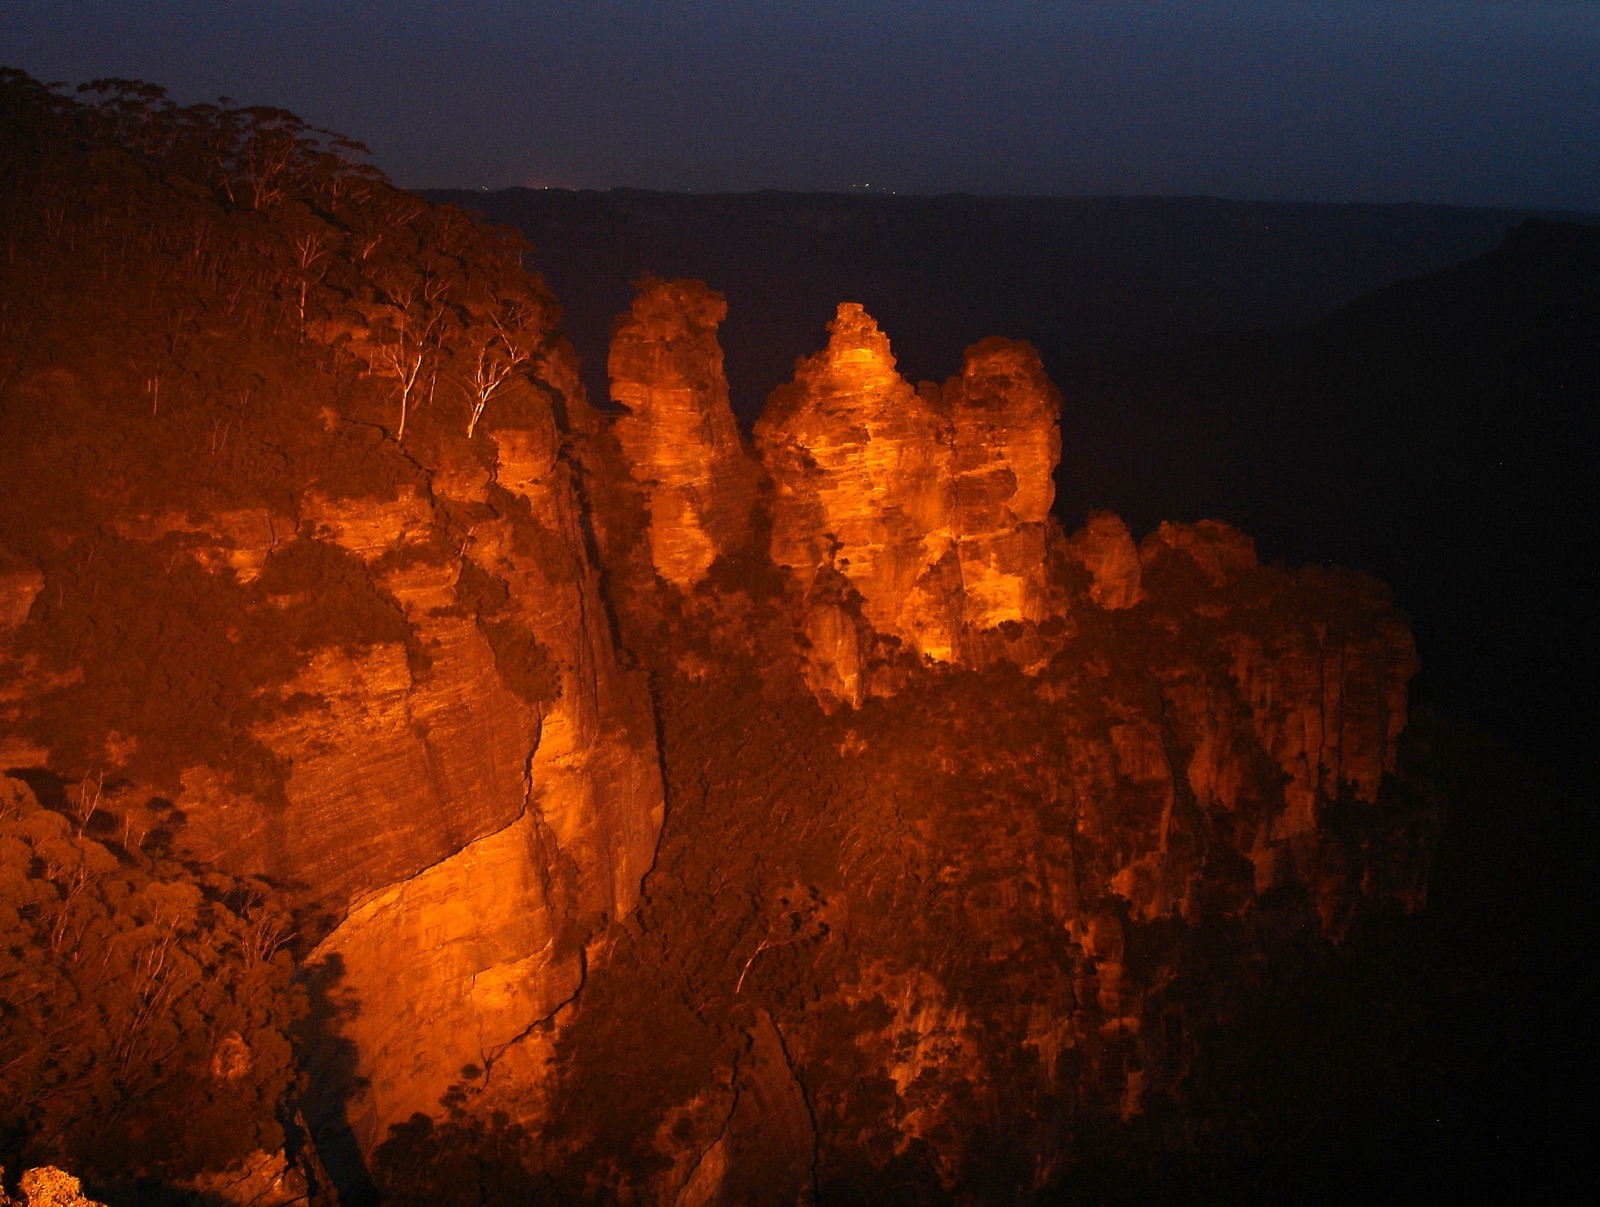
7. Blue Mountains — eucalyptus haze and sandstone cliffs
Two hours west of Sydney, the Blue Mountains get their name from the haze of eucalyptus oil that gives the air a literal blue tint. Shoot the Three Sisters from Echo Point at dawn before the tour buses arrive; for something less photographed, hike to Pulpit Rock for a 270° view of the Grose Valley. Long exposures of the misty valleys at first light are a signature shot.
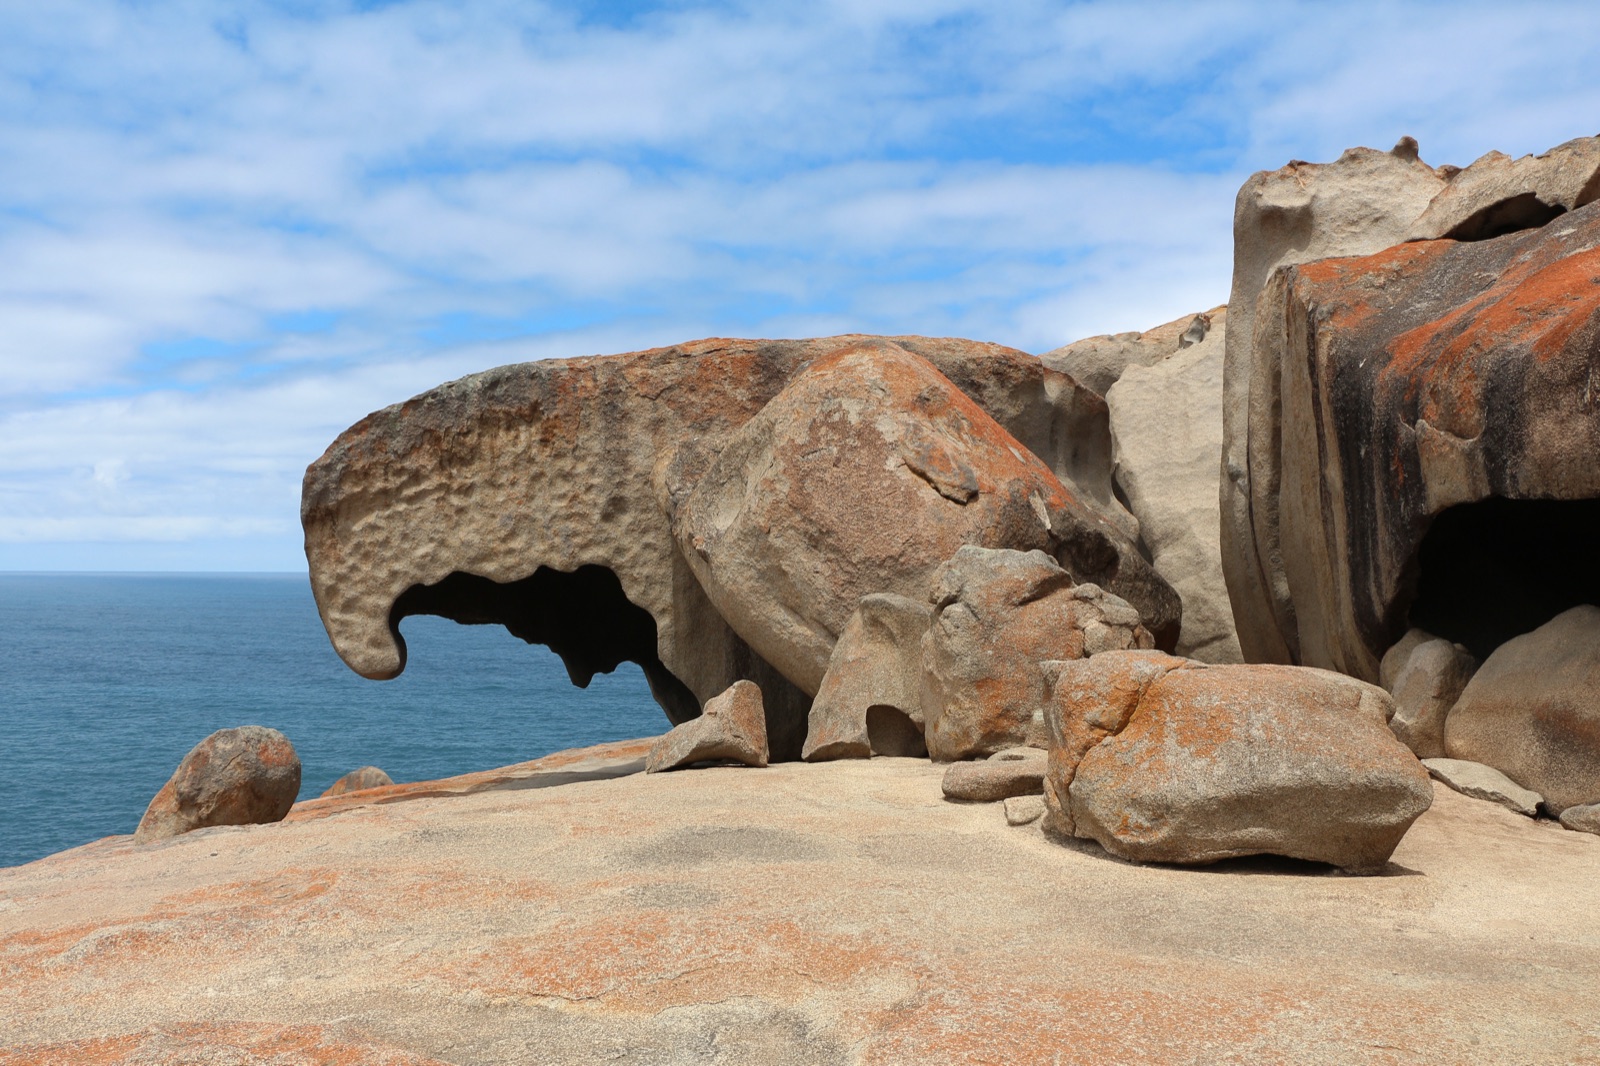
8. Kangaroo Island — wildlife on tap
Off the South Australian coast, Kangaroo Island is what mainland Australia looked like 200 years ago. Sea lions on Seal Bay (yes, you can shoot from metres away with a guide), wild kangaroos at golden hour in Flinders Chase, and Remarkable Rocks — wind-sculpted granite that catches the late sun like sandpaper through a backlit window. Bring a fast prime (50mm or 85mm f/1.8) for low-light wildlife.
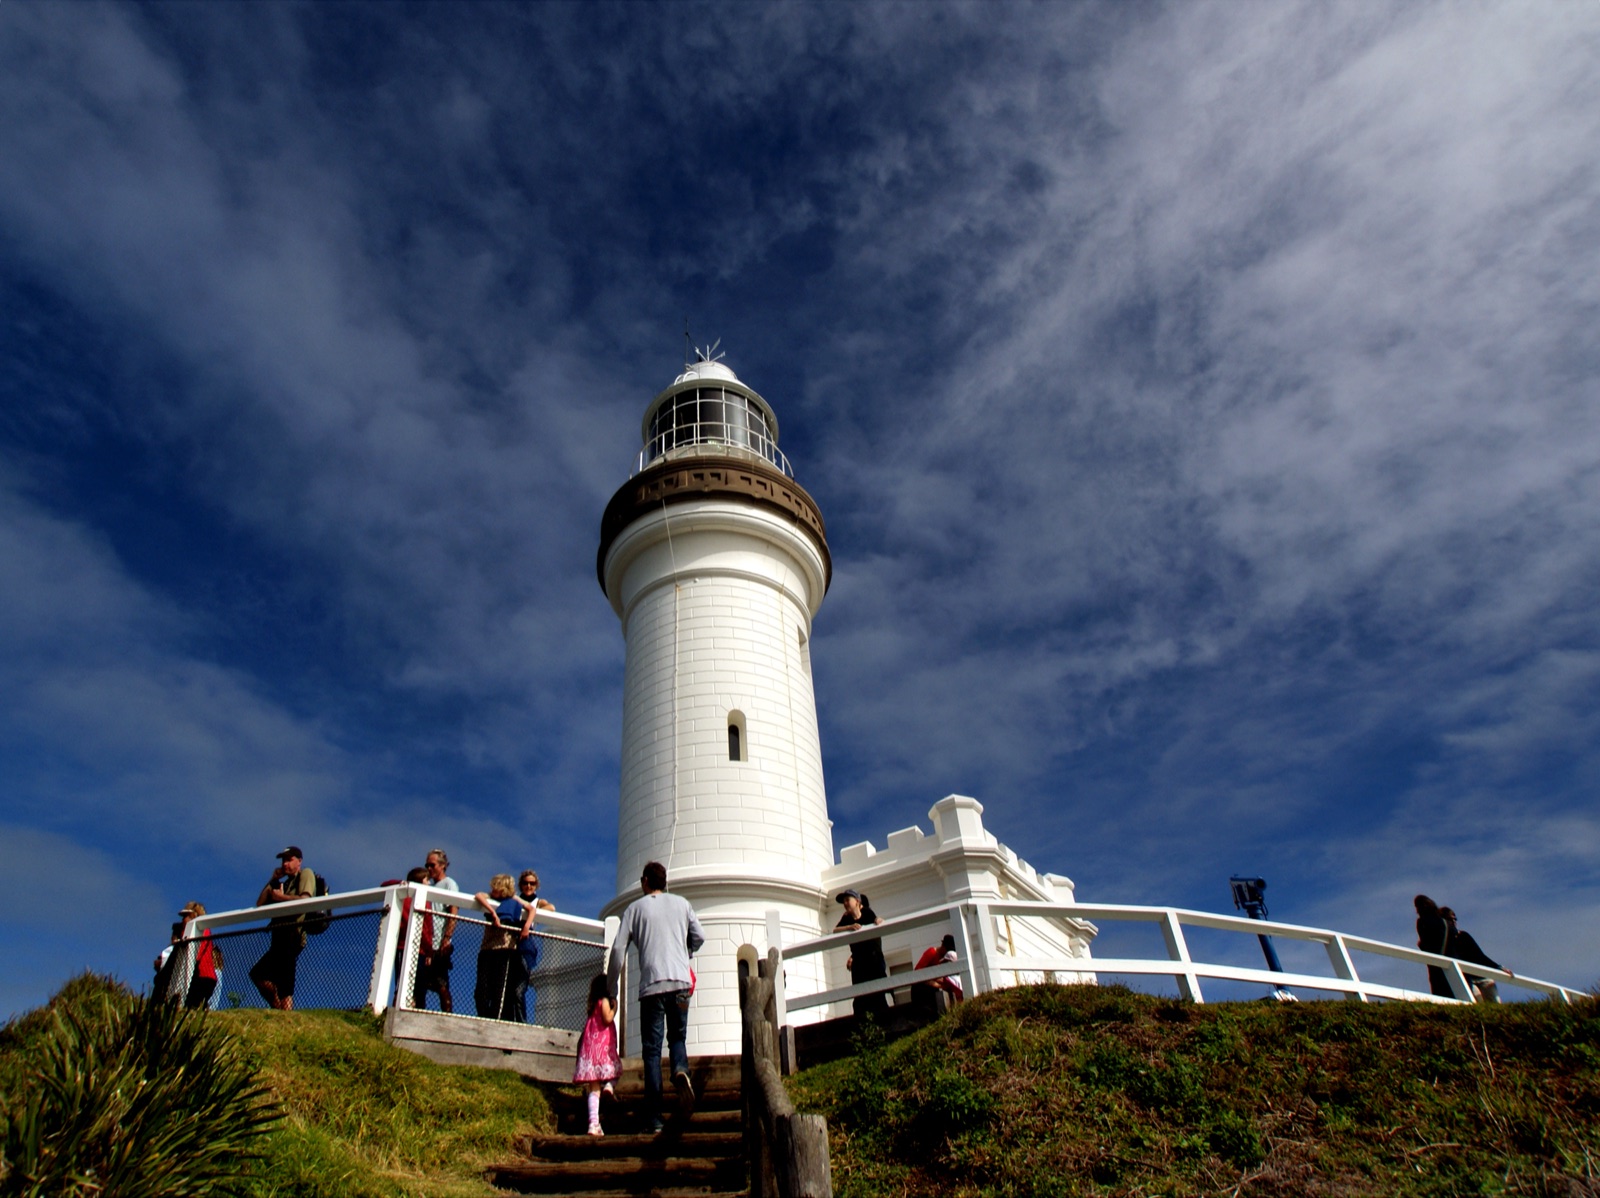
9. Cape Byron — Australia’s easternmost lighthouse
The Cape Byron Lighthouse is the easternmost point of mainland Australia — first light hits here before anywhere else in the country. Shoot from the headland car park for the lighthouse against an empty Pacific; from the beach below, you’ll see migrating humpback whales between June and November. Drone shots of the curved coastline at sunrise are dramatic. Lifestyle shooters: the surf town below is a goldmine for editorial work.
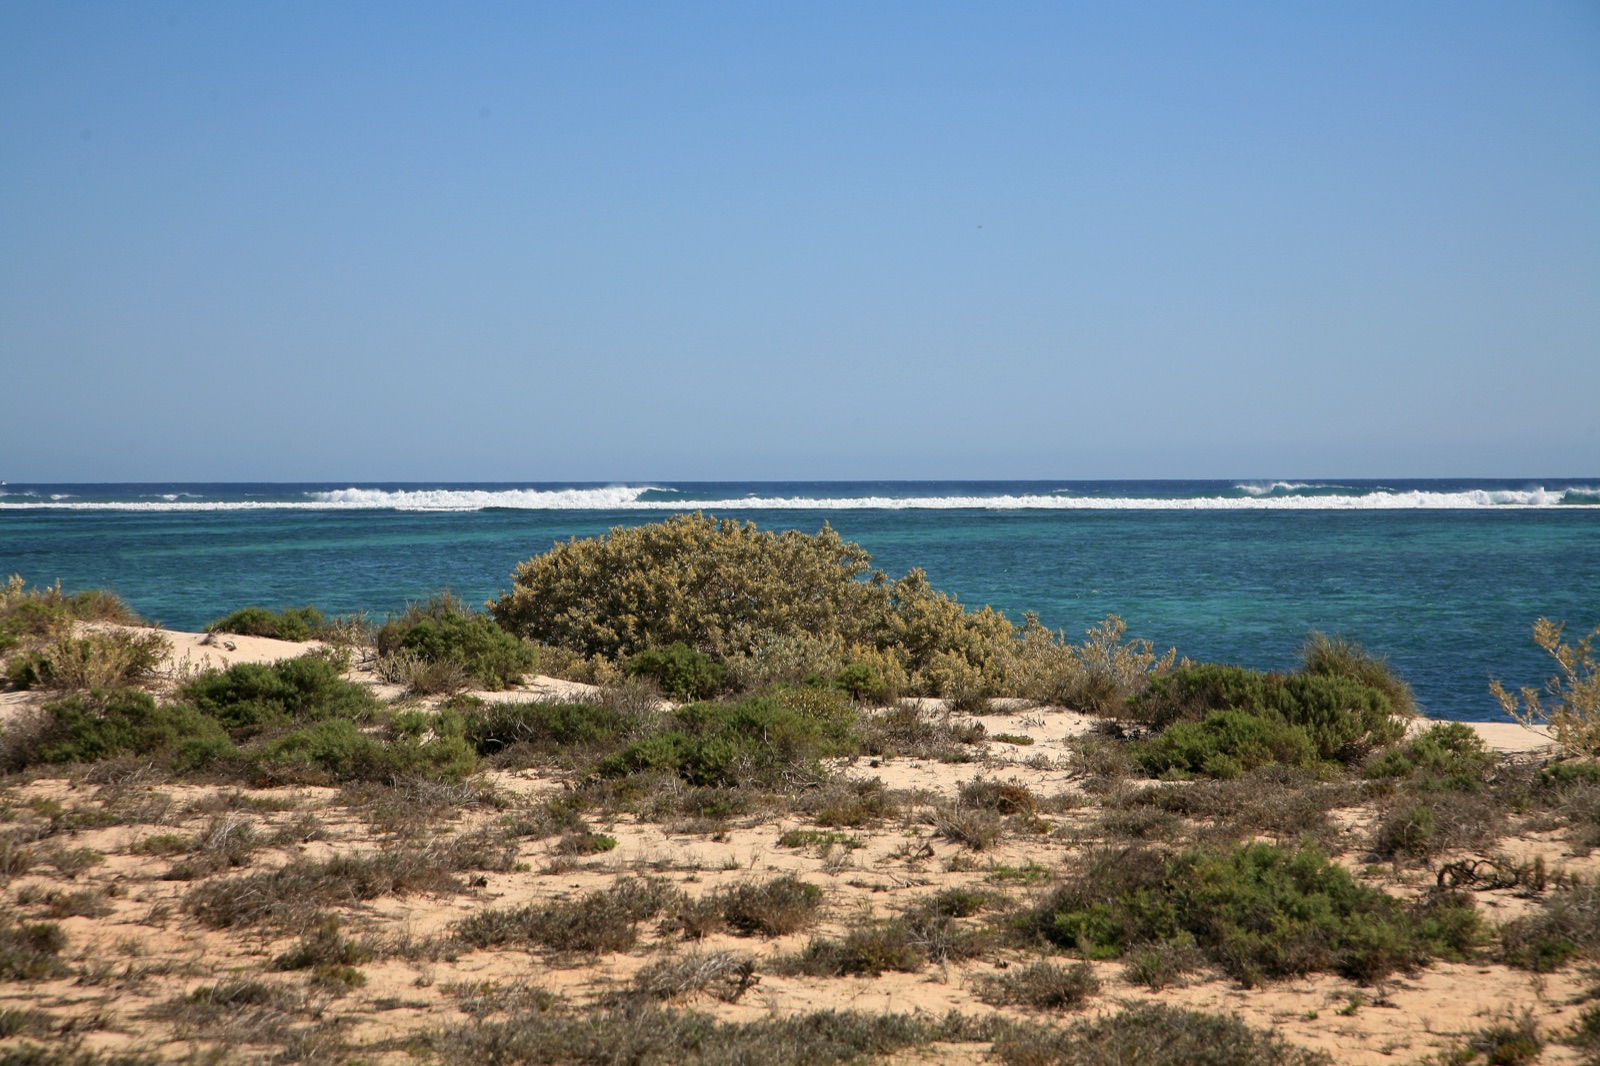
10. Ningaloo Reef — underwater colour without the crowds
The Great Barrier Reef gets the headlines, but Western Australia’s Ningaloo Reef is more accessible (you can wade off the beach), less bleached, and far less crowded. Whale sharks aggregate March–August. Underwater housings start at $300 for a phone, $1,500+ for mirrorless — and unlike most reefs, here you genuinely don’t need a boat to get publishable shots.
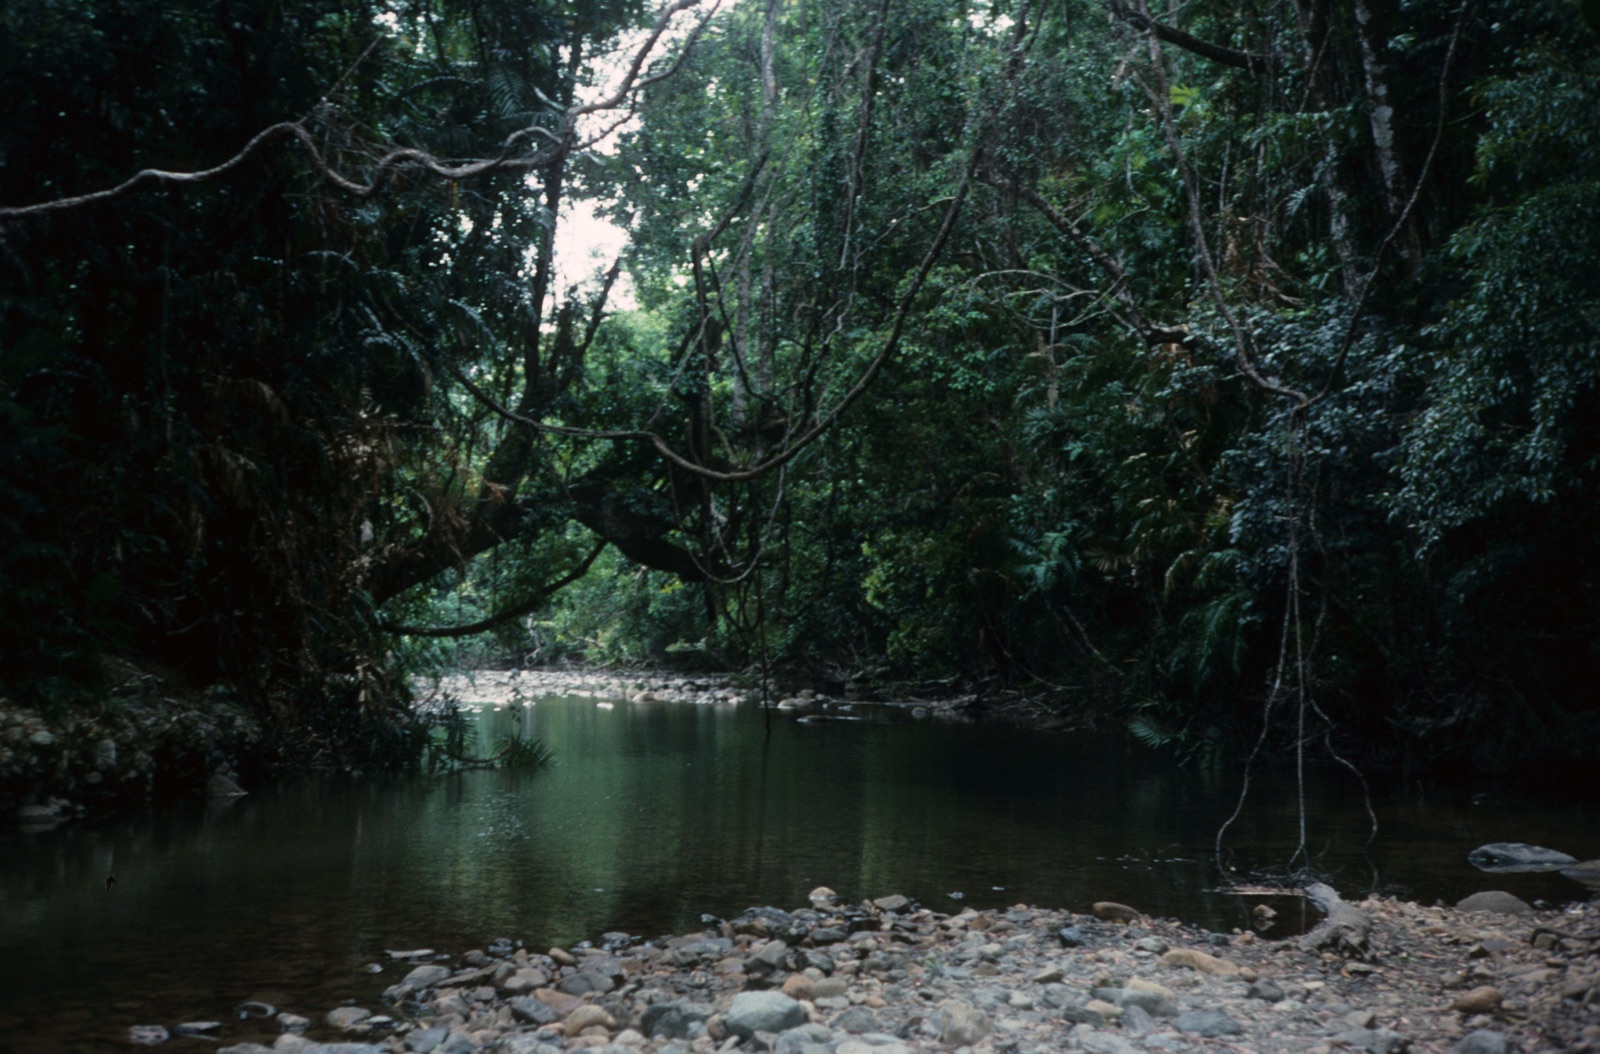
11. Daintree Rainforest — green on green on green
The Daintree is the oldest continuously-surviving rainforest on the planet — 180 million years and counting. The challenge is exposure: dim, high-contrast, with shafts of light through the canopy. Shoot in RAW, bracket aggressively, and bring a sturdy tripod (a slow shutter is the only way to handle the low light without pushing ISO into noise territory). Cape Tribulation at low tide gives you that iconic “where the rainforest meets the reef” composition.
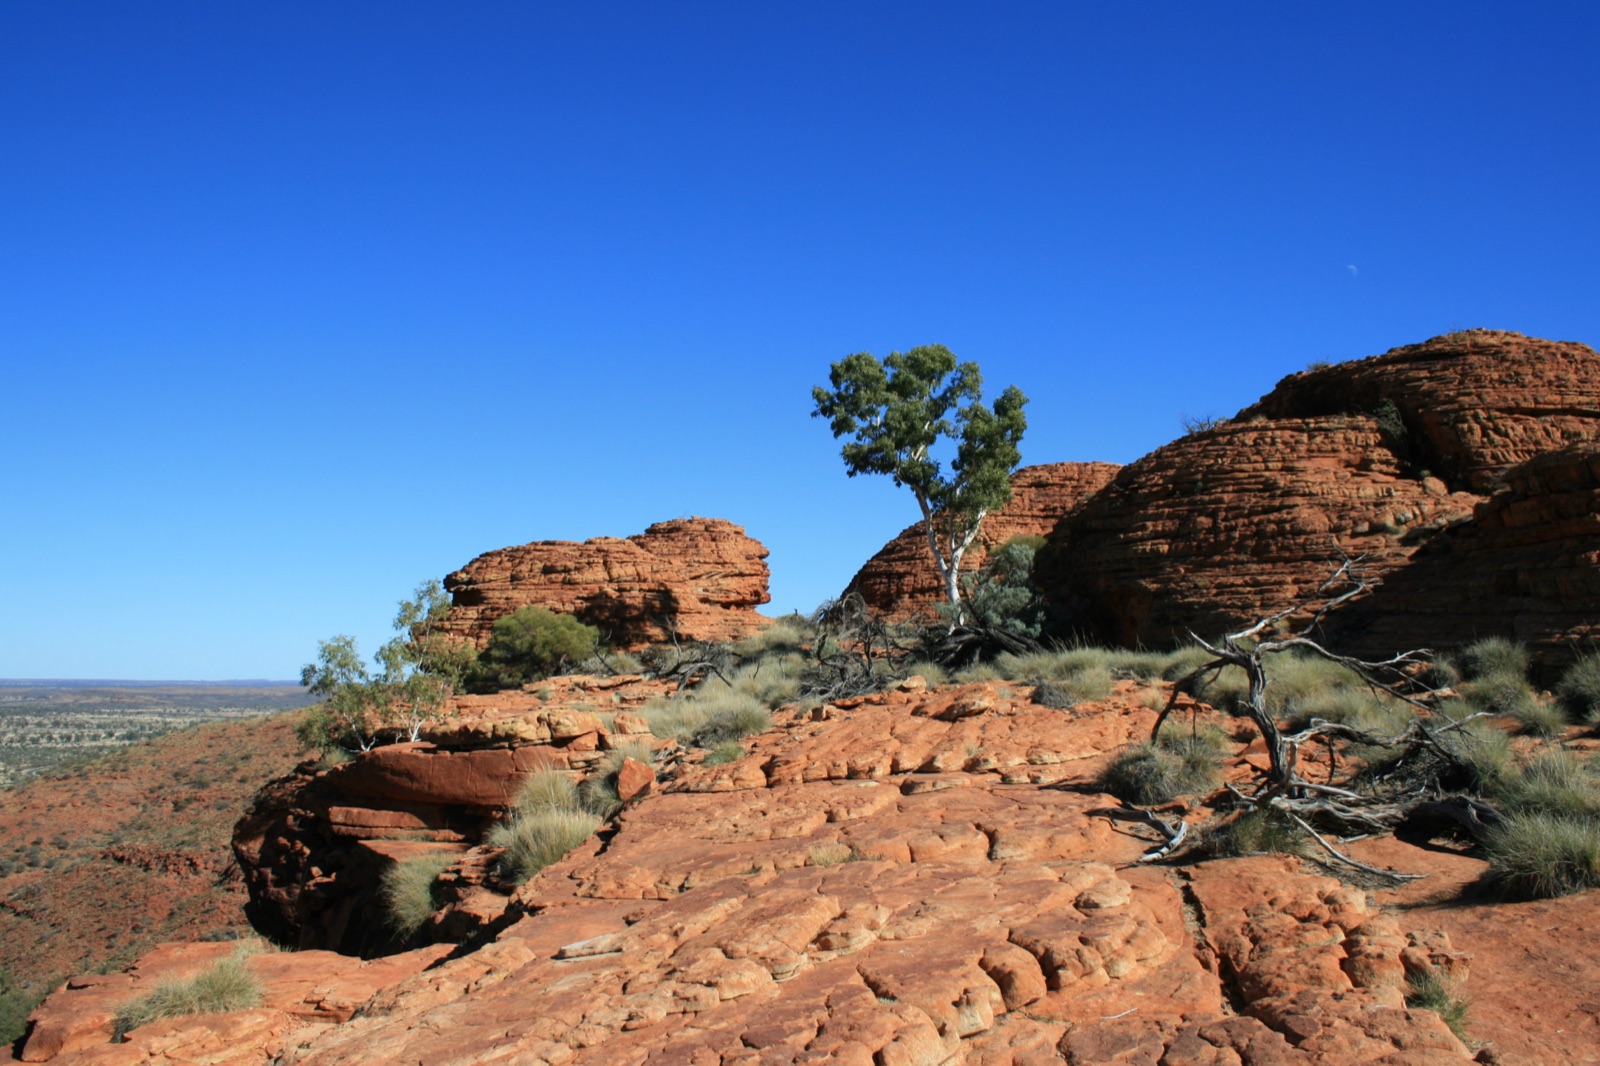
12. Kings Canyon — Watarrka’s red walls
Often skipped on Red Centre itineraries, Watarrka (Kings Canyon) is arguably more dramatic than Uluru. The Rim Walk gets you 100m above the canyon floor with views into the Garden of Eden — a permanent waterhole surrounded by cycads that have been there since the dinosaurs. Start the walk at first light: the canyon walls glow before the sun hits the floor, and you’ll be back at the car park before the heat ruins everything.
Gear and planning checklist
- Body: any modern mirrorless with weather sealing. Australia is dusty, salty, and humid in roughly equal measure.
- Lenses: 16-35mm wide, 70-200mm telephoto, plus one fast prime for low light.
- Filters: circular polariser (cuts glare on water), 10-stop ND (silky water, dreamy clouds).
- Tripod: non-negotiable for landscape and astro.
- Drone: register with CASA before flying — Australia takes drone regs seriously.
- Storage: double your usual card capacity. You will shoot more than you think.
- Backup: a portable SSD and a cloud sync workflow for every night on the road.
Protect your shots
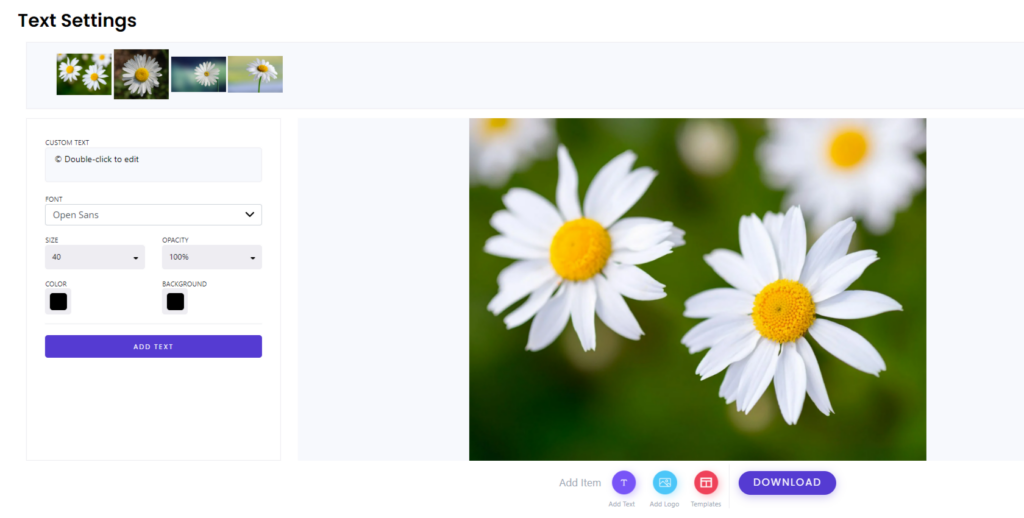
You’re going to bring back a hard drive of images that took weeks to plan, thousands of dollars to capture, and unrepeatable moments to compose. Before you post a single one online, watermark them. Image theft is a real and growing problem, especially for travel and landscape photographers whose work is highly shareable on social media. Watermarking your photos takes seconds and protects months of work.
For more advanced techniques and creative approaches to capturing Australia and beyond, our travel photography tips dig into composition, light, and storytelling for the road.
Planning the trip? Touring Guide has destination-by-destination breakdowns of every location above — campsites, tracks, attractions, and seasonal access info — at touringuide.com.
Companion piece: Why Should You Shoot RAW Format Photos? 5 Facts.


 Modest photography describes a
  Luckily for budding
  Something that has a big effect on how your photograph looks is the quality of light that is hitting your subject. There are two aspects of lighting that you need to pay attention to – the color of the light and how harsh the light is.
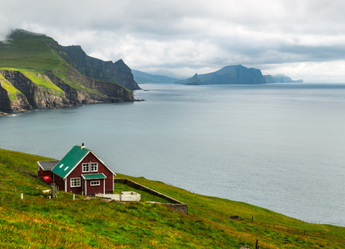
 In many good landscape photographs, you will see the photographer places the horizon in the top third of the photo, while the landscape takes up the bottom two thirds of the photo.
 Blurry photos can be a problem, with the key to reducing blur caused by
 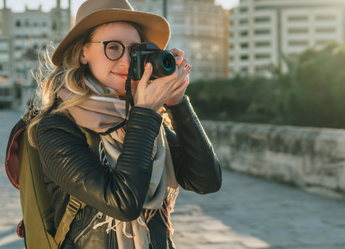 For example, a full frame
  Once you’re happy with your modest photography, the next step in any photographers’ process would be to protect their work before they publish it.
 The only downside to the process is that watermarking can be difficult without professional photo editing knowledge.
 While it is a simple process, an E commerce Photoshoot can be the make or break of your business, with product
  If you can’t take a good photograph of what you have on offer, what does that say about how you run your company?
 This is great because it means and the quality of your photos will depend more on your shot setup, lighting, and post-processing than on the
  To begin with, you’ll want your setup to be lit from the side as side lighting helps highlight the shape and textures of the object being photographed.
 To get a better idea of how to employ this technique, start by placing one or two tall props in the back right or left corner, directly in front of your vertical surface.
 Using natural light, is always best as it will provide you a good amount of light with a soft shadow. If the shadow is too sharp, you can place a screen, paper, or cloth on the inside to soften it.
 For those of you with a more advanced camera and tripod set up, you could even try setting the lens to a small aperture and a slow shutter speed.
 After you’ve taken your shots during your e commerce photoshoot, you’ll want to move on to retouching them. Expensive photo editing software isn’t necessary for this step, as there are countless free image editing tools available for post production on your e commerce photoshoot. If you’ve taken great shots, you’ll only need to do some light editing to make the images from you e commerce photoshoot really pop.
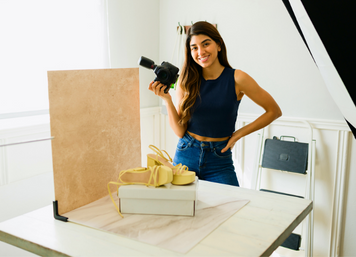 Once you have completed your e commerce
  Unlike lifestyle photos,
 Leading lines, juxtaposing colours, and framing with
  Although a shallow depth of field can give very creative results, when it comes to product photography it’s generally preferable to be able to see the entire product in focus.
 Once you have gone ahead and completed your makeup product photoshoot, the next step in any professional photographers process would be to protect their work before publishing it online.
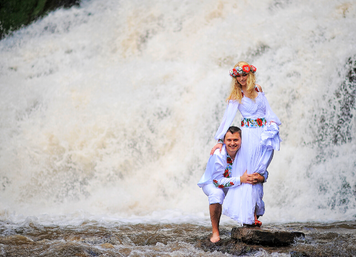 Luckily, most new
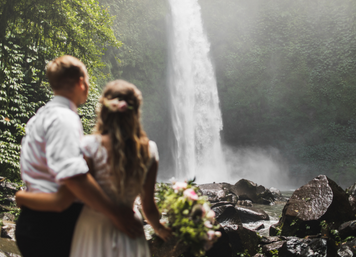 Don’t get too caught up in the intricacies for waterfall photography. While there are lots of technical settings that can influence your waterfall engagement photos, the most important thing is to make sure you get the basics right.
 Well to put it simply, a
  Instead of only focusing on paid work, ask for volunteers in your personal life and start creating shots that are going to make their way into your portfolio while again making sure you’ve got variety, scope, etc. As you get clients, you can start adding those in to replace or accompany the volunteer photos from earlier in your career when you had to ask, ‘what is portfolio photography?’.
 However, you can certainly make sure that your portfolio as the best and strongest it can be by keeping it fresh and creative wherever possible.
While highlighting that you are experienced with many technical aspects, design is equally an important element to keep at the top of your mind if you want to help your portfolio stand out from others asking ‘what is portfolio photography’.
One of the most overlooked elements of a portfolio that can really help you stand out however, is progression. As a
However, you can certainly make sure that your portfolio as the best and strongest it can be by keeping it fresh and creative wherever possible.
While highlighting that you are experienced with many technical aspects, design is equally an important element to keep at the top of your mind if you want to help your portfolio stand out from others asking ‘what is portfolio photography’.
One of the most overlooked elements of a portfolio that can really help you stand out however, is progression. As a  As mentioned earlier, quality is always better than quantity – a portfolio with hundreds of images quickly becomes overwhelming and will make your audience question what is portfolio photography. As such, your portfolio should include your best work and only your best work. If you can identify even one small flaw in your image, it is best not to include as you’re trying to showcase your best images, not all your images.
If you find yourself wanting to include more than you should, consider creating a blog or spam account to display images from all your shoots, and a portfolio with just the best ones from your when you had to ask what is portfolio photography, all the way to the when you’re an expert.
As mentioned earlier, quality is always better than quantity – a portfolio with hundreds of images quickly becomes overwhelming and will make your audience question what is portfolio photography. As such, your portfolio should include your best work and only your best work. If you can identify even one small flaw in your image, it is best not to include as you’re trying to showcase your best images, not all your images.
If you find yourself wanting to include more than you should, consider creating a blog or spam account to display images from all your shoots, and a portfolio with just the best ones from your when you had to ask what is portfolio photography, all the way to the when you’re an expert.
 Now that you understand what is portfolio photography, and once you have gone ahead and put together your photography portfolio, the next step in any professional photographers’ process would be to protect their work before publishing it, online or in print.
As a content creator who publishes any form of work online or distributes it in person, you should know the importance of watermarking your work.
In terms of security, watermarking can’t be beat, allowing you to safeguard your work from any potential content thieves and protect your copyright on all work you publish online.
The only downside to the process is that watermarking can be difficult without professional photo editing knowledge. Luckily, WaterMarquee is here to help! While there are a few tools online that allow watermarking, no tool can match the free bulk watermarking offered by
Now that you understand what is portfolio photography, and once you have gone ahead and put together your photography portfolio, the next step in any professional photographers’ process would be to protect their work before publishing it, online or in print.
As a content creator who publishes any form of work online or distributes it in person, you should know the importance of watermarking your work.
In terms of security, watermarking can’t be beat, allowing you to safeguard your work from any potential content thieves and protect your copyright on all work you publish online.
The only downside to the process is that watermarking can be difficult without professional photo editing knowledge. Luckily, WaterMarquee is here to help! While there are a few tools online that allow watermarking, no tool can match the free bulk watermarking offered by  When someone lands on your website for the first time, what elements do they notice first? If you guessed visuals, you’d be right, with human’s processing visuals 60,000 times faster than text, our visuals actually do the talking for us. So what is your imagery saying? If you aren’t visually communicating the right message through your photography, you might unknowingly confuse your audience.
 While stock photos are readily available for anyone who wants to download or purchase them, a relatively positive feature, this means that they can be used by anyone, including your competitors. When it comes to building a brand this is definitely not ideal, as you don’t want to be mistaken for one of your competitors simply because you use the same imagery on your website.
 If you’re like most entrepreneurs, you’re always looking for ways to improve your visibility. You’re already an expert at your craft, but you want imagery that helps you look like one.
 Now that you have figured out your brand’s style, its time to figure out an actual shot list. To begin with, its important to make a list of what you actually need your photos for, in terms of whether you’re using them for your website, Instagram posts or Insta-stories, blog posts or GIFs.
 Once you have gone ahead and completed your brand photoshoots the next step to really put the finishing touches on your images and polish your overall personal brand is to consider watermarking.
  Classic Balloon Party
 For some teenage girls, you cant go past a classic, pink, and pretty sweet sixteenth where they get to dress up with all their friends and have the party that they always dreamed of.
 However, there should be one more stage in your process before you publish any sort of photo online – protecting your photos.
 Real estate agent
  It may feel silly, but raising your arms above your head like Superman for a few minutes has been shown to increase feelings of power and confidence.
Spending even a minute or two before your shoot in a power pose can increase your confidence and result in a better picture.
In addition, consider choosing a few poses before your photo shoot. Even if your photographer helps you pose, you likely won’t feel as confident if you’re in an unfamiliar position. Try out a few poses in the mirror and decide on one or two that feel the most natural.
It may feel silly, but raising your arms above your head like Superman for a few minutes has been shown to increase feelings of power and confidence.
Spending even a minute or two before your shoot in a power pose can increase your confidence and result in a better picture.
In addition, consider choosing a few poses before your photo shoot. Even if your photographer helps you pose, you likely won’t feel as confident if you’re in an unfamiliar position. Try out a few poses in the mirror and decide on one or two that feel the most natural.
 The most important thing to keep in mind when choosing a background is to make sure it doesn’t distract from the image’s focal point which is you in the case of a real estate agent photoshoot.
As such, one of the best headshot backgrounds is pure white, which is especially powerful when it comes to tiny profile pictures that appear online.
However, your background can also be relevant to the real estate you work with. If you work in the city, an artfully blurred street scene or brick wall can be an integral piece of your real estate marketing. On the other hand, agents in a more rural or suburban area may respond more to something like a blurred forest or pastoral scene, exemplified by the headshot on the right.
The most important thing to keep in mind when choosing a background is to make sure it doesn’t distract from the image’s focal point which is you in the case of a real estate agent photoshoot.
As such, one of the best headshot backgrounds is pure white, which is especially powerful when it comes to tiny profile pictures that appear online.
However, your background can also be relevant to the real estate you work with. If you work in the city, an artfully blurred street scene or brick wall can be an integral piece of your real estate marketing. On the other hand, agents in a more rural or suburban area may respond more to something like a blurred forest or pastoral scene, exemplified by the headshot on the right.
 After all, as there are plenty of real estate agents, we know there won’t be a shortage of houses to photograph, as even if some estate agents will keep old photos, the majority are more likely to commission new photographs when selling a house.
In terms of actual dollar values, in real estate photography, the location and the size of the house play a important role in determining the price.
So, if you’re a budding photographer or a sales agent looking to put on a real estate agent photoshoot, where do you start?
After all, as there are plenty of real estate agents, we know there won’t be a shortage of houses to photograph, as even if some estate agents will keep old photos, the majority are more likely to commission new photographs when selling a house.
In terms of actual dollar values, in real estate photography, the location and the size of the house play a important role in determining the price.
So, if you’re a budding photographer or a sales agent looking to put on a real estate agent photoshoot, where do you start?
 Just like the real estate business, preparation is crucial when it comes to a real estate agent photoshoot. There’s nothing worse than being at a shoot and finding that you forgot something.
While you may be knowledgeable enough to work around it, having a few key pieces of photography kit missing means that youll need to work on your feet a little more.
If you do nothing else in terms of preparation, at least always take your charger – a dead battery is a dead shoot. On this, if you have a secondary
Just like the real estate business, preparation is crucial when it comes to a real estate agent photoshoot. There’s nothing worse than being at a shoot and finding that you forgot something.
While you may be knowledgeable enough to work around it, having a few key pieces of photography kit missing means that youll need to work on your feet a little more.
If you do nothing else in terms of preparation, at least always take your charger – a dead battery is a dead shoot. On this, if you have a secondary  Being able to get in and out quickly is essential for a real estate agent photoshoot so using a flash on your camera is always advised as it lets you cut down on set up time per room.
The issue with a flash it that if we point the camera flash directly into the room, we get an unappealing bright area in the center of frame.
This is known as vignetting, but it’s undesirable for real estate photography.
To fix this turn the flash so that it bounces off a wall behind you, the ceiling above, or even one of the side walls. This way you allow that light to diffuse into the space and give a more even look. Of course, these positions aren’t possible with a pop-up flash on your
Being able to get in and out quickly is essential for a real estate agent photoshoot so using a flash on your camera is always advised as it lets you cut down on set up time per room.
The issue with a flash it that if we point the camera flash directly into the room, we get an unappealing bright area in the center of frame.
This is known as vignetting, but it’s undesirable for real estate photography.
To fix this turn the flash so that it bounces off a wall behind you, the ceiling above, or even one of the side walls. This way you allow that light to diffuse into the space and give a more even look. Of course, these positions aren’t possible with a pop-up flash on your  Watermarking is also highly regarded as one of the best ways to establish an easily identifiable brand online.
Much like how a painter adds their signature to a painting, watermarking with a custom
Watermarking is also highly regarded as one of the best ways to establish an easily identifiable brand online.
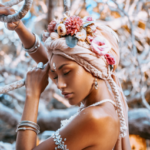
Much like how a painter adds their signature to a painting, watermarking with a custom 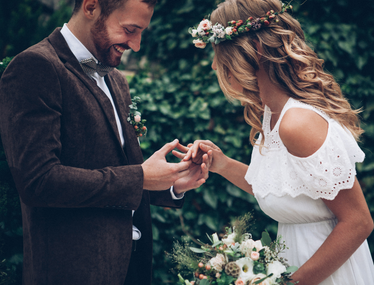 As a fashion style boho is strongly related to hippie fashion, in which natural fabrics, retro patterns, neutrals and warm shades merge with 70s style accents and a flair for statement accessories.
 The fashions labelled as bohemian represent the lifestyle ideology that comes with it – an alternative to the traditional way of dressing, paired up with an equally alternative, more liberated lifestyle and a social stance against everything from materialism to society’s constraints.
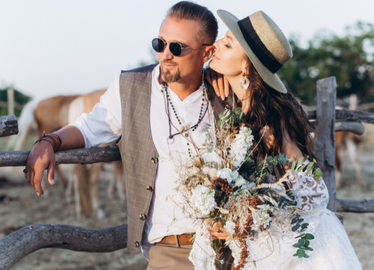 Once you have gone ahead and completed your bohemian
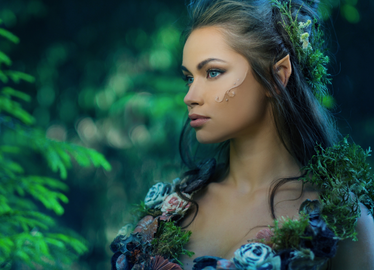
  Often appearing as a dark or angry goddess with blue skin, a garland of skulls and a knife, Kali’s tongue is red with the blood of those she devours. In all of her origin stories, she emerges through anger to destroy evil forces.
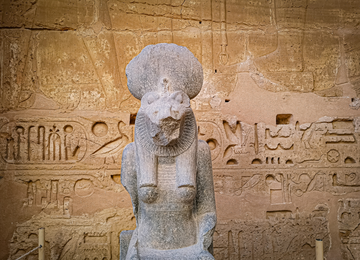 In one legend, Sekhmet was sent by the god Ra to punish humanity for its laziness. Her rampage decimated mankind until Ra decided things had gone far enough.
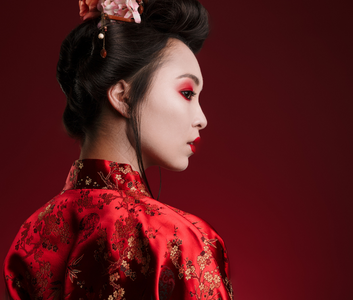 As such, if you’re aiming to find some clarity on lost love, or wish to channel the beauty of these well loved ancient goddesses then these might be the ones for you. However, you don’t need to travel to the underworld to get these photos!
 Remember that every subject is a unique individual, with their own personality and this should be highlighted in their goddess themed
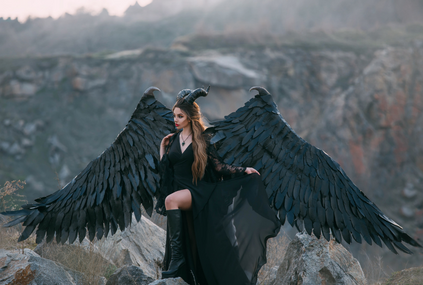
 As a person who publishes any form of work online, you should know the importance of watermarking your work.
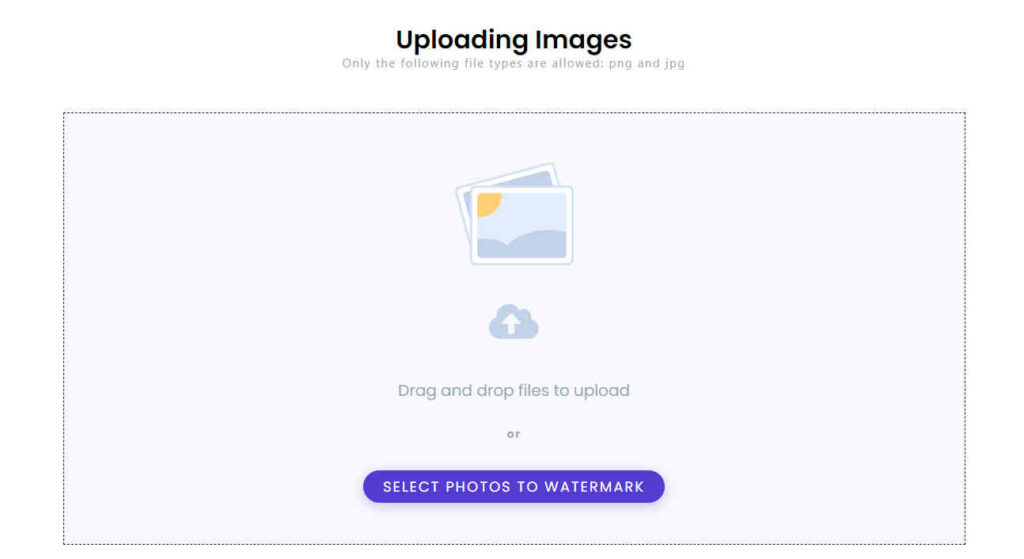


 One of the most important parts of any
  Tripods are extremely useful as not only do they hold your camera in place for you, but they also let you assess the tilt and level of your camera. Nothing is worse than taking your photos home and realizing that you have accidentally shot on a slight slant, throwing off the visual appeal of all your pictures. Luckily, tripods have built in spirit levels, which can let you assess any slope and adjust the camera accordingly so every shot you take is nice and level.
 Candid Photoshoot


 When tastefully done, watermarks could be a wedding photographer’s most potent advertising and marketing tool. If you are a budding wedding photographer, here’s the lowdown on how to watermark your photographs to help you attract new customers.
 Hence, your shared watermarked photographs are a visual recommendation of your skills and how you work. These types of testimonials and recommendations are usually more effective than other marketing and advertising strategies, because:
• they are from trusted friends and family
• they are usually shared with bridal party members, as well as other friends who might also be having celebrations and weddings soon
• they organically reach more people through email or social media
(Nevertheless, some people may still try to remove your watermarks before uploading the photos. However, not everyone would go through the hassle of removing watermarks out of each photo they post, so you would still get some exposure on the internet.)
Hence, your shared watermarked photographs are a visual recommendation of your skills and how you work. These types of testimonials and recommendations are usually more effective than other marketing and advertising strategies, because:
• they are from trusted friends and family
• they are usually shared with bridal party members, as well as other friends who might also be having celebrations and weddings soon
• they organically reach more people through email or social media
(Nevertheless, some people may still try to remove your watermarks before uploading the photos. However, not everyone would go through the hassle of removing watermarks out of each photo they post, so you would still get some exposure on the internet.)
 It is rather frustrating when you find a lovely picture and you want to see more from the owner or photographer, but you are unable to find their details or website. Suffice it to say, that’s a failed chance for that photographer to obtain a client and exposure.
Instead of capitalizing on your interest and drawing your attention to more of their art, you have both missed out.
They have missed out on a potential client, “word of mouth” marketer, social media shares, and loyal subscriber, while you have missed out on seeing more of their work, potentially buying a product from them, reading their blog, etc.
A watermark with their website and contact details would have been all it takes to benefit both parties.
It is rather frustrating when you find a lovely picture and you want to see more from the owner or photographer, but you are unable to find their details or website. Suffice it to say, that’s a failed chance for that photographer to obtain a client and exposure.
Instead of capitalizing on your interest and drawing your attention to more of their art, you have both missed out.
They have missed out on a potential client, “word of mouth” marketer, social media shares, and loyal subscriber, while you have missed out on seeing more of their work, potentially buying a product from them, reading their blog, etc.
A watermark with their website and contact details would have been all it takes to benefit both parties.