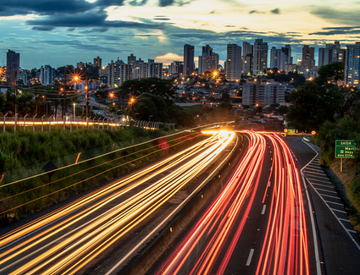
At some point, every photographer creates images featuring light trails and it’s easy to see why. Beautiful and always a hit online, light trail photography is a well-trodden path in photography, as the vast majority of aspiring photographers live near roads or in built-up urban areas. While lights trails are a great subject in themselves, they’re a particularly nice way to introduce a budding photographer to the manual mode on their camera and will also provide some good training in low-light photography.
What Is Light Trail Photography?
 Light trail photography is a type of long exposure photography that highlights the movement of light over time. While this sounds like something from a physics textbook, it is actually quite simple in reality.
By keeping the camera shutter open for a long period of time, you can collect more ambient light and show how that light moves across the frame, hence creating light trails on your photos.
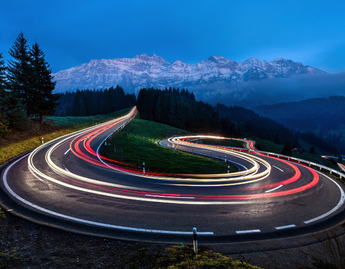
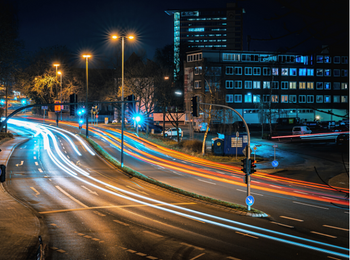
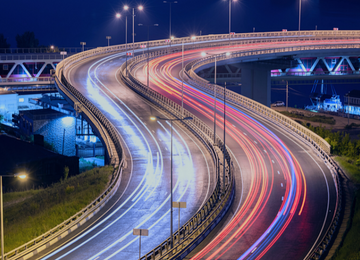
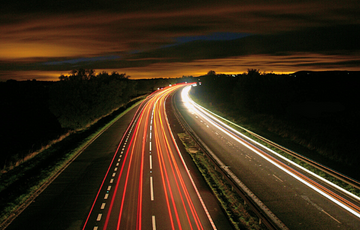
Light trail photography creates a beautiful image from the simple movement of lights seen in everyday life, like car headlights and taillights, headlamps, streetlamps, streetlights, and even bike lights. While you can move a flashlight or laser to create lines in the air, known as light painting, the most common depiction of light trail photography is on a roadway.
Car light trail images capture the paths of illumination created by the headlights or taillights of a vehicle and create well known and widely adored images of traffic and light moving over time.
What Gear Is Needed to Photograph Light Trails
As camera technology has developed over the years, the capabilities of the everyday consumer camera has gotten more and more impressive, to the point where you can capture light trail photos on any camera, even your smartphone’s! However, there is one prerequisite for capturing light trails, and that is the ability and knowledge to control exposure settings, particularly those that allow you to choose longer shutter speeds, in the area of 10 seconds to 1 minute.
 What this means is that in order to capture light trails, you must have a camera or a camera application that can shoot in either full manual mode and/or shutter priority mode.
All DSLRs and interchangeable lens mirrorless cameras should offer this functionality, though certain compact cameras, film cameras, and native smartphone camera apps do not.
However, if you’re desperate to shoot light trail photography on your smartphone, there are specific apps that should allow you to adjust shutter speed and other camera settings.
“You must have a camera or a camera application that can shoot in either full manual mode or shutter priority mode.”
The one other prerequisite for light trail photography is a tripod or some means to rest your camera in a locked off position for a period of time. As such you can perch your camera on a concrete railing, the ground, or even a car in a pinch but it’s really best to work with a sturdy tripod if you have access to one. This is because any form of camera shake can ruin light trails due to the extremely long exposure time required for this specific type of photography.
Another beneficial piece of gear is a lens hood as these block flare from ambient lights, creating clearer light trail photos with less ambient light bleeding in. Another good investment would be a remote shutter release, which allows you to trigger your camera without pressing the shutter button and causing camera shake.
While the two-second or ten-second self-timer is an adequate substitute for a remote release, it can be inconvenient to wait for the shutter to fire while shooting, not to mention it can throw off your light trail photography timing.
One last item to consider is a natural density filter, also known as an ND filter.
 ND filters block light to allow for longer shutter speeds, and usually aren’t necessary if you’re shooting in complete darkness.
However, if you plan to elongate your shutter speeds around sunset and at dusk and shoot light trails during the golden hours, then an ND filter might be a smart investment to help you have complete control of lighting and exposure.
What Are The Best Shutter Speed Settings For Light Trail Photography?
Whether you shoot with a film, digital or phone camera, understanding how each setting functions together and knowing how to adjust the standard camera settings of ISO, aperture, and shutter speed are essential to capture light trail photography. Below is a basic rundown of all the settings that you need to understand for light trail photography:
ISO
ISO is a measure of the light sensitivity on the digital sensor of DSLR, mirrorless and compact cameras. The way ISO functions is relatively simple – the higher the ISO, the more light a camera captures.
Most standard DSLR cameras have ISO settings that range from ISO 100 to ISO 1600 while other cameras may have even higher ISO options.
The trick with ISO is to try and keep it as low as possible, which helps reduce visual noise, a very unappealing look on digital and film photos. Instead, you should be using the long shutter speed used for light trails to gather more light, compensating for the lower ISO.
Shutter Speed
Shutter speed is arguably the most important setting when it comes to light trail photography and essentially represents the amount of time a camera’s shutter remains open to let light pass through the lens to the camera sensor. Shutter speeds range from thousandths of a second to many seconds or minutes. Light trail photography favors longer shutter speeds, between 5 and 60 seconds, so you can capture the full motion of light across the frame, creating interesting and visually appealing light trail photography.
Aperture
The aperture controls how much light your lens lets in the camera, different to shutter speed in that aperture directly related to lens’ diameter instead of sensor exposure time.
 On both film and digital cameras, the aperture is also called a f-stop and is labeled on cameras with measurements like f/8 or f/22.
A favorable aperture setting for light trails is typically about an f/16, which is a relatively deep focal length, meaning that most items in your frame will be easy to see.
Self Timer
Self-timer functions are available on most DSLR cameras and are incredibly useful when it comes to light trail photography.
Since shutter speed and aperture settings for light trail photography let light enter the camera for longer periods of time, any bump or shake of the camera will cause blurry images. As such, using the self-timer function to avoid this is high recommended.
Even better would be to use a shutter release as discussed earlier, which takes out the need for difficult timing or potential bumps.
“Any bump or shake of the camera will cause blurry images, which can be avoided with a self timer.”
Bulb Mode
Bulb mode on a camera is when the shutter button is pressed down for an extended period of time, keeping the shutter open for as long as the button is pressed down. Photographers can try this method of capturing light trails if they have very stable hands or are using a tripod that won’t move when the shutter button is pressed. The benefit of this technique is that when moving objects with light are consistently passing past the camera’s vantage point, this method allows for easy capture of light trails that require specific manual timing.
How These Settings Work Together
When you better understand the relationship and interaction between ISO, shutter speed, and aperture, you can play around with each function to get the best shot from your chosen vantage point. The most important thing to remember with light trail photography is that the darker the environment, the more light you want to pick up.
As such, shooting on a higher ISO with longer shutter speeds and wider aperture settings will let an appropriate amount of light pass through your lens to create a visible light trail. A good place to start would be around ISO 800, with a shutter speed of five seconds or longer, and an f/8 aperture.
What To Do After Shooting Light Trails
Once you have gone out and taken some excellent light trail photography, the next thing to do is publish your work for all to see! However, before you do, there’s one final step to take to ensure that your work is safe, secure, and easily recognizable online. As a digital content creator who publishes any form of work online, you should know the importance of watermarking your work.
“Watermarking can’t be beat, allowing you to safeguard your work from any potential content thieves.”
Watermarking is highly regarded as one of the best ways to establish an easily identifiable brand online.
 Much like how a painter adds their signature to a painting, watermarking with a custom watermark can help potential clients identify your work, helping your photography stand out in the sea of content on the internet.
But that’s not all! In terms of security, watermarking can’t be beaten, allowing you to safeguard your work from any potential content thieves and protect your copyright on all work you publish online.
While there are a few tools online that allow watermarking, no tool can match the free bulk watermarking offered by WaterMarquee.
So, what are you waiting for? Get out there, take some amazing photos and protect your light trail photography with WaterMarquee today!
 The Olympus Tough TG-6 has the ability for Raw-shooting, 4K-shooting, and even has some nifty new features like improved LCD resolution and an Underwater Microscope mode for getting in close. The TG-6 also has a generous 25-100mm optical zoom lens that lets you get closer and closer to the action, making the camera overall a straightforward but sophisticated option, and one of the best beach ready cameras around.
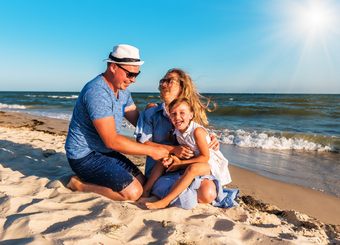 A focal point is
 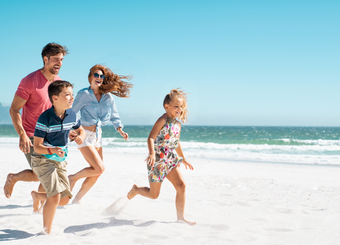 Consider Your Exposure
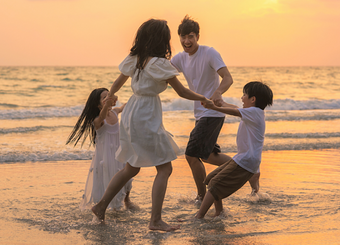 WaterMarquee is a free online watermarking service where you simply upload your photos and get them back with a custom watermark in no time at all. WaterMarquee also offers premium services that will help elevate any work you produce and mark you as a true photography professional. So what’re you waiting for? If you want to protect your beach family photos, look no further than
 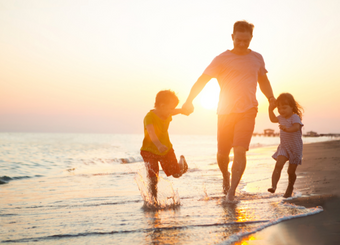 Aperture
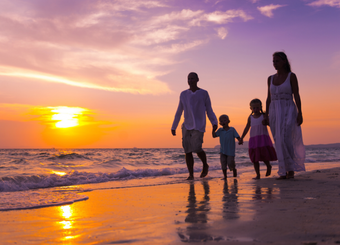 Everyone wants to show off their beautiful sunset family beach photos, but no one wants their
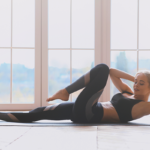
  Unlike glamour shoots, and regular portraiture shoots, where you aim to use one key light, one rim light and a fill light, body building photography requires an entirely non traditional lighting set up. To begin with, the first major difference is the level of light diffusion required. In normal photography, soft light is often viewed as more flattering and a much nicer way to light a subject, however, body building photography is the opposite, requiring hard and harsh lights in order to cast shadows allowing for musculature contrast.
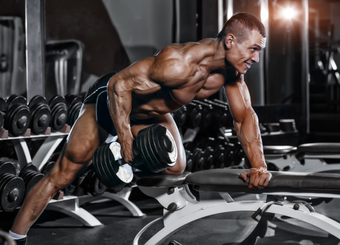 Additionally, you’ll also have to correct for the light around small and large muscle groups in order to achieve the proper form and structure, and increase the contrast around the impressions of the muscles themselves. However, be careful not to overdo it, since it can turn out quite unnatural if you don’t understand the body structure and if you aren’t consistent with the your editing process.
 Unless you’re lucky enough to be shooting a fitness photoshoot for a gym or a promo for a piece of specific equipment, you’ll need to organise a location to take your photos. While this offers you the freedom to take photos wherever you want, you will need to be proactive in finding and securing a location ahead of time that works for you and your client.
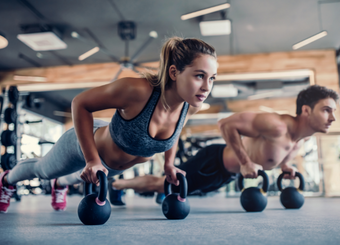 Photographers need to think ahead to avoid wasting time while getting the best fitness photos, as you cant just enter a shoot with only a few ideas about what you want. As such, the best thing fitness photographers can do to prepare is write down the shots they need. This shot list should describe in detail, the angle, focus and style of shot required, as well as how to obtain them.
 Tell the model what style you want in the photos, bring some sample photos of good fitness poses, do whatever you need to incorporate your model into the creative decision making. This is very important as it will help the model feel more confident and allow the photographer to capture the desired photos in less time.
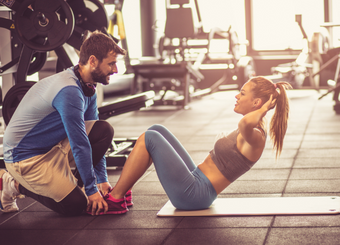 The natural light from a window is well known to be some of the best sources of light, loved by all photographers. A large window provides an opportunity to create direct light, side light, or backlight, allowing for a large variety in pictures. What’s even better is that this light can be controlled through the use of netting or reflectors to diffuse light and create gentle and soft tones.
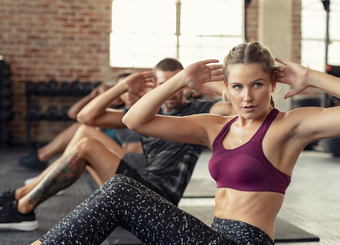 One of the best things about photography is the chance to shoot any angle you feel like, with a the ability to sort through your images after the shoot and decide which ones are the best. This is especially useful in fitness photography as the the angle of the light hitting the subject and the pose angle determines what is emphasized in the photo, with straight-on light flattening out muscles.
 To be a family, coming together over a shared joy. That’s why the maternity photo shoot with family is such a popular service offered by photographers, as well as such a joy to shoot for all involved. So, if you’re looking to break into the photography industry with one of the most special niches around, then taking maternity pictures might be your calling.
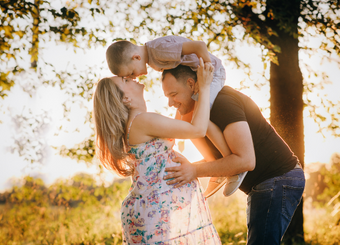 Internally, it uses an APS-C sensor and processor with a few extra features like a built-in flash, useful for less formal maternity shoots, and candid style photos. While it’s not the cheapest camera for beginners, you get a lot of features for your money, and its looks alone could inspire you to take up photography seriously.
 The best maternity photographers know to be ready for anything, and this means ensuring you’ve done proper preparation for the shoot.
 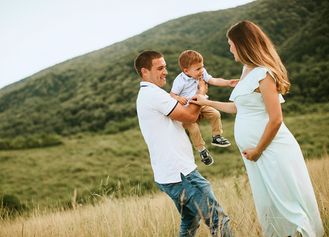 As you wont be shooting professional models, guidance as to posing will be greatly appreciated by any client, and it will also ensure that you get every shot your want from the session. In terms of what to actually shoot however, coverage is key. Get wide, medium and close-up shots and include partners and older children in some of them to ensure you capture the whole family aspect of the maternity shoot.
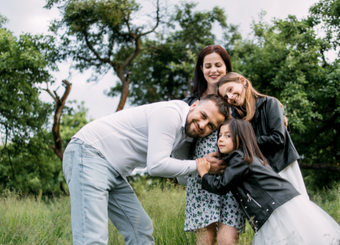
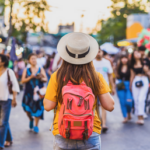
 If you’re looking to expand your skills beyond the occasional landscape or portrait, then a good addition to your portfolio would be photography for models. Photography for models can act as a great creative outlet, can lead to networking opportunities within the
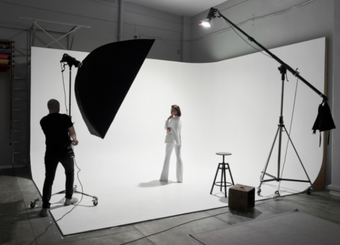
 Whether through networking with other
  Contacting modelling agencies can be intimidating, but by understanding their needs and speaking their language, they will see you as a peer and ally to their business, which is essential, especially in big markets like Los Angeles. After all, much of the
  If your email was successful then you’ll most likely be invited to a meeting to discuss how to move forward. A first meeting with the agency is pretty much a job interview so treat it as such. Dress nice, arrive around 10 minutes early but be prepared to wait 20 minutes and don’t forget to bring your portfolio and some business cards to ensure they take you seriously.
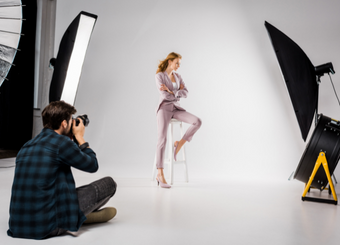 A good way to make sure everyone is comfortable is to create a physically comfortable environment for your models on the day of your shoot.
 No matter what stage of the model photography process you’re in, a top priority for you should be to always keep your work protected from anyone who could be looking to steal, or misappropriate your work. This is where water marking comes in.
 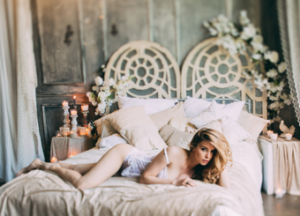 A Boudoir photoshoot is a very intimate form of photography that treads a fine line between fashion portraits and typical glamour
  The setting for a boudoir photo shoot will help to create the right mood and tone for the images while also making your subject feel comfortable and sexy so the boudoir photos turn out well. The first thing to consider when choosing a location is lighting. Good lighting can make or break a boudoir photo shoot, especially if you don’t want to worry about a complicated lighting set up.
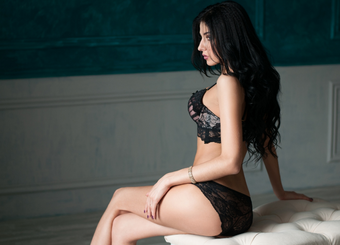 The key to a good boudoir shoot is to have a consultation with your client before the shoot to ensure they feel comfortable and sexy in front of the camera. This is the perfect time to discuss their ideas for the shoot and create a shot list so the client will have a sense of what the boudoir photo shoot will be like, and are comfortable with everything you ask them to do.
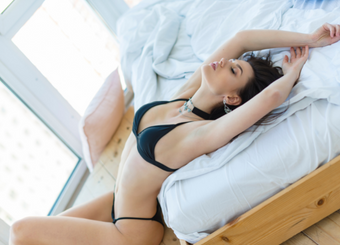 Perhaps one of the more challenging aspects of a boudoir photo shoot is posing your subject in a way that makes them look and feel beautiful. Every person’s body and comfort level is different, so maintaining strong communication with your client is key. Discuss each pose with your client head of time to make the shoot feel collaborative, and create strong boudoir photos.
 WaterMarquee offers a free online
  A common struggle among nearly all creative professionals, finding
  The first step to generating photography customers is giving them something to see. Now, while man photographers take their online portfolio for granted, it is in fact a very helpful marketing tool that should be your first priority when trying to gain new clients. After all, it doesn’t matter how many clients you manage to bring to your website – if they cant see anything of value there, then you’re only gathering visitors, not clients.
 For this, you need to make sure that you have a strong and consistent photography brand. This is the best way to communicate who you are as a photography business and attract those who fit your brand. For example, if you are a
 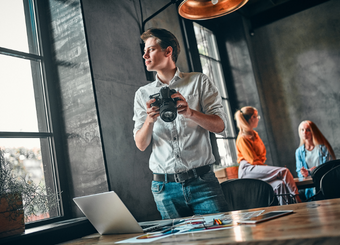 For example, people who are getting married often use Pinterest to find inspiration for planning so having an up-to-date Pinterest profile and focusing your effort there, would be a great plan for wedding photographers. Or if you are specialising in food photography, you could focus more on Instagram as this is the platform where lots of foodie content appears and where your target audience might be the most active.
 Sometimes the reason
  No matter what stage of the model photography process you’re in, a top priority for you should be to always keep your work protected from anyone who could be looking to steal, or misappropriate your work. This is where water marking comes in.
  A majority of photographers are more familiar with traditional-style posed shots, as opposed to candid shots. Posed photos are where the photographer makes the subject sit in a particular way, facing the
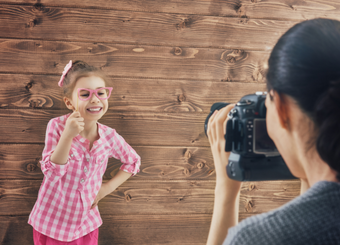 While it might sound obvious, it is important to remember that you’re likely to be much taller than your subjects as a children’s photographer. When photographing adults you have to be very careful about how you pose them, and this is even more so with children, as shooting from your own eye level can create a shoot that is full of photos which distance the viewer from the subject.
 So, if you want to keep your photography safe from theft, then consider using
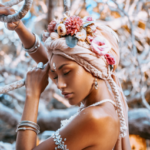
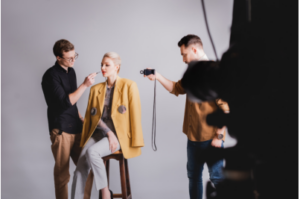
  Model headshots differ significantly from the what most people associate with headshots – the acting headshot. Acting headshots are designed to emphasize expressions on the actor’s face and role type, where as model headshots on the other hand concentrate on the face, the body and the connection between the two.
 A photographer must understand that modelling agencies don’t want to have another model who is just like someone else in their clothing style or acts a certain way to fit in. They are looking for models who are individual in their looks and character, and so this individualism is what you should hope to be highlighting in any model photoshoot or headshot session.
 One thing that a lot of photographers overlook when taking headshots however, is posing, as this can seriously impact the success of a model headshot. A lot of times when models are just starting out, they don’t have many skills in posing or being in front of the camera, which is a shame as posing is key in a modelling career, since it shows that the model knows how to act in front of a
 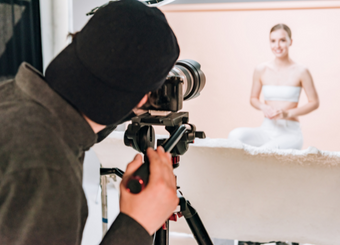 During a model photoshoot, it’s the model’s responsibility to know how to turn their body and pose for the shot, so don’t get too involved with directing, try to let the model do their thing. However, it is the
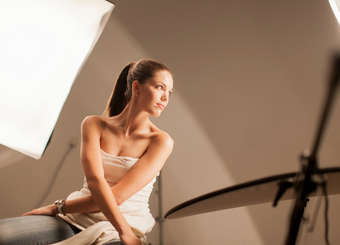 Although the focal point of any good headshot is obviously the face, don’t neglect the background when setting up. Plain or highly bokeh backgrounds usually work best, and be sure to watch for shadows if your subject is standing close to a wall or a screen, as this will make the photo look less professional, which can really detract from a professional model and their looks showcase in the shot.
 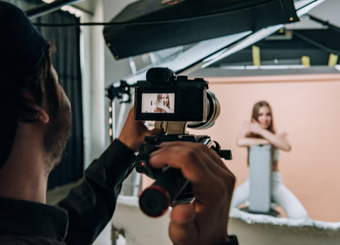 No matter what stage of the model photography process you’re in, a top priority for you should be to always keep your work protected from anyone who could be looking to steal, or misappropriate your work. This is where water marking comes in.
  To start with, the most important tip to avoid shooting awkward family photos, is to avoid silly poses – no wacky faces, no recreations of the last supper, no back to back
  In fact, holding hands is a popular choice as it creates a bond between the people in psychological terms but also in photo composition. The hands have to be visible. Holding them too tight will make two people look like a single object in the frame, while having some distance between the people, while holding hands, gives one the impression of a connection.
 A common problem with
 This means that these websites are super simple to create if you have the right tools, and are even easier to continually keep up to date since all you have to do is upload your latest work to the already existing portfolio site.
 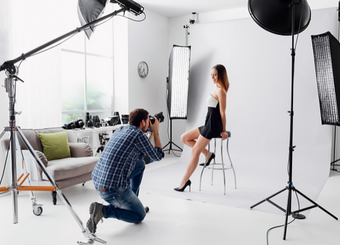 Clients need to know what you are good at what you do, so make sure to show only those images that truly showcase your talent. You may also want to put your best work at the forefront of your website. Most clients are busy and don’t have the time to scan through every
 Another key feature that all the best photography portfolio websites share is simple interconnection between the portfolio site and the artist’s social media pages. With this feature, visitors can share your photos on social media platforms with just a click, allowing you to gain more visibility for your brand and letting clients market your work for you without you having to ever lift a finger.
 So what is a website builder and an online portfolio site, and what is best for your portfolio? Well, while you may have good intentions to build your own custom portfolio site, wanting it to be a representation of your own unique brand, many photographers find it much more effective to focus on their work and leave the coding and technicalities to the professionals. This is where online photography portfolio builders come in.
 Using a portfolio website service with responsive design, enables your clients to see your site perfectly formatted to their device. Also, as mentioned previously, if you plan to give your clients the option to purchase certain images directly from your site, then you should look for providers that have a built-in e-commerce function so your clients can use easily choose and purchase the images they love.
 Adding a visible watermark to all your images before you upload them to your online photography portfolio, helps establish copyright and protects your images. By placing your watermark in an obvious and hard to remove location, you can save your image from unauthorized use. With services like Watermarquee, you even create custom