The aspect ratio is the shape of an image that is created by dividing it into a certain number of equal parts. It can be difficult to decide whichaspect ratioto use for your photography, as there are many different options with their own strengths and weaknesses.
This article discusses some popular aspect ratios in photography, such as 4:5 or 3:2, and what they are best suited for. Read on to see how you can make better decisions about your photographs based on the type of shoot!
Why Should We Care about Aspect Ratio?
Most cameras have their own native sensor sizes. This means that they only produce photographs that are made up of one particular aspect ratio (regardless of how many smaller photos you stitch together). For example, the 16x24mm size was popularised by digital compact cameras. It was also used by DSLR’s for a while before full-frame sensors became popular. A photograph that was taken with a camera that uses 16x24mm sensors will always be square and 4:5.
This may not seem like a big deal, as it doesn’t stop you from cropping your photographs when they aren’t the correct shape. However, if you are producing stock photography or presenting them on certain websites (such as Behance), then having the wrong aspect ratiocan be detrimental for business.
The Most Popular Aspect Ratios for Photographers
The two most important aspect ratios for a photographer are 3:2 and 4:5. Both of these have been used widely at different times in history. They work well with any camera sensor size and allow you to produce stock photos that will be more likely to be purchased by customers.
A popular way of producing these photographs is to create panorama shots; this involves stitching multiple images together after they have been taken so that the final image has the correct aspect ratio for your target market. By using this method, you can shoot a super high-resolution panorama that would not be possible with a single image.
The main thing to consider when you create panorama images is how big they are going to be when printed. Don’t forget about this! An enormous, high-resolution panorama may look great on your computer screen, but it will print as an enormous and unprofessional-looking blur if you don’t keep the target size in mind during the shoot.
How to Calculate the Aspect Ratio of Your Photo
If you’re not sure what aspect ratio your shot will have, the easiest way to find out is by using a simple mental calculation. If you already know that the shape of your photograph is 3:2 (this used to be very common), then it’s easy!
3 x 2 = 6: Find the square root of both sides and multiply them together. This will give you the proportion between width and height. i.e., in this example, it would be 1/6 or 16%. You can use a calculator for complicated calculations like this one!
If you have a new digital camera with a full-frame sensor such as a Nikon D800, there are actually two different dimensions that fit inside the same sensor size because they are slightly different aspect ratios.
1.264 x 1 = 1:1243: Find the square root of both sides and multiply them together; you should get 1/4 or 25%. This is your new, smaller photo’s ratio, but it will still be 4×6 inches big. It is useful to know that these two different sensor sizes have the same area so that you can shoot panoramas without introducing camera shake from moving between frames.
Common Uses for Each Type of Aspect Ratio, and How It Will Affect Your Photos
4:5 – square: This is the standard size for photographs taken with a compact digital camera or point-and-shoot. It results in a square picture that is great for online use. A ratio of 4:5 will crop perfectly when put next to a 3:2 aspect photo; this makes it a popular choice for stock photography.
3:2 (or 6:6) – portrait: The most popular photograph sizes are often determined by the user’s preferred sensor size, and DSLR users were happy with this ratio until full-frame sensors became widely used in 2009.
However, many cameras still offer alternative ratios on their screen so you can choose what best suits you without actually changing your camera settings. These options include 6:6 and 4:5. The square ratio on a digital camera is unusual because the sensor is rectangular, usually resulting in photos that are not the correct shape when printed or viewed on-screen.
3:2 – portrait: There are many use cases for this ratio other than portraits; it is used by professional photographers all over the world. These days image editing software has made it very easy to crop large images into portrait shapes so you might not even need to use 3:2 as a standard aspect ratio!
However, if you plan to print your photographs and they will be cropped by a printer (rather than using photo editing software), then getting them right at the source is best for professional-looking results. If you do want to edit your images later though, don’t forget that they will need to be at least twice as wide as they are tall in order to print correctly.
3:1: panorama This is a common aspect ratio for panoramas; it is used by photographers who are using special software (such as Photoshop or the free/paid Autopano Giga software) to create them from multiple images. It also requires you to shoot your photos with this precise aspect ratio in mind.
If you would like to make a standard-sized, postcard-sized photo instead of printing a panorama, try cropping the image into an 18×24 inch photograph after you have taken it. Your camera may not offer this but it is possible!
Tips on Choosing the Right Camera for You Based on What Kind of Photography You Want to Do with It
There are many different kinds of photography that use standard aspect ratios, from landscapes to portraits and even panoramas. However, you will probably want a camera with a good lens range as well as manual settings so that you can learn to take better photos. It is also very important to choose the right sensor size for your needs if you are buying a DSLR or other advanced camera.
4:3 – landscape: This ratio has been standard for decades in order to provide high-quality images printed onto standard-sized paper/film. The most popular digital crop DSLRs currently on the market have sensors that produce 4:3 images (eg. 80D, 7D, 60D, etc.) because these cameras were designed for amateur photographers who print their own photos. 4:3 is also very popular for printed portraits.
1:1 – square: This is a good ratio if you want your images to be displayed on websites or other media where they can be displayed in their full size without being zoomed out. Photos that are 1:1 in aspect ratio will take up the whole screen when viewed online, and may look distorted if made larger than this. If you want very small prints though, then having no extra space around your subject’s image can make them look interesting!
4:5: panorama – Since most cameras don’t offer a setting for an aspect ratio of 4:5 it isn’t common. However, this aspect ratio is very popular for printing panoramic photos and some compact cameras can do it automatically.
4:6: panorama – This one is mostly seen in portrait mode on digital SLRs since they produce images that are the correct shape for printing as standard-sized postcards without needing to crop them afterward. It’s also a favorite of amateur photographers who like to take landscape photos with their DSLRs because you don’t need to adjust your image size and crop afterward if you use the 4:3 or 3:2 aspect ratios when shooting the photo!
16:9 video format (eg 720p) – Since most TVs have screens with this same aspect ratio, displaying videos at 16:9 makes them look wide when viewed on a television. If you want your videos to be letterboxed (with black bars at top and bottom) then you can shoot videos with this format (eg. 720p) but if you prefer to have no borders around the screen then movies should be filmed in 1080p, which is 16:9 but has twice as many pixels.
1:2 – portrait– Having more height than width gives your photos a slightly different feeling than 4:3 or 3:2 and they are becoming increasingly popular among pro photographers for portraits. 1: 2 images may crop poorly if printed large because there will be slightly less height than width left for cropping afterward.
Conclusion
So, now that you’ve read this blog post and know what aspect ratios are and how they can be applied to your photography, we hope you have a better understanding of the types of cameras available on the market. If at any point in your research process you need help deciding which type is best for you or need more information on a certain product’s capabilities, please don’t hesitate to reach out. Our team would love to answer all of your questions as well as provide our professional opinion for free!
Related: See our complete watermarking workflow for photographers — brand kit, batch gallery export, and the multi-size pipeline for wedding, portrait, and real-estate work.
Watermark Fonts: 5 Effective Tips for Choosing the Best Font
Watermark fonts can impact the effectiveness of your watermark.
When making a visible watermark, both the watermark and any images you add it on are significantly impacted by your choice of font.
If you are not trained in typography art, finding the best font to use may need a long and tedious trial-and-error process.
Here are some ideas to help you in finding the best watermark fonts—the font that would apply to your images, and define your brand.
Types of Fonts
1. Serif
Serif fonts are recognized as traditional watermark fonts and are likely to be applied in print materials. Serif fonts are pleasant to eyes and belong to a tradition, security, reliability, history, and safety.
So if you’re going to market your brand that’s related to any of these categories, you can choose serif fonts. Example: Times, Georgia, Palatino, New Roman, and Cambria, etc.
2. SanSerifs
SanSerifs fonts are usually used in websites and other publications due to their modern, fresh and elegant look.
Their excellent feature is that they don’t have thick and thin transitions in strokes. Example: Arial, Impact, Tahoma, Verdana, Corbel, etc.
3. Script or Handwriting
As a name for handwriting fonts, it looks like a cursive and handwriting script. These fonts are known as graceful, elegant, playful, and feminine, but they are difficult to read.
That is why they need to be used moderately.
They give you a historic look, so if you need a historical text, you can use them.
4. Decorative
These watermark fonts can catch your attention and are commonly used in logos, posters, homepages, and anything that needs to be bold. Example: New Rocker, Pinewood, Curlz, etc.
Look for Fonts that Show Well in Photographs
First and foremost, watermark fonts should show up properly in photographs. After all, a visible watermark is intended to be seen.
If the letters of your font are not readily visible, the effectiveness of the watermark will be greatly reduced.
There are a lot of good watermark fonts that show up really nicely, but a few that have skinny letters don’t.
If you are planning to make the size of your watermark font 36-points or larger, you may be able to use any font except the thin ones.
If you’d prefer to keep your font size smaller so that it does not cover the whole picture, bold font with thicker letters may work well.
Limit Your Choices to Fonts That Are Compatible with Your Branding
Second, good watermark fonts should be consistent with your current branding. Keep in mind that your watermark may be the first branding that prospective customers are exposed to, so your watermark must serve the same message as the rest of your marketing and branding efforts.
To find watermark fonts that match your brand, first look at the fonts on your website, letterheads, and business cards.
If any of those work well as a watermark font, it would be easy to choose.
If none of the fonts you are currently using work as well as a watermark, you might want to change the fonts on your website, business card, and letterhead to match your watermark fonts.
Using the same fonts across all of these areas will ensure that you have a consistent brand message, especially inFood photography.
Select a Watermark Fonts That Enhance Your Photos
Third, the ideal font is going to enhance your photos. It’s not going to overwhelm your photos and undermine them. Furthermore, it will add to them by enhancing the feeling that your images evoke.
The exact font that complements your photos will depend on what type of image you specialize in.
For example, if you take landscape shots of rural barns, you are going to want a different watermark font than someone who specializes in grunge portraits of inner-city youth.
A flowing font that resembles a handwritten cursive may reinforce the old-fashioned, relaxed feelings that remind us of country barns, while a block lettering font might better suggest the graffiti that is found in a lot of inner-city neighborhoods.
Consider Multiple Fonts for a Multi-Faceted Watermark
Ultimately, you do not have to limit yourself to one font. Having different fonts will help you identify styles or collections from one another while maintaining continuity within each collection and having fonts that enhance each collection of images.
Using several fonts inside a single watermark can also be useful, as it makes it easier to discern the various components of your watermark and allows you to consolidate styles into a single watermark.
If you are searching for the best font for your watermark, check out the choices on Watermarquee, a free watermarking software.
Not only does the platform offer photographers a wide range of fonts to choose from, but it also lets photographers use as many fonts as they want.
Bottom-line
While there are a few instructions that you can follow to build your watermark, there is no right or wrong answer. You can make a variety of watermarksand apply them to your images.
Related: See our complete watermarking workflow for photographers — brand kit, batch gallery export, and the multi-size pipeline for wedding, portrait, and real-estate work.
Free Watermark Maker — Online & Browser-Based
If you want to protect the copyright of your work and ensure that it cannot be reused or altered without your permission, then watermarkingyour photos should be an essential part of your process. Not only can watermarking act as a form of insurance that your watermarked images will be protected from desperate thieves, but it can also act as a branding tactic.Much like a painter will mark their work with a signature, a photographer or digital content maker can create custom watermarks for their work, almost like a watermark logo, which is a way to get your name out and heighten brand awareness.Luckily, watermarking is as easy as it is useful! With a great range of software out there offering watermark templates and general watermark services, there’s no end to the options. In fact, there are even a select variety of services that offer free watermarking! So, if you’re looking to watermark photos for free, then look no further than these free watermark app options.
What Is The Best Free Watermark Maker?
PhotoMarks
PhotoMarks is a watermarker software that works across desktop operating systems (both Windows and Mac) and also on portable devices, (iOS only) which means you can use it to create image watermarks whenever and wherever you are. PhotoMarks watermark tool can be used to layer multiple lines of text over pictures and add text effects like stroke or shadow, making it ideal for photographers and other creators who want the flexibility to add watermark’s that have a transparent background and adjust watermark position on the fly.
Format Factory
As far as watermark programs go, Format Factory is relatively comprehensive for a free watermark software on Windows 10. Able to process both still photos and videos, it appeals to users who need to work with both media. Format Factory is also very versatile, offering the ability to watermark Instagram photos, set a manual watermark position, preview watermark content and event adjust watermark position on videos, a service that is rarely offered by other apps, making it a good choice if that is a priority for you.
UMark
UMark is a watermarking program that handles bulk images processing easily. With uMark you can easily stamp your watermark, barcodes or QR codes onto pictures to make it easier for viewers to navigate back to the original author. It’s also available in eight languages, making it more accessible than other software for watermarking images.
Motionbox
A little more slick in design than many others in this round-up, Motionbox can be used as a free photo editing software to add a watermark but also doubles as an app that lets you add automatic subtitle captions to video content. An odd combination of services, but still very useful if the need for subtitles ever arises. In terms of actual watermarking capabilities however, motion box is slightly lacking, not allowing you create watermark or logo watermark options manually, as well as lacking any output settings screen, meaning it Motion box can’t be used to resize photos.
The Best Option – WaterMarquee
Users looking for the best free watermark service, however, should look no further than WaterMarquee. This free watermark software is browser based, meaning that it can be accessed by any kind of device so long as it’s connected to the internet. This is excellent in terms of versatility as it allows anyone to import images from anywhere at any time, whether it be at work, at home, or even on holiday, a level of flexibility that is perfect for the busy photographer.And yet, for such an easily accessible option, WaterMarquee is also impressively powerful and generous in its features. With WaterMarquee you can create and upload custom watermarks, resize images directly in the browser, and then go ahead and watermark pictures and images however you like, thanks to the service’s impressive export settings and unique watermark designs. Thanks to these features, and the service’s impressive accessibility and versatility, WaterMarquee stands out as the best free watermark maker.
How Does WatermarqueeWork?
Import Photos IntoWaterMarquee
WaterMarquee is a very simple to use solution, that makes it incredibly easy to add custom watermarks. The first step is to drag and drop your photos, or even whole folders into the web page, or click on “Select images” and pick one of the following options: “From My Computer”, “From Google Drive” or “From Dropbox”.This will import the photos and images you select without any more hassle, and without storing them in any insecure system server. With this method, you can go ahead and add as many images as you please to WaterMarquee with only the press of a few buttons. How easy!
Create, CustomiseAnd Add Watermark To Your Images
Once you have uploaded your images you can start to get creative. Our service offers a broad range of options, so be sure to make use of our fully featured toolkit to edit your watermark. With WaterMarquee you can create custom watermarks without any hassle by simply choosing a font and color of the initial watermark.From there you can then adjust the size of the watermark, add a manual watermark position, and then go ahead and fine tune the opacity of the watermark, letting you really polish the overall look of the final product. This means with WaterMarquee you can play around and experiment as much as you want, feeling free to let your creativity flow, and making your ideal watermark that can not only protect your work, but also act as a form of artistic signature – what other free watermark maker offers a service like that?
Export Watermarked Copies
Once you’re happy with your watermark, you can begin exporting simply and easily. Unlike other free watermark maker services, WaterMarquee doesn’t need the express and written permission from the software provider, a hurdle which usually involves a membership option, making your free watermark maker much less free than it seemed at first.With WaterMarquee however, you dont need to ever worry about hidden charges or complicated exports, instead giving you the ability to simply create, upload and then export your watermarked photos, even offering the advanced customisations option of selecting the format and quality of your watermarked pictures. All you have to do to complete this process is click on the “Watermark Images” button, to start the watermarking process, which won’t take longer than a few seconds.An even better feature that WaterMarquee provides is total retention of your original images. This means that instead of altering the original file provided like some free watermark makers do, WaterMarquee instead creates an entirely new copy of the original image, on which it applies your custom watermark in the exact location and style previously specified. Once the process is finished, all you have to do is download your watermarked copies to your device or save them to Google Photos, Dropbox, or any other cloud storage services. Once you’re done, WaterMarquee will go ahead and erase the photos you uploaded from its system, meaning that they will never have a chance to get into the wrong hands.
A Few Watermarking Tips
Before you start watermarking it is important to have consider these useful watermarking tips, which can really help elevate your final product and ensure that you’re getting the most you can out of your free watermark marker.To start with, it’s important to remember that if your watermark is small and tucked into the corner of your image, crafty content thieves could still crop it out, so it’d be wise to place your watermark somewhere where it can’t be easily Photoshopped out. In fact, if you’re watermarking a digital image to protect your work, it is best to position your watermark over a busier part of the image to make any photoshopping even more difficult for thieves. Of course, there’s always the possibility that some desperate thieves will attempt to steal your watermarked works, however their attempts will be futile if you have placed your watermarks correctly, as they will either end up ruining the work in the process of removing the watermark, or when they publish the stolen work, it will still be directly attributed back to the real owner. Another useful watermarking tip is to really consider placement, style and opacity. While they’re always going to be effective, the bland and generic watermarks offered by some other free watermark maker services can really make a photographer’s work seem tacky or even unprofessional. To avoid this, creating a custom watermark that really represents your brand as a photographer is always a good decision, and it can really help elevate your work to the next level if used correctly. If you’re looking for inspiration, consider scrolling through some other professional photographer’s online albums and seeing how they incorporate watermarks into their work in a way that doesn’t detract, but instead adds to the overall product that they’re trying to sell.
What Are You Waiting For?
If you want to keep your photography safe from theft, then its time to start using WaterMarquee’s free watermarking services, where you can create and upload your own custom watermark that will keep your work safe, and even double as and easily recognizable digital signature to really make your work pop.Once you’ve dived into everything WaterMarquee has to offer, the app even has a pro plan, that gives you unlimited access to all features and unlimited watermarking for all your photos for only $19.99. So, what are you waiting for? Protect your photography portfolio today with the great watermarking for free service from WaterMarquee!
What it does: Watermarquee’s free watermark maker lets you add a custom text or logo watermark to photos directly in your browser — no signup, no software install. Upload one image or a folder, choose your watermark, position it anywhere on the photo, adjust opacity, and download the result in seconds.
Everything You Ever Wanted to Know About Watermarking But Were Afraid to Ask
Watermarking 101
If you’re a photographer or a consistent digital content-maker, the question of watermarking your work has likely come up. But while you’ve heard that watermarks are a sure way to let the world know certain assets are yours, you may still be hazy on the what, how, other purposes, and best practices around this process. So, to help you make an informed decision on whether to watermark your work or not, we’ve decided to do a deep dive into and everything you ever wanted to know about watermarking but were afraid to ask . Let’s get started!
What is a Watermark?
A watermark is a type of graphic overlaid onto an image. It’s typically transparent or monochromatic so that viewers can still see the details of the asset under the imprint.
Today, watermarks tend to be found on photos, illustrations, and other digital art, but you’ll also see them on stamps and legal docs like passports, and banknotes where they’re used to prevent counterfeiting.
In a pre-digital world, the source of an image was stamped onto the back of that image. Some print stamps were even embossed so that the photo would be slightly raised on the other side disabling its use.
Nowadays, of course, few photos are printed first as practically everything is uploaded online for the digitally savvy market.
But this in itself causes problems – which brings us to the next question: why use watermarks?
Why Use Watermarks on Your Work?
The main reason for watermarking your work is to assert copyright protection. Online content is constantly being poached or plagiarized.
With 4.48 billion people actively using social media alone the need for new and novel visual content is higher than ever …and some feel it’s AOK to swipe someone else’s content to keep up with output.
But if you’ve labored over a creative piece of content, you wouldn’t want another to claim ownership or even just to use it without your consent, right?
That’s where watermarks come in.
Signifying Authorship
A watermark with your name or logo embedded in it signifies you as the author or creator. If you’ve created the content for sale, a more obvious watermark in the center or over the entire image can prohibit unauthorized use completely.
Brand Recognition
In fact, if your business is photography or the creation of other visual art or content, watermarked work can help potential customers recognize your brand. The consistent use of the same logo or your signature on every piece of work you create will not only improve brand awareness but also help folk find you easily in the crowded online world.
Protection Against Misuse
It’s not just that someone else might profit from your photos (though, who wants that!) The issue is also that your images and content may be misused. Every day people share, copy, cut, and paste others’ content as standard practice, often not realizing that what they’re doing is unethical if not illegal.
But be warned – even if they do, the laws governing copyright and fair use provisions can be a little unclear.
This means that if your artwork suddenly ends up as a backdrop in a YouTube cat video, it can still be difficult to prove misuse or even that the content is yours – especially if there are no signifiers on the work in question to back you up.
Further Uses of Watermarks
Watermarks can be used on all types of digital content. Across the Internet, you’ll see a variety of different overlays on photos, illustrations, and digital paintings and drawings signifying authorship and protecting against unauthorized usage.
Adding Dates and Details
But watermarking is also often used to add details or descriptions to an image. For example, a photo of a historical event may have the date imprinted on it or a very short summary of what the viewer can see.
World-renowned media organizations and businesses do this to such an extent that the details are now part of their brand. Think of the bottom black bar of an image released by National Geographic or the descriptions on property photos from realtor company RE/MAX. Both these organizations use watermarking to offer additional information to their content viewers in a way that promotes brand awareness but remains professional-looking and unobtrusive.
Adding details to images is something that many like to do with their personal pics too. It’s a great way to remind yourself of the places and people that have brought color to your life.
For example, how many times have you come across digital photos of past events or holidays, and tried to recall where the photo was snapped or the name of the guy on the left who told those great stories and fell into the pool that time?! Watermarking helps you relive happy memories without having to wrack your brain for the little details!
Creating Memes
Further fun use of watermarking is the ability to create memes. The internet today is choc-full of comical captions and quotes emblazoned across pics of adorable babies, cute pets, and pop culture moments.
If you’re yearning to create a meme of your own you can do so using our watermarking tool – and add a watermark of your own name alongside it too!
Watermark Best Practices
Aside from memes and personal captions on pictures, if you’re using watermarks in a more professional capacity it is important to follow best practices to ensure their effectiveness.
Size
For starters, size does matter. Sure, you want your watermark to be legible but you don’t want it to be the first or only thing a viewer sees.
On the flip side, you don’t want it to be so small either that it defeats the whole purpose of being a watermark!
A minuscule symbol in the bottom corner of your asset can be easily edited or cropped.
Color
Watermarks used directly on an image tend to be white or grey and somewhere between 30-70% transparent. This means that even if it covers a significant part of your picture, viewers will still be able to see the image below.
A colorful watermark will not only arrest the attention of the viewer but may mess with the content of your image too, particularly if you’re already using a lot of colors in the original photo or artwork. And c’mon, why spend so much time and energy creating a piece of content, only to dilute or disfigure it through your watermark?
So, when considering size and color, think of an overlay that does not detract from the image you’re promoting but at the same time acknowledges you as the owner and asserts the content as copyrighted. The (usually) right-sided, translucent grey bar with text that Getty Images use is a good example of an obvious yet unobtrusive watermark.
Content
One of the wonderful things about creating your very own watermark is that you have endless options to choose from. It’s completely your design. So, don’t create a watermark off the cuff. Instead, put some serious thought into creating a specialized watermark that’ll work for you or your business.
Will you use your logo and if so, is it discreet enough that it won’t encroach on all of the diverse images you’ll need to watermark over the days, months, and even years?
Perhaps you want to use your signature. Many artists do this when uploading images of their artwork online.
Or you may prefer to use a symbol that signifies you or your business. Whatever, watermark you do opt for, just think of the long game and how this watermark will appear on your assets, and work as an effective tool for you.
Adding a Watermark
Adding a watermark to your photos or content is super-easy when you use Watermarquee.
Our aim is to help you create the watermark that you want and need within minutes.
Because the truth is, watermarks are a necessary tool to use in a world gone digital but they don’t have to add to your workload or disrupt what you do.
Instead, a good watermark, easily created, should protect your work, boost your brand and help you to continue business as usual. Start watermarking today with Watermarquee’s Pro Version for unlimited watermarks.
Whether you’re travelling around the world or to the beach for the weekend, taking photos is a fun way to document your adventures.
Sharing your journey onsocial media or planning on taking your photography to the next level? Whatever you decide, these tips will help to improve the quality of your photos and protect your images using a free watermark maker.
It does not matter if you are using a phone or a fancy camera, just think about how you are going to make an image uniquely yours – to create better travel photos (and possibly monetize them in the future).
Snap the needed shots, but add a twist
I’m sure that anyone who goes to beautiful Paris is mandated by law to take a shot at the Notre Dame, Eiffel Tower, and the iconic River Seine. These photos are the ones that shout, “Hey, I was actually there!” Nevertheless, if you are doing something unique and different, these are also the travel photos that people will jump over quickly.
Know your exposure
To add a twist, take a shot from a different angle. Get high, get low, get close, get far, but don’t be boring. Placing a famous landmark in the background may force the viewer to do a double-take.
Most cameras have scene modes that adjust camera settings to suit shooting situations. For instance, the portrait mode tells the camera to set a wide aperture to blur the background, while in the landscape mode, it sets a small aperture to capture a lot of sharp detail. It is better to swap between these modes than to shoot in a fully automatic mode.
Shoot quickly
Candid photos of people are an excellent way to capture the vibe and energy of a new place. You want to capture people candidly when you are photographing someone. So do not linger on, get the camera ready, and shoot the scene quickly. If you are seen, and you are smiling, that’s alright: give them a friendly wave and ask if you can snap another one.
Shoot themes
There are often small details that remind you of a particular place. In the spice market, for instance, it could be the vivacious colors, in the old Tuscan town, it could be the texture of the old walls. Whatever it is, make it a point to shoot a series of images of it. keep in mind that it is the details that you remember instead of the bigger picture.
Use selective focus
It is not enough to have a very interesting subject. It is our mission as travel photographers to make an interesting image of sometimes uninteresting subjects. We can do more than just click a picture; we can take pictures of what we’re thinking and how we feel.
We can use a wide-angle lens to overestimate what is closest to the camera or telephoto to compress the scene. If we have enough light or a tripod, we can decide to do everything in focus. Alternatively, we can choose to use a shallow depth of field and concentrate on just one element of the image, leaving the rest of it out of focus.
Shoot at nighttime
A lot of places look better at night since most attractive buildings are lit during that time. However, it’s best to snap photos while there’s still some color in the sky before it’s too dark; this will give you more stunning images with less dense shadows.
Keep the camera sensitivity (ISO) set low; this will guarantee the best quality travel photos with the most beautiful colors.
Use culture to your advantage
Take note of local customs and traditions. You should also study some of the customs and traditions of the location you visit. Some of the best photographs can be taken during ceremonies or on special occasions that are relevant to your destination.
A lot ofexperienced photographers say that this is one of the best tips for great travel photos because traditions and customs are specific to the site you are visiting, and memories are irreplaceable. If you take pictures of these special events, you’ll end up with unique photographs that show the true experience of your trip and the people you’ve met.
Silhouettes
Creative silhouettes can be shot at any time of day by looking for a camera position that puts the photo subject against a bright background and adjusts the exposure control. It is essential to have a strong contrast between the object or subject you are trying to silhouette and the background.
Do not forget the people
Make sure you get some photos of the people you’re travelling with and the people you’re encountering along the way. Many people make the mistake of just taking pictures of the scenery, and return home disappointed because they forgot to take pictures of themselves at incredible locations, or their family or friends enjoying the trip.
Actively engaging in conversation with your chosen subject should happen before or after a photo-shoot — not during, doing so may result in unflattering images. It is better to share a quiet and tranquil human moment and let the lens peer into the window of your subject’s soul.
Environmental portraits
Photos of people in their surroundings add an essential human component to any travel stories. Professionals tend to use a medium to wide lenses for environmental portraits, with the aim of producing an image that conveys emotions and interaction with the subject.
Travelling is one of the most rewarding gifts we can give ourselves, and memories can last a lifetime. To help you remember those moments and share your experiences with others, use these tips for great travel photos to help make sure your photos that will help you relive the magic of your journey throughout your life.
Protecting your photos with a watermark maker
You’ve exerted effort and spent time taking those shots and making sure they look good—don’t let other people on the internet steal them and claim your works as their own. Protect your photos with a free watermark maker, like Watermarquee. Watermarquee is a free watermark maker that allows multiple watermarking of photos for added convenience.
It also offers a pro watermark maker version for only $19, which allows users to upload bigger photo files to be watermarked. Check out our watermarking tips here using our favourite watermark.
Heading to Australia? Our companion guide Photography in Australia: 12 Iconic Locations has location-specific tips for the country’s most photogenic spots — Uluru, Kakadu, the Whitsundays, and beyond.
Beach Photography-15 Tips for Perfect Summer Pics
What makes beach photography an interesting niche?
Beach photography tips are well loved because everyone likes a beach trip–especially taking photos of the sun, sand, and sea. Even if you’re not a surfer or a sunbather, walking on the sandy beach is a wonderful experience.
There’s something about the sense of renewal that’s always there; as the tide flows and ebbs, the waves continually wash and hit the sand. Going to the beach takes us back to nature and rejuvenates our weary spirits.
This makes the beach an ideal place for showcasing your photography skills. There are changing textures, dramatic lighting, movement, wildlife, and picturesque scenery. What else can a shutterbug wish for?
Here are our top 15 tips for amazing beach photography:
15. Have a Beach Photography Subject
Our first tip might sound like a no-brainer. Nevertheless, how many mediocre beach photos have you seen? The aspect that is missing a lot of the time in beach photography is the focal point. It doesn’t have to be any obvious thing, like an animal or a person. It would still work well for dunes, fences, shells, or even a footpath on the sea oats.
Beach photography needs something to catch the audience’s attention. It helps add more depth to the picture, too. Try to have a foreground, a background, and a middle ground. This is composition. However, sometimes when you’re at a location that’s as stunning as the beach, the basic composition can easily be overlooked.
Beach photography is no different from other landscapes. Still, you also have to exert a little more effort to add dimension.
14. Circular Polarizer
If you’ve never fitted your camera with a circular polarizer, you’re in for a treat. It is an essential tool while working around water. Nothing will make your beach photography more stunning.
A polarizer allows you to control which lightwaves are entering through your camera. With a polarizer, you can also enhance the reflection of the water, which is especially useful for sunsets.
13. Textures and Details
Textures also form perfect focal points for spectacular beach photography. The ever-changing yet beautiful ripples of sand are both fascinating and breathtaking. Wind-swept dunes offer a lot of charming details and textures that you can focus on.
The beaches also have tiny details that are often overlooked. By focusing on those details in the foreground and leaving the vast views in the background, you can add even more interest and expand the scope of your composition.
12. Slow Shutter Speeds
Slow shutter speeds paired with a powerful tripod will take your beach photography up a notch. Slow speeds can blur the waves’ motions, and even add depth to the clouds’ movements.
A benefit to doing this is that the pictures take on a fantasy-like, ethereal quality. Combine this strategy with the golden hour for beach photography that is out of this world.
11. Use Your Lens Hood
Daylight at the beach tends to be especially harsh, whether direct from the sun or bouncing off the sand. To keep the metering system of your camera accurate and to steer away from unpleasant lens flares, take your lens hood out. If you’re like a lot of photographers, you’d probably find it at the bottom of your gear bag, and it’s rarely used.
Still, it is one of the simplest items to use to improve your beach photography.
10. Avoid Midday Portraits
If you’re doing portraits at the beach, avoid doing it during midday when the sun is straight overhead. It would be too harsh, and you won’t be able to do your subject justice with the photos you’d produce. The light reflecting off the sand adds to the problems; under these conditions, shooting results in blown highlights and unsightly facial shadows.
The best choice is when the sun is setting low, just below the horizon. The light quality would be a lot better, more directional. When it’s late afternoon, however, you might want to use a fill flash or a reflector to control the light falling on your subjects.
9. Sunrise or Sunset
Sunrises or sunsets are what beach photography is all about, depending on how you look at it. Absolutely nothing is more spectacular than the sun falling into the horizon with the yellow, pink, and orange clouds just right.
The late afternoon photoshoot is a big part of the beach photography experience. The changing light is as much dynamic as it is obvious. The light intensity fluctuates every few minutes, and a good photographer will always find a way to make the most out of it.
8. The Golden and Blue Hours
The golden hour comes before sunrise or after sunset. It is the time of day, say during sunsets, when the light is soft and lovely and not too harsh. As the light is indirect, it doesn’t make unsightly shadows on people. The golden hour is literally the perfect time to shoot photographs of the beach landscape. The sky is dramatic.
The reflections of the sea are stunning, and the light is perfect for shooting subjects and people in their best light.
On the other hand, the blue time comes after the golden hour. The light dims and becomes bluer as the sun starts to set lower. This is the ideal time of the day to try long exposure photography. The stars are coming out, but there’s still enough light in the atmosphere to get nice images of the landscape.
7. Night Photos
Seaside venues make for a perfect location to take star photos because they appear to be away from light pollution.
Second, the scenery is ideal for stars. If the waves are calm, you could even get some reflections of the stars on the water. Try your hand at snapping wonderful Milky Way photos with a super-wide lens.
Set the aperture as wide as possible, and play with the ISO and shutter speed before you shoot. A lot of newer DSLR cameras do a pretty decent job.
6. Reflections
Check for reflections in tide pools or wet sand, regardless of what time you start your beach photography. Keep in mind that reflections add depth and interest to photographic compositions. Always find ways on how the reflections can be further emphasized through your lighting setup.
5. Off-Season Travel
One of the main challenges when going to the beach are the other tourists. Crowded beaches aren’t ideal for beach photography. You can’t control the background, and some people don’t want their pictures taken. During the peak season, it would be difficult to find a beach that you can enjoy for yourself.
It’s not always easy to do, but you can plan your travel when no one else does. Travel when the weather of a particular place you have in mind isn’t great. For example, don’t go to beach destinations during the summer months. Remember that dramatic storm clouds and fog still make for remarkable beach photography.
4. Add Light When Needed
Sometimes, regardless of how bright and sunny the day is, you’ll still need to add light to gain more control. Starting with natural lighting is always best, but sometimes the shadows are just too harsh. When you do a portrait photoshoot, you need to prepare yourself for this eventuality.
A reflector can soften shadow and add a touch of light. You’ll need a sturdy stand to hold it in place, though, particularly at the beach where the sea breeze can topple it. Reflectors come in gold, white, and silver.
The gold side adds warmth to the light, which matches perfectly with beach photography. Diffusers and shades can also be helpful.
3. Monitor the Background
Beaches are wide areas that it’s sometimes a challenge to monitor everything that happens within the photo frame. A lot of things, like people walking along, clumps of seaweed, trash cans, and signs, can look awkward and out of place in a picture.
Although some of these can be edited during post-production, getting it right the first time and paying attention while shooting, is much easier.
2. Break Out Your Drone
Aerial beach photography is a fantastic way to shoot from a new perspective. Some of the most striking beach photography shots are captured straight down. It has no horizon, so it relies entirely on lead lines, as well as on other elements of the composition.
1. Keep it all Clean
None of your costly equipment like the beach as much as you do. Sand comes in and messes up nearly everything—add that to the moisture, corrosive salt, and hot temperatures in your environment. Always have an air blower in your bag and a few lens clothes to keep everything clean and sand-free.
Conclusion
There are as many beach photography styles as there are beaches all over the world. Beaches are beautiful places that connect people together.
The universal fact is that people go to beaches for rest and relaxation. Use your beach photography to share a little bit of that natural beauty with those who can’t travel, or to inspire people who never thought of doing so.
For some of the most photogenic beaches in the world, see our guide to Photography in Australia — Wineglass Bay, Whitehaven, Cape Byron, and other Australian coastlines worth a flight.
10 Most Exciting Photography Trends to Watch Out For
Why should we be aware of the newest photography trends?
A few years ago, photography trends were only interesting for professional photographers whose bread and butter are the pictures and images they take. Upcoming fresh trends, however, have such an immense impact on the world of photography that photographers must be aware of what people will be watching for in the future. It will also be beneficial to have some time to think about these upcoming trends in photography and to recreate the wheel and make something similar but new. Hey, you might even get some ideas on how to build your first online photo portfolio.
Times Have Evolved
The art of photography is no longer something for a limited number of people – it’s a favourite hobby of millions. Innovations affect our lives at every turn, and there are tons of new trends in photography that people want to be part of.
Accessibility of modern and state-of-the-art photography equipment has opened the door for enthusiasts, amateurs and professionals alike to pursue new niches in capturing captivating images. As photographers try to experiment with new techniques, some exciting photography trends emerge and produce beautiful results. Here are some of the newest and freshest photography trends to check out in 2020.
Macro
Macro photography is a photographic style that zooms in close to an object (or part of it) to capture its intricate details. Think of pollen on the wings of a flower or a butterfly, for example. Macro photography takes a day-to-day object and displays it in a way we have never perceived and thought about before.
When we look at the subject through a macro lens, or the special device used to make every layer of detail clear, for the first time, our mind is fascinated by the opened scene. In this special moment, people could easily forget that millions of other people have already seen and photographed these things. In photography trends like this, you’re going to need to be more creative and original.
Film
While most of the population enjoys the freedom of digital photography instead of using traditional film, photographers are back in film photography. It requires thoughtfulness and intention to make sure the angles and lights capture the best shot possible before shooting a photo. Working with photographic film also allows photographers to discover the basis of this visual world. And best of all, after capturing your shot, you have a physical, tangible object.
Light Painting
This method is one of the most versatile photography trends. The same image can be shot in several different ways by experimenting with exposure time, natural and artificial light, and reflection.
This is a profitable trend for photographers because of its unlimited creative potential. Everyday photos become captivating works of art with a few simple adaptations of lighting. It does not need any special equipment or lenses and is not limited to studio settings. For photographers who enjoy experimenting with shadow and light, light painting is an excellent niche to show off their artistry and skill.
HDR
High Dynamic Range (HDR) photography is a method that taps the range of brightness between the lightest and darkest areas of the subject. It does not need any special equipment, although it takes a little more time to edit and get the wanted result. HDR photos are perfect for portrait and landscape photography because of their ability to highlight differences between light and shadow in an image and to strike a balance within the two.
A lot of modern cameras have an HDR setting that lets the user set the contrast styles directly in the shot and saves the editing time. Some photographers choose to take three photos at different shutter speeds and then combine them to create a final image.
Panoramic
Panoramic photography, or photography, uses wide-format photographs to capture larger images, such as skylines and landscapes. It’s designed to capture the image in the same way our eyes can see it.
If a wide format lens is not available, but you want to experiment with photography trends like this, many smartphone cameras offer panoramic settings. You could also edit individual photos to create a single panoramic shot.
Aerial
Air photography used to be limited only to those with access to helicopters or aircraft. Now, thanks to the popularity of drones, almost anyone can take mesmerizing images from the air. The clumsy drones of the past that cost the arm and the leg have innovated into a new generation of compact photo drones that cost less and take higher-quality images with a wide range of settings. While there are state rules for where and when drone photography and photography trends like this are acceptable, there is a rapid trend as a new outlet for architectural, landscape and wildlife photographers to capture images that would otherwise not have been feasible.
Vibrant Colors
Bright and bold and strong, colours are what we expect to see in 2020. We believe this is to draw attention to the hundreds of thousands of photos that are taken and shared daily. The bolder and stronger the colour, the louder it cries out. And that’s what it needs if it’s to get seen. Graffiti, wall paintings, and other outdoor ideas are also becoming more trendy and louder to stand out.
Saffron 14-1064
There have been many internet chatters about teal and orange split-tone over the last few years or so. Of course, nothing new has been created. What is new, however, is how we use the colours in our photos and how we manage them.
In 2020, we anticipate a trend in photography where the Pantone colour, Saffron, is widely used. You could also find the yellowish-orange colour in the photo editing apps by using the Pantone number, in this case, 14-1064.
360 Photography Trends
360 ° photography is going to be a massive trend in photography in 2020. Whether it’s real estate photography or panoramic landscape photography, there is a huge potential. This type of photograph became popular in product photography, where the subject turns as the camera captured it. Now, photographers are improving the way we shoot pictures by turning the 360 ° camera as it captures.
Timelapse photography is also a benefit of this process. However, it is also excellent for real estate photography. With this trend, you could capture a 360 ° shot of a room where the viewer can move around as if they were actually there. It helps bridge the gap in reality and digital photography. You can also design tiny globes, which, when done right, look marvellous.
Nature Awareness
As we move deeper into a more technological world, there will always be resistance. We ‘re looking to use the natural environment in our images, one way or the other. It could be product photography or even portraits, like weddings.
A natural setting fits into our increasing awareness of the environment. Our relationship with nature is developing more and more. This is evident in our consumer behaviour by actively opting for natural and sustainable ingredients.
As we continue to search for these products, manufacturers need to source images from a natural setting. This also paves the way for your choices in stock photography images. Hence, nature awareness and sustainability are one of the freshest photography trends to watch out for in 2020.
Minimalism
Every year, we look at our photos and evaluate them with a magnifying glass. Complexity has always been the main player in photography trends, where photographers use top-of-the-line colour management methods.
With the reputation of Instagram and its overused filters, photographers that want to stand out and be taken seriously are taking a step back.
They choose something that makes their images unique and different: a more minimalist approach. How about that? Less noise signifies more focus on the subject. This applies to fashion, portrait photography, landscape photography, etc. The more minimal your images are, the better they are. PRofessional photographers choose to watermark their online photos to protect them from theft. You can too! Watermarquee allows you to add a watermark right on your browser, so no downloading to your computer. Check our their Pro version with unlimited watermarks.
There are almost unlimited ways for photographers to create mesmerizing works of art through these and other photography trends, and by using old techniques and equipment more freshly. Photography is an art form that is constantly changing and paving new ways for creative photographers to showcase their talent. Now, check out some photography mistakes that you need to avoid.
How Do You Effectively Adjust the Opacity of Your Watermark on 1 or More Photos in One Batch?
Why should you consider the opacity of your watermark?
One of the most common problems that photographers face is adjusting their watermark to be appropriately visible and not overly obtrusive. This blog post will show you how to reduce the opacityon every photo in one batch. The process for this can be done with a few clicks – no need to go through each individual photo to adjust the watermark opacity!
What is Watermarking?
Watermarking is the process of adding a recognizable image or pattern to an output, often in order to identify the copyright holder. This technique has been used for centuries by artists and architects, but it wasn’t until the 20th century that watermarks were used on paper documents as well. Today, digital watermarks are common on many different types of media files including images and various forms of photography.
It is a technique that you can use to protect your images from being used without permission. When you watermark an image, you add something like your name or logo to it so that people know who owns the content.
Why Does Opacity Matter in Watermarking?
When you are watermarking your photo, there is something very important to consider:opacity. The purpose of the watermark is often to deter people from stealing or copying your work. It should be subtle and not too distracting. If it’s too light, then people will be able to see through it and steal your work even more easily! However, if you have any text on your photo, then opacity becomes more important because it will need to be visible at different levels of transparency depending on what part of the picture it occupies.
Open the Photo Editing Software of Your Choice
A watermark is a symbolic or graphical image or text that identifies the copyright holder of a work. When you are adding one to your images, it’s important to make sure that the software you’re using has an option for transparency and positioning. Here are some things to keep in mind when making a watermark:
Make sure that the size of your watermark matches your original photo (you don’t want it too small)
Make sure you have enough space for the text and logo (if applicable)
In some cases, your watermark may be cut off. If this happens, remember to use negative spacing so it remains readable when cropped out of its original context.
Some common types of watermarks are: copyright, “do not copy,” or an organization’s name/logo. Once your design has been finalized in Photoshop or on another editing software program, make sure there is no white showing around the edges of the image before uploading it onto social media!
Batch Watermarking
Ever found yourself trying to watermark a folder of photos, only to find out that you need to do them one at a time? It is easy enough for some people, but others may find it tedious. Luckily there is an easier way! In Watermarquee, you can click “Select Photos to Watermark” and choose in your desired folder up to 5 photos for the free account and unlimited in the premium account.
This will save you time and also make it easier for the next person who has to watermark and adjust the opacity of a photo. All they have to do is click “Select Photos to Watermark”, find your folder of photos, then choose one at a time if needed.
Apply a Watermark to Each Image with Opacity at 50% (or Whatever You Desire)
All you have to do is open the image in Watermarquee, add your watermark text or logo, and use the opacity tool set at 50% or whatever percentage you want. Once done, save it as a new file under a different name so that when someone downloads the original they’ll see both versions of your work!
Save the Images as New Files, Keeping Their Original Names and Locations
Many people watermark their images to protect them from being stolen and used without permission. This is an important step for any content creator, as it can be difficult and expensive to try to get images back if they are taken without your consent. However, many people make the mistake of saving the image after they have applied a watermark with a new name – this can create confusion later on when trying to identify which version is original.
First, make sure that you are saving the image as a new file. Remember to keep the original name of the photo intact and save it in its original location! This will ensure that any watermarks are not lost or become difficult to identify later on.
For example: if I have an “image_name” saved at C:\Users\Alice\Pictures\Photos-Watermarked Images, then my folder should now be called “C:\Users\Alice\Pictures – Watermarked Images”. Saving these images without changing their names can cause confusion when people try to find them again because they might seem like duplicates with different titles (but still contain your copyright information).
Delete Unedited Photos from Your Hard Drive to Save Space
Do you ever find yourself looking for an image that is on your computer but can’t seem to find it? If so, then there are two possible reasons. One option is the file was deleted and another possibility is that the folder containing the image was moved or renamed. A third option could be that a new folder with a duplicate name has been created without realizing it.
In order to prevent these problems from occurring, we recommend following this simple process: first watermark all of your images, then delete any folders that have unedited or unnecessary files in them to save hard drive space!
Conclusion
You’ve made it this far! Congrats. Now, go through the steps ofadding watermarks to all your photos and adjusting the opacity, as well.
Start unlimited watermarking today with Watermarquee and have fun coming up with your own watermark ideas with adjusted opacity and let us know how it goes in the comments below. We can’t wait to see what you come up with!
Watermark Color: 5 Excellent Ways to Choose the Best Hue
How do you choose the right watermark color for your photos?
The watermark color (as well as the placing) has a significant effect on how noticeable the watermark is when it is overlaid on the image. There is no absolutely wrong or absolutely right watermark color; the right color for any particular watermark depends on the photographer’s branding, the use of a watermark photo, and other factors.
When watermarking your photos, you need to make sure that the watermark is not so dark that it is totally distracting from the original image. Nevertheless, you need to make sure that it still shows through and your images can’t be stolen or used by others without your consent. Here are some tips to help you choose a watermark color for your digital photographs.
Only Consider a Watermark Color that Complements Your Branding
It can be challenging to narrow your options down to a few choices with an almost endless range of colors to choose from. Make the selection process more accessible and ensure that your watermark color matches your branding by limiting your choice of colors that are consistent with the branding you already have in place. You might like to consider:
Colors that you used in the background of your website
Obviously, the colors included in your logo should match your branding, and you’ve probably already determined that any colors on the background of your website are going well with your marketing scheme. Neutral colors, mainly black, white, and grey, will provide an alternative to the colors you used elsewhere. They ‘re still matching, however, since these hues go well with almost anything.
Get a Watermark Color That’s Visible Yet Tasteful
The next step is to get one (or a few) color that complements your brand and fits well with your colored photos. Keep in mind that the color you would use for a watermark might be obvious in the images. After all, that is the essence of putting a visible watermark on your photos. It’s not supposed to interfere with your picture, though, because that’s what clients are most interested in.
For example, a white watermark is unlikely to show up well on a picture of a winter landscape with lots of snow. For a bolder look, a black watermark will be noticeable and might complement a striking, sharp image well. Gray, however, is more likely to produce that’s visible watermark but doesn’t take the focus away from the photograph. Some images may have the most fitting logo color. Still, it could be too overwhelming for a calm, comfortable winter scene.
Once you have a color that complements the image well, you can adjust the location, size, font, and opacity to increase or decrease the image’s visibility. Nevertheless, the perfect combination of these parts is often a trial-and-error process.
Have One or Two Watermarks that Work Well with Almost Everything
Because professional photographers take a lot of pictures, most of them streamline their workflow by creating two watermarks that work well with all of their images. Some photographers have a watermark made of the colors of their logo used in most of the images. A second that is neutrally colored for images that their logo-colored watermark clashes with.
Other photographers have two grey watermarks, one light grey and the other dark grey. They just use whatever appears best on an image.
If the image has darker colors, I prefer grey or even black, depending on the most dominant colors in the picture. Gray is more of a color for all seasons for me as it blends well with both white, black, and other colors. With Watermarquee, it is possible to change your watermark to any color, change the blending mode as well as change the flow to adapt it to any background.
Play with Opacity Too
The color of your watermark should be something that does not turn the attention of the viewer away from the image. The watermark should be there in the picture, but it shouldn’t appear too prominent. Try and play with the opacityto get the watermark blend in.
With a pair of versatile watermarks, you won’t have to create a new watermark for each image. Instead, you’ll be able to concentrate on taking more pictures and promoting yourself.
To create a couple of watermarks that will go with a lot of your images, check out the selection available on Watermarquee. The platform lets photographers use any watermark colors they’d like.
Using Watermarquee
Watermarqueeis a perfect online application that you could use to place a watermark on your photos quickly. You don’t need to download or install anything – you can use Watermarquee right on your web browser. It has a simplistic user interface. You could easily change the color, location, and font of your watermark to get your favourite effect on your image. Best of all, it has a free version, so you can put watermarks on your photos without breaking the bank. For unlimited watermarking choose our Pro Version for the low one off fee of $19 and start unlimited watermarking today!
Now that you know what colors to choose, let us help you select thebest fonts to use for your watermark.
Related: See our complete watermarking workflow for photographers — brand kit, batch gallery export, and the multi-size pipeline for wedding, portrait, and real-estate work.
Watermark Opacity – Maximizing the Effectiveness of Watermarks
Watermark Opacity for Photographers
As most photographers know, watermarking is a process that helps protect the copyright of your work and ensures that it cannot be reused or altered without your permission. This means that people can still preview your work before purchasing it, without the risk of them stealing it. Luckily for photographers, watermarking is as simple as superimposing a logo or text on top of a document or image file.
Additionally, watermarking can be used as a branding tactic. Much like a painter will mark their work with a signature, digital watermarking is a way to get your name out and heighten brand awareness. That way you know that any time your work is shared, say on Instagram for example, your name or brand is always attached to it. This also applies to non-photographical pieces of media, as some people may want to watermark text or video in order to get their name out there.
“Watermark opacity should be visible enough to provide adequate protection against image theft”
What is Needed in a Watermark?
Design, Color, Size and Font
While watermarks are simple, to be effective you should consider the design, color, size, font, location, and opacity. Although it might be the easiest option to whip up a watermark in Microsoft Paint, you may not have as many options as you’d like.
To be effective, generally, a watermark should follow three guidelines:
Be small and monochromatic – or have very little color
Be placed in a discreet area of the image that does not interfere with the view of the image but will make it more difficult to remove or clone out
Have limited text
This, of course, leads to underlying question of this article – should watermarks be visible? The answer is that watermarks should be visible enough to provide adequate protection against image theft. However, if they’re too prominent, they’ll obscure too much of the image for it to be appreciated at all.
Ideally, the watermark should be visible without detracting attention away from the contents of the image itself. For that reason, it’s better to use a watermark that’s free of any color or anything else that’s too eye-catching.
Opaque Watermark vs Translucent Watermark
Opacity
Now while color and design are simple – don’t choose anything too distracting – watermark opacity is a bit more difficult to determine a clear answer on.
The general consensus, from the photography community, is that your watermark should be opaque enough to make it visible, because the entire justification for having a visible watermark, after all, is that it’s seen. If no one sees your watermark, then what’s the point of it all?
However, your watermark shouldn’t be so opaque that it detracts the focus from your photograph. Even if you want your logo, or name and contact details to be seen, you still want the beauty of your photos to be seen too. If people can’t see your photographic work because the watermark is too opaque, they probably won’t care who has taken it.
If you’re not sure if your watermark detracts too much from a photo, check if you see your watermark or the image’s subject when looking at the shot. Make it slightly more transparent if the watermark is still too prominent.
On that note, make sure people notice your watermark, especially if you use it to display copyright information. It’s important to note here that some platforms delete this copyright information from the image metadata. Without your metadata details, a clear watermark is the only way to hold copyright information for an image.
Opacity Level on a Custom Watermark
Opacity Percentage
To summarise above, your watermark should be eye-catching and tasteful, not too visible, but still unmistakeably there. Many photographers find that a 20 to 30 percent watermark opacity makes their watermark visible but not too intrusive. However, that range is not the only option.
Some photographers use higher watermark opacity but place their watermarks away from the subject of the photograph. Some even make their watermark 100% opaque, placing it in negative space and matching the shade to a photograph color.
If you choose to go down this route, then your watermark opacity will depend on the size and location of your watermark. To find out what works best for your photographs and watermarking purpose, you will need to experiment a bit.
Does Watermark Opacity Change Effectiveness of a Watermark?
Visible Watermarks
No matter what you choose, the experience of countless artists shows that people who steal someone else’s images from the web don’t edit visible watermarks most of the time. Furthermore, only a few who try to remove watermarks can do so without making the image itself significantly degraded to the point of making it unusable.
Adding watermarks to an image will undeniably ensure that your work is protected from potential theft and misuse. Even if your watermark opacity distracts from your image, an obscured image will undoubtedly be more effective than a stolen one. Choosing a good watermark is a perfectly understandable and smart choice if you want to protect your digital property.
Start unlimited watermarking today!
Related: See our complete watermarking workflow for photographers — brand kit, batch gallery export, and the multi-size pipeline for wedding, portrait, and real-estate work.
4 Ways to Improve Your Video Engagement
Videoing Tips to Engage your Audience
There’s no denying that video content is mandatory for any business that wants to get the attention of its target audience. Watching videos is one of the most popular pastimes in this day and age, and most people are even willing to watch through advertisements, provided they aren’t too long and obnoxious.
Thus, it offers ample opportunity for new businesses to start by going for engaging video content.
That said, getting the attention of online users with video content is easier said than done. There isn’t always a straightforward path to success, but there are many different paths to take to improve your chances. Here are four solid ways to improve your video engagement.
Follow the rule of TikTok and go for shorter videos
Some companies use the tried and tested marketing tactic of placing as much relevant information as possible in their videos.
While it might end up getting the attention of those already predisposed to the company’s products, everyone else will likely close the video before it can impart anything meaningful.
One of the reasons TikTok is such a successful social media platform is that it tries to do more with much less.
As a result, concise videos are the norm, and the result is a surprisingly successful way to get video engagement across.
While you don’t necessarily have to go for 20-second videos, keeping it as short and to the point as possible is for the best.
The power of accessibility
There’s no denying that accessibility is the way to go when trying to increase video engagement. Something as simple as adding closed captions could open the door to an entirely new demographic, as those who are hard of hearing can better follow the content.
Fortunately, accurate closed captions are quite easy to achieve by relying on the right professionals.
It might not seem like a big deal compared to many other improvements, but something as simple as closed captions can provide the most bang for the buck.
You’ll have a much easier time getting people to watch your videos if you make things more convenient for them.
There are even audio description services for those with vision problems. If you want to get people to support you, the idea is to show them that your company cares enough to go the extra mile.
Be aware of where your videos are played
For example, if a company intends to spread its message with the help of video streaming websites such as YouTube, there are some rules to follow that are specific to YouTube.
The YouTube algorithm also acts differently from other search engine algorithms, which means more research is necessary.
That said, YouTube is also known for having a relatively easy algorithm to optimize, as you’ll find most of the keywords you need in the recommended bar.
Such is the reason why many of the most popular videos tend to follow similar beats. A description that is short and gets straight to the point can also go a long way to help overall video engagement.
Taking the necessary steps can ensure that you are never blindsided when posting videos anywhere outside your website. It can also offer plenty of insights when it comes to catching the attention of your target demographic.
While it might take some practice to master, understanding the platforms where your videos play can be a significant step forward for any business or content creator.
More Ways to Improve Your Video Engagement
Keep your website optimized!
Last but certainly not least, if you are interested in people watching your videos on your website, the best thing to do isdevelop an optimized site. Keeping things simple and ensuring those who enter your site can get what they want right away is crucial to gaining full video engagement.
Content such as videos and articles are great for any website, though everything else must get straight to the point. It also helps that keeping things simple will make your site and your videos load faster, increasing the odds of people watching all the way through.
Another part of web optimization includes focusing on the mobile side of things. There’s no denying that most people prefer to surf the web using their smartphones, even if their laptops or desktop computers are within arm’s reach.
In addition, most people are content to use their phones for just about everything, which is why it is crucial to shift your focus toward mobile as much as possible. The rule of thumb is to build your website for mobile as a priority.
Interact with your target demographic as much as you can
It’s an age where people expect to interact with the businesses they support, which is where social media comes in. One way to help improve general video engagement is to ensure that you are keeping up with your supporters online. One of the most significant advantages an active social media account offers is that many online users have surprisingly good ideas when it comes to making improvements to a company.
Feedback is crucial, and taking the time to listen and respond to constructive feedback is always a good thing for your videos. Anyone who wants to improve their videos as much as possible would do well to make improvements based on the viewers’ feedback.
It’s understandable to want a more isolated experience when it comes to making videos, but there’s a reason why companies that listen to their supporters are so successful. There are times when it’s challenging to make improvements without an outside perspective, something that the viewers have in droves.
A company that listens to their customers is far more likely to achieve overall success and get their target demographic’s attention.
Looking into the latest trends
While it might seem like a straightforward and obvious tip, not too many people look into trends and their patterns when building video engagement. There’s no doubt that following trends is the key to success when it comes to digital marketing, photography, and the same thing goes for videos.
Even if the content creator is not particular about using their videos for marketing, video content will always be about marketing. Fortunately, it can be quite easy to learn about the patterns given enough time. With enough research and experience, it’s possible to be a trendsetter for your chosen platform.
However, building videos only for the sake of trends has a habit of backfiring due to the lack of sincerity with the content. It can be clear to viewers when a company or content creator is simply phoning it in, which is why the ideal solution is to look into topics that interest you.
Eventually, you’ll become more skilled at mixing current trends with your personal style of videos, which will ultimately lead to standout success.
While there are many roads to success when building video engagement, there are just as many roadblocks for those who aren’t prepared to get the job done. Video engagement can be tricky for those who aren’t sure where to start, though it’s more than possible to learn how with the above tips. Given enough time and consistency, you’ll find more and more ways to get the attention of your demographic.
8 Best Instagram Filters For Your Next Post
Instagram filters can improve photos on Instagram
Do you want to know the best Instagram filters? You’ve come to the right place. There are a lot of factors that go into picking the perfect filter, but we have narrowed it down to five must-have filters for your next picture. Keep reading and find out which ones are worth using on your next Instagram post!
Have a Clear Idea of What You Want to Post
Filter-wise, it’s all about the mood you’re trying to set for your photo. Do you want to take a picture of something that is bright and vibrant? The Valencia and Lark filters are great options. These two Instagram filters feature light pastel hues with a subtle brightness throughout the image. Maybe you want a darker look? X-Pro II adds vignetting, which darkens the edges of an image, creating a more dramatic feel overall. This filter also has golden undertones that give pictures an autumnal vibe that can be perfect for fall foliage photos!
Try Out Different Instagram Filters Until You Find One that Fits Your Personal Style and the Photo
You should try out as many Instagram filters as you can until you find the one that fits. Don’t limit yourself to one filter if it doesn’t give you the look that you want! Each picture takes on a slightly different tone depending on what filter is used, so play around with all of them until you find something that looks good and feels right. The beauty of apps such as Snapseed is that they are free, so there’s nothing stopping you from downloading several and experimenting with each to see which works best for your chosen photo.
Make Sure the Filter is In Line with Your Brand or Personality
Use Instagram filters that fit the mood of your photo and are consistent with your brand or personality. If you’re a travel blogger, it’s best to go with something playful like Lark, since your photos will be of bright locales and happy people experiencing awesome things! If you’re more of a serious photographer, going for something dark like X-Pro II is a good option. Your audience will know what to expect from you when they see that filter on your posts. Not sure which filter matches your style? Browse through other users’ feeds and take note of which ones you seem to gravitate toward most!
Experiment with Instagram Filters – Some Can Make an Image Look More Dramatic, While Others Might Be Better for Portraits
As mentioned before, each filter has a slightly different look to it. This should be taken into consideration when choosing your photo and how you want it to be presented. For example, the Juno filter is great for selfies because it brightens up the skin as well as the rest of the picture! If you are thinking of posting an image of yourself on Instagram, this might be just what you’re looking for. The C7 filter features soft pastel colors with slight vignetting at the corners, giving pictures a vintage feel that fits perfectly with lifestyle bloggers who love sharing images from their travels or food snaps from delicious restaurants!
The Best Instagram Filters to Use
To Make Your Photos Look More Professional, Use the Filter “Lark”
“Lark,” the less-is-more filter for portraits, is a good choice if you want to give the impression that you’ve used more than one filter. Lark features light hues with a slight warmth throughout the image and also brightens up your face! This is another perfect option for selfies – just make sure your photo looks great as is before adding any effects.
Don’t forget about contrast: playing around with contrast in your pictures can have a huge effect on how it turns out. Make sure to not only adjust the brightness but also shadows and highlights (both are found under “exposure”).
If You Want to Have a Vintage Feel to Your Photos, Use the Filter “Hefe”
The Hefe filter gives images an aged or vintage feel. Use it if your content has a retro vibe, or want to evoke one in your audience. Because of its golden tones and the way it darkens the edges, this filter is perfect for those who love sharing older pictures of themselves like high school or college yearbook photos!
To Give Your Images a Sharp and Crisp Look, Try Using the Filter “Valencia”
Images with the Valencia filter tend to look sharp and clear. The “Valencia” filter is great for those who love taking photos of food, close-ups, or images of themselves because this effect gives it a professional shine! If you want your pictures to look like they belong in an editorial spread, this might be the one that will do just that.
If you want a more vintage feel on your photos, use the filter “X-Pro II”
The “X-Pro II” filter brings up highlights and shadows for a deeper and moodier look that also gives off an illusion of sharpness. This kind of photo tends to give off the appearance that it was taken with a professional camera, so this is good for those looking to pull off a sincere, documentary style.
The Instagram Filters “Gingham” and “Juno” are Great for Adding an Artistic Touch to Any Photo
“Gingham” and “Juno” are really great for those who want to add an artistic touch to their photos. These Instagram filters not only make your images look brighter but also add a vintage tone that makes it look like they were taken in the 1920s or 1950s!
For Those Who Like Bright Colors in Their Pictures, Try Using the Instagram Filters “Toaster” or “Slumber”
“Toaster,” the super-saturated filter, is perfect for those who want their images to have a crisp pop. It’s great for users who love bright colors and taking photos of food or landscapes! “Slumber” creates an ethereal tone that makes images look like they were taken mid-day! This can be used if you are looking for a softer look on your pictures – just be careful not to overdo it (unless that is what you’re going for).
Want More of a Sepia Tone in Your Images Instead of Traditional Black-and-White Shots?” Try Out the “Lo-Fi” Filter!
The “Lo-Fi” filter is one to consider if you’re looking for a sepia tone option. It’s great for those who want their pictures to look like it was taken on an old school camera with the square format! If you are also looking to give your images more of a vintage feel, this could be a good choice as well!
Conclusion
We hope this article has helped you understand how to make your photos look more professional with the use of Instagram filters. By following these tips and experimenting with different Instagram filters, you should be able to find one that works for you! If not, don’t worry – we have a team full of experts ready to help out in any way they can. Just remember toadd a watermark with WaterMarquee before posting your photos so they don’t get used without your permission and it helps you get more exposure by letting people know who took the photo. Let us know if there is anything else we can do to lend our expertise as well!
Best Baby Photoshoot Ideas: 8 Photography Tips for Beginners
What baby photo-shoot ideas should you keep in mind on your next newborn photo-shoot?
Best Baby Photoshoot Ideas: 8 Photography Tips for Beginners
If you’re into newborn photography, you will never have a shortage of customers! The demand for baby photo-shoots is booming as everybody has babies — and they all want adorable pictures of their little ones. For photographers who like to try out various photography niches or monetize their photography skills, this is spectacular news. Baby photos are also an awesome addition to your online portfolio since great baby photoshoots can really display your talent and skills as a photographer.
Want to learn some baby photo shoot ideas so you can profit from this profitable business? Our list of baby photo shoot ideas will guide you in snapping newborn photos like a pro.
Be Aware of Your Client’s Expectations
When you’re doing newborn photography, time is really of the essence, so you need to set your clients’ expectations for the photo shoot before their bundle of joy gets on set.
Take some time to find out what kind of baby photo shoot ideas the customer is after. You have two kinds of photos of newborns: posed and lifestyle.
So, what’s the difference?
Posed Newborn Photos
Positioned shots can occur either in a studio or a venue of the clients’ choice. An ideal posed newborn should be done when the baby is only just a few weeks old because they are still very sleepy most of the time. They are usually shot with a few well-placed baby photography props, such as a “one-month-old!” sign or a soft velvety cover.
Lifestyle Newborn Photos
Newborn lifestyle photo-shoots are intended to be much more relaxed. They are usually snapped at the house of the company, and captured with natural light and without many newborn picture props, hence you have more room to express a lot of your baby photo shoot ideas. The newborn may be up to a couple of months old at this stage because they are still relatively moldable and utterly sleepy.
A newborn photo shoot of a lifestyle aims to snap more candid shots of the baby in their own home or environment, and it usually includes the parents in the photos. Such photo shoots are usually a little quicker as they require less setup and careful styling, as long as the lighting is fine.
Be Prepared with The Right Equipment and Cool Baby Photo shoot Ideas
It’s important to have the right camera and accessories on hand-particularly when an infant or a baby is involved! Below are some things and accessories you should have to guarantee that you shoot the best possible pics for your baby photo shoot.
Memory Cards
Make sure you have a ton of storage space for all the awesome newborn photos you’ll be saving on your memory cards.
Multiple Lenses
Consider all the different angles and shots you can take from the subject and bring the proper lens with you.
Stepstool
These are crucial to snapping pictures of those awww-inducing bird’s s-eye views.
Now it’s time to collect some more props unique to babies, including:
Toys
You need to ensure that you have a lot of cute and adorable toys with you. If you need to capture the child’s focus in a certain way, it doesn’t always work to clap your hands or snap your fingers.
Large, Soft Cushion
Try to imagine a big soft ottoman, or anything similar. The baby can lie on that, giving you access to 360-degree shooting, which is essential to newborn photos.
Pillows
These are perfect for splashing a dash of color or making textures pop — and help keep the baby a little more relaxed.
Theme Props
This is the awesome part: try to have different choices, including buckets, barrels, huge flowers, cute and furry animal ears, etc. Try to keep your prop arsenal up to date with trendy pieces a few times a year; parents should always be satisfied with your baby photo shoot ideas and props!
Soothing Music
Have a playlist packed with calming music on your phone to help block your shutter’s sound and keep the baby fast asleep. Remember that sleep time is crucial when it comes to baby photoshoots.
Prep Your Clients
Your customers need to have a good idea of what will happen during the photo shoot, as well as any baby photo shoot ideas you may have. Your best bet possibly is an email template. Craft an email outlining the photo shoot itinerary and what you will be providing or bringing with you, as well as what your customers should bring, like any props and baby photo shoot ideas they wish to try.
Work Those Colors
There are a couple of baby photo shoot ideas you might to try here.
Match It
You want the infant to be the star of the photo-shoot! One way to do that is to use a variety of complementary shades for your backdrop and any baby photography props, such as earth tones and warm colors. Do not take the attention of the audience from the centerpiece.
Complement It
Play with contrasting colors, such as a rich violet, or light yellow or even sea foam purple.
Pastel It
If you want photos of the baby to look very cool and chic, go for a pastel-coloured backdrop and accessories. Pale pink, butter yellow, baby blue–they all look fantastic.
Master the Poses
A timeless tummy pose is a lovely start for newborn pictures. Once you get the hang of it, try other baby photo shoot ideas and gently push the child onto their side with the parents’ support and permission for a sweet side shot, then proceed to the sprawling back shot.
Go With the Flow
For all photography newbies, here is a great baby photo shoot idea: let the baby move! Let the little one wiggle, grin, pinch, and rollover on their hands. These are perfect times to be present and snap away. Many of these natural movements are pretty adorable, so use that sweetness to benefit.
And don’t fear being macro. With the baby sleeping it’s an ideal time to get up close a
nd snap away from those cute fingers that grab Dad’s head, or the plump tiny toes that stick out adorably from under the covers.
Even downtime is a chance for a candid shot, be it a moment of relaxation between the newborn and dad or a mutual smile during feeding. These spur-of-the-moment photos also turn out to be the real jewels. Just make sure that the parents give their consent.
Make it a Family Affair
Often newborn photo shoots may involve more than just the baby: mommy, daddy, and siblings may come along. Some clients like their family pet to join in on the fun, too!
The connection is essential, and preparation even more so. Discuss what will happen on the day, suggestions on what the clients should wear, and let them know what you’ll bring. Coordinate their wardrobes with your props or the baby’s booties. You have to think about baby photo shoot ideas that can help make your shoot a success. The best part is if the family likes the shoot, they are going to refer you to their friends and family, and your client base is going to boom.
Add Newborn Photography to Your Online Portfolio
You never know where the next career-changing referral would be coming from, so always be prepared! Make sure you show off your fantastic baby photo shoot ideas and add those breathtaking newborn pics to your online photography portfolio. These will showcase your photography skills to potential clients. The more breathtaking newborn pictures you have on your site, the more clients will want to book you to snap their little ones!
Creating Your Business Logo
Creating Your Business Logo With A Recognizable and Unique Brand Identity
Whether your business is just getting off the ground or you own an established business wanting to rebrand, the first step to creating your business logo is designing a recognizable and unique brand identity. However, creating a business logo isn’t as simple as it might seem. While creating your business logo, it’s always a good idea to first understand the basics of logo design to ensure your business logo is up to scratch.
What Makes a Good Business Logo?
Memorability
A key aspect of a good logo is that it is memorable from the very first time you see it. You see, the goal of creating a business logo is to create a connection with a consumer and generate interest in your brand.
When consumers can easily recall your business logo and brand, they are more likely to connect them to your company. This means that logos that are easy to remember and produce a strong impact are valuable because they help your brand stick in consumers’ minds.
Memorable logos combine many of the elements discussed above and they are the best way to communicate your brand’s personality and tone clearly and cohesively. A memorable logo should always strive to be unique. Even in industries where there are standards and common norms for designs, your logo should always aim to stand out from the pack as much as possible.
Relevancy
What all great business logos share is their relevancy to the markets their companies target, and how clearly they communicate a brand’s personality and identity. A primary component is the use of colors in your logo, which can trigger different emotions and show
your brand’s personality to consumers. A company that sells toys for children may choose bright colors that communicate energy, fun, and excitement.
Font
The second important component is the font used in the logo or wordmark. Fonts help communicate your brand’s tone and its values, which ultimately help define your personality.
Finally, choosing the right symbol is a key aspect of establishing a visual anchor for your logo. Symbols are important aspects of a logo because they can be used by themselves as a simpler version of your logo. Symbols are also important when building connections between your brand and the ideas and values behind it.
“The most important aspect is keep it as simple as possible to communicate your brand’s identity.”
Simplicity
Many of the most impactful and successful logos in history are surprisingly simple, as most consumers only focus on a logo for a short time. From Nike’s single swoosh to Apple’s eponymous design, simple logos are easy to recognize and remember. A simple design can express your brand’s personality concisely and effectively.
Simple logos focus on highlighting the most important parts of a brand’s personality with limited real estate. This includes focusing more on aspects like colors and fonts as well as on distilling ideas into their simplest form.
Other great designs for a simple logo include letter and wordmarks, which dispense with images, and focus instead on communicating brand personality directly with fonts and colours. Overall, the most important aspect is to focus on using as few elements as possible to communicate your brand’s identity.
Timelessness
The best logos stand out from the pack because they remain relevant and effective over the years.It’s always tempting when you design a logo that incorporates current design trends and fads but it’s not always the best decision.
Timeless logos favor quality over quantity, removing many of the unnecessary elements and crazy ideas, focusing only on what works. This means focusing exclusively on your brand’s core ideas and values to uncover the most effective way to transmit them without unnecessary clutter.
Even in industries where there are standards and common norms for designs, your logo should always aim to stand out from the pack as much as possible.
“You have limited real estate, so it is important to focus on saying more with less.”
Versatility
Last, but certainly not least, a good logo should be able to be used in a variety of ways. For example, a logo you can only use in one size online is not very useful, as it limits the ways you can expose your brand to the world. On the other hand, creating your business logo so that can be resized, printed, or placed on different media, makes your brand significantly more visible.
On a design level, keeping the clutter to a minimum and opting for a simple design will instantly make your logo more versatile. Having too many lines, flourishes, elements, or colors can create a complicated design that will scale poorly. Instead, keep in mind that you have limited real estate, and focus on saying more with less.
Some of the Best Logo Maker Tools
Logomaker by VistaPrint
A very intuitive logo creator, Logomaker begins by simply asking you for a product name, an optional tagline, industry and product. Once you fill out these details, you will have access to a variety of design suggestions you can customize by changing the graphic, font, color, layout and sizing.
This free tool also includes a large library of fonts and images, which means it will generate a large variety of options for various elements. To download the software, all you have to do is create a free account. You can then use your logo on any VistaPrint products, in which case you only pay for the prints.
The one downside is you have to pay to download your logo files. This means, of course, that this soft ware doesn’t actually act as a free logo maker, however the price of exporting the logo as digital file is not exorbitant considering the quality.
Designhill’s
Logo Maker
Designhill’s logo maker stands out from its competitors, thanks to its AI-focused design creations. The software operates by asking you questions about what you want in your business logo, in order to generate a range of designs. You can then choose a style you like and select the color palette and symbols you’d like to include.
To access all the options that the AI has created, you will need to sign up for free. Once you’re signed up, you can change font size, spacing and try out different color combinations. When you’re ready to download and use your logo, you can pay $20 for a low-resolution PNG file. If you’d like to have a higher quality copy, regrettably you will have to pay $65 for the more comprehensive package which includes multiple high-resolution PNGs and vector files.
TailorBrands Logo Maker
Similar to Designhill’s software, TailorBrands’ logo maker is an AI-powered logo generator through which you could be creating your business logo in a matter of minutes. All you have to do is answer a few questions such as: what type of logo you’d like (icon or text-based), and what typography styles appeal to you. You can also “explain” your business in a few words so that the algorithm can match you with more accurate assets.
This logo maker is incredibly easy to use with decent customization options. You will need to sign up to view any logos, and this involves a tad more financial commitment than other options. However, for $9.99 a month, the basic plan covers everything you’d need, such as resizing a high-resolution logo and full ownership, and it’s cheaper than other options.
Adobe Express Logo Maker
Adobe Express works with AI as well. You are asked a set of questions ranging from business name to business category. It then provides lots of thoughtful logo options. While not highly customizable, the results are on the cleaner and more minimal side, meaning the free version is a great choice for a low-commitment and quick business logo design.
With the Adobe Express logo maker, you can create your own templates and create as many logos as you would like, as well as having a high-resolution PNG and JPG file for no extra cost. The software also offers a premium option, which gives you a lot more file type options, customization tools and templates to use, if you really want to embrace more complex design.
Use your Logo in a Watermark to Protect Your Online Images
Now that you have the perfect logo, you can use it in a watermark to protect your online images from someone using them without your permission. Watermarking is easy with Watermarquee – you can do it right there in your browser, so no downloads! Click here for unlimited watermarking.
How Can You Watermark Photos without Photoshop for Free? 5 Easy Steps
What is a watermark and can you watermark photos without Photoshop, you ask? A watermark is an image, text, or logo that is placed over a digital photograph. It’s usually displayed at the bottom of the photo and it helps protect your work from getting stolen or being used without your permission. Digital watermarks have been around for decades as a way to identify ownership of an image.
However, not all have access to Adobe Photoshop. Fortunately, there are still ways to watermark photos without Photoshop. There are free online tools, like Watermarquee, that can add some extra security to your photo in seconds and for free! This will make sure no one steals your hard work from right under your nose!
But before we discuss how to watermark photos without Photoshop, let’s first discuss some watermarking basics that you should know.
What is a Watermark and What Does It Do
A watermark is a way to easily identify if an image was stolen or hacked from the actual photographer. By placing a watermark, you can make it known that the photo is yours and not to be used without your permission. Even if someone tries to remove your watermark, the evidence will still remain with traces of it visible.
Watermarks are also more common in professional photography than just snapshots as well. They’re used for building branding and credibility for the business rather than individual photos themselves. While they aren’t always mandatory, most photographers recommend adding one while sharing their images on social media sites like Facebook or Instagram.
What to Consider When Watermarking Photos
You can add a watermark in any corner, however, it’s important to choose one that doesn’t stand out too much from the photo itself. This will make it less obvious for the viewer and reduce the chances of them even noticing it. Some people like adding a logo at the bottom or side of their image as well, which you can also do with some free online tools, like Watermarquee.
How to Create a Watermark
We’ve all seen photos on the internet with watermarks. They usually appear along the bottom of a photo and they contain information such as who owns the image and contact information in case someone wants to use it for personal or professional purposes. If you don’t have photoshop, there is no need to download any more complex software. Programs like Watermarqueeare simple with nothing to down load. All you need is your computer and an internet connection. Best of all, it’s free!
How to Watermark Photos without Photoshop
Watermarquee is a free tool that will help you create watermarks for your photos. While it’s not as complex as Photoshop, it still serves its purpose and is great to use when you need to quickly add a watermark to your images! It also doesn’t require any downloads or installations – all you need to do is visit the website and begin uploading the image that you want to watermark. To get started with Watermarquee follow these steps:
Go to the website then click “Select Photos to Watermark”.
Choose a photo to upload. You can choose between jpeg, png, gif or bmp files.
Next, the watermark editor will appear and you’ll be able to edit your image by clicking the “Add Text”, “Add logo” buttons at the bottom of the interface
There are also other options, like fill color or transparency that you can play around with as well.
Once done, click the “Save” button at the bottom of the interface to save it to your computer!
Now that you know how easy it is to add a watermark, you can use this tool anytime in just seconds. It’s free and without any installations needed which makes it ideal for anyone who wants to add watermarks to photos without Photoshop! Another great thing about this tool is that it automatically scales your images so they fit perfectly within a rectangle that you specify. This way, you can also be sure that the watermark is even visible and gets a lot of attention from your viewers
So if you’re looking to make your photos more professional or prevent someone from stealing it, then give Watermarquee a try!
Why Use a Watermark?
There are a few reasons why you may want to use a watermark. The most common reason is due to copyright claims. If you put your work online without any security, other people will be able to steal it for their own gain (or even just for the heck of it). While this might not seem like much at first glance, if someone copies something that’s already copyrighted and published on the web – they could make thousands thanks in part to your hard work!
While it may seem like a hassle at first, it will actually become second nature after you get used to putting them up! And best of all, this can be done in under a minute if you use the right tools.
When Should I Add a Watermark to My Photo?
Adding watermarks is a personal choice – but in my opinion, it’s never too early to start! If you want an image to gain popularity and recognition, the rule used to be that you should keep your watermark on until the photo is well known. However, now with search engines like Google Image Search being so popular, many photographers are removing their attributions within days of uploading photos online because they don’t want people getting their images from search engines instead of directly from their websites.
If you’re trying to build a portfolio or get your work out there – put up some basic text watermarks right away!
Conclusion
The watermark is a copyright attribution that can be used to identify the photographer and their work. You can watermark photos without Photoshop–just use Watermarquee. It’s important for photographers to have control over how their images are being used, as this practice has increased in recent years with social media platforms like Instagram allowing users to share photos without attributing ownership of the photo. A watermark should always accompany your photograph on all digital prints or online use. In addition, it may also help deter people from stealing your photographs by adding an additional layer of protection and making them more difficult to reproduce digitally.
How To Watermark a Photo: 6 Most Important Watermarking Basics
How to watermark a photo?
We get a lot of questions about how to watermark a photo. Before we go to that, let’s first talk about what a watermark is and how it can help your photography. Watermarking your photos is an important step in protecting them from being stolen and used on other sites. The process of watermarking a photo means adding a visual logo to the image, using copyright law as grounds for ownership.
The article goes on to teach all about how one can properly protect their work by adding a watermark before uploading their photos online.
What is a Watermark?
A watermark is a small, semi-transparent logo or text placed on images that you intend to publish online. Watermarking an image is important because it acts as proof of copyright ownership, which gives you the legal right to use the photo for any purpose. In addition, when someone takes your photo and uses it without permission (such as posting it on their website), the watermark will be visible in some form and can be traced back to your original material. While this does not necessarily prevent people from stealing photos without permission, it provides solid evidence that they have stolen copyrighted work.
Watermarks can be used as a copyright notice. A watermarked image provides proof that you own the photograph and have the legal rights to use it. In addition, if someone steals your photo and uses it without permission, your ownership will be clear once anyone sees the watermark. Watermarks also act as an anti-theft device for online images, preventing people from using them without first asking permission or purchasing them from stock photography companies.
If you also want to promote your photos and your brand to a bigger audience, you should know how to watermark a photo. Watermarks can be used for promotion as well. When you have a website or blog, and you add your watermarked images to the site, this will become an advertisement for your other work, including any prints on sale (or any products with your branding).
How to Watermark a Photo
There are many programs that allow you to add a watermark to your photos, like Watermarquee. The free version of the tool allows users to upload and watermark up to 5 images at once. After uploading an image, you can choose from various designs of text or logos, and place them over the photo using drag-and-drop functionality. A unique feature of this program is that you can create a semi-transparent logo over any part of an image by adjusting the opacity tool. Watermarquee also allows you to specify which corner of the photo you would like your logo placed in.
What are the Advantages of Using a Watermark
One common question that arises about using watermarks is whether they have any effect on search engine optimization (SEO). The truth is, not really. Watermarking a photo will not impact your image’s SEO at all. However, it does provide another layer of proof that you own the work and can therefore use it for commercial purposes if desired.
Another advantage of watermarked images is their ability to deter theft on websites such as Facebook and Flickr. If someone takes one of your photos, adding a watermark may create enough friction so that they decide against using it in their projects or profile pages. This could also help you avoid legal spending on copyright claims made by other people who may have stolen your image without permission
It is also important to remember that not all photos need watermarks. It depends on your intended use of the image and what personal information you want to reveal about yourself online. For example, if you are posting a photo for purely personal enjoyment or as part of a small family blog, it makes sense to watermark the photo because this will prevent people from using it without asking permission.
However, if you plan on using the same photo in an advertisement for a business or website, adding a copyright notice may actually decrease clicks by making visitors feel like they are looking at an advertisement.
How Watermarks Can Be Used for Branding
Watermarking a photo is one of the best ways to create brand awareness or promote your business. Logos and slogans make it clear where photos were taken, provide credibility, and promote a sense of trust with customers and clients.
This can be especially useful when you are trying to sell products or services from your site using images. For example, if you own an online pet store targeting people looking for dog food, adding a small watermarked logo like “Pet shop” on every image of dogs gives them something familiar to look for when they visit the rest of your website.
The best part is that these images will already be watermarked with a designated logo, so you can either run Facebook ads to find people interested in seeing these photos or publish them on your own site for viewers who are curious about what’s available.
Tips for Choosing the Right Type of Watermark
If you want your watermark to be transparent, it can help if you save the logo with a transparent background from the start. You may also want to use text instead of logos or images for a simple and straightforward look.
The placement on your photo should take precedence over any other consideration when choosing a spot around which to draw the watermark. Try different options in order to get everything centered correctly on each image. Another option is to have more than one watermark at a time over multiple images, such as including logos or phrases as well as contact information like an email address or social media handles
When Should You Use a Watermark
In the case of using photos for marketing purposes, be sure to include a watermark so people know who took the shot and where it came from. It also keeps others from claiming they are the ones who took it.
A photo without a watermark is more difficult to categorize or search for online. A tag that includes your name makes it easy for people to find what you have made and also gives potential viewers more context about why they should care. For images intended for commercial use but still meant to be shared — such as on social media — another option is putting the logo right in front of where someone would take a first look at an image. This has two benefits: it adds consistency across each photo’s visual style, and it also simplifies where to look first for the logo.
For photos containing logos, you may want a watermark that mimics them in terms of color tone and style but is different enough that readers can tell they are not looking at an image used as an advertisement. Make sure this mark does not detract from the images themselves — especially if the watermark is meant to be seen alongside other text or information.
How to Watermark a Photo – Conclusion
Your watermark is a visual representation of your brand. It’s the one thing that should remain consistent on every photo you share, no matter who takes it or where it was taken. Hopefully, these tips were able to answer your question, “how to watermark a photo.”
Related: See our complete watermarking workflow for photographers — brand kit, batch gallery export, and the multi-size pipeline for wedding, portrait, and real-estate work.
5 Best Watermark Positions Explained
Why the Watermark Position Matters in Watermarking
The watermark position is among the most important aspects that you should keep in mind when watermarking your photos. The watermark position can vary depending on your brand aesthetic or if you’re trying to obscure other information in the photo.
What’s the Most Common Watermark Position?
The most common watermark position when watermarking photos are bottom left, top right, top center, and bottom center.
Bottom Left
This is the most common photo watermark position that you will see. The majority of people choose to put their watermark in this locationbecause it’s easy to crop out with a logo. However, some people also feel it creates a better balance between the logo and other information on the page.
Top Right
The top right is another commonly used place for adding logos or branding on photos. It’s reasonable if you have text next to your logo. You might wonder why someone would go with this when there is already title text there? The answer is that by putting it here you’ll avoid clashing with the title text, while still adding information along the top of the photo.
Top Center
The Top center is one of the more traditional placements for branding in graphic design and photography. This isn’t very popular because it often looks overly done or out of place in photos where people are important. However, when there is not much else going on then this type of branding can work well so long as it remains flexible with other elements on your page.
Bottom Center
Since we’re talking about positioning on photos, you probably shouldn’t be surprised to learn that you can also put a watermark at the bottom center. Bottom center watermarks aren’t used by too many people since they’re quite intrusive but if there’s nothing else taking up the bottom of a photo then it can look quite decent.
Bottom Right
You might be surprised to learn that this is a very popular location for watermarking photos. The reason why so many people nowadays use it is because of how well balanced the positioning is on social media platforms such as Facebookand Instagram.
The bottom center option is also commonly used by photographers who want to have all their branding in one location, but still allowing ample room for other content at the top of their images. Bottom-right watermarks are also great because they allow you lots of flexibility with other design elements on your pageor blog without being intrusive (as long as there isn’t too much going on above or below the photo).
How to Position Your Watermark
There are two main areas for placing your watermark. Some people like to place them in the bottom left corner, and others prefer to use the top right. You can also try using both of these positions within a single image.
If you’re just starting out with watermarking images, then it’s always best to test different placements until you find something that suits your needs! Avoid simply placing text over an image without any real thought about how it will be seen in the end.
This won’t make a good impression on potential clients or readers of your blog posts. When watermarking photos, think about what information is most important: Is it more important that a professional-looking logo appears? Or would you rather get someone’s attention with a witty phrase or quote?
If you want the best results, then always start by thinking about what important information needs to be featured on every single photo that you create! Overall, remember that consistency is key here. When adding more than one element (i..e an image and a watermark), make sure that the sizes don’t clash together! A great idea is to have your watermark be larger than any of the other content in the image.
Placement of the Text and Image on the Screen
You can also move the watermark position around until it is in a place that makes sense. Some people choose to put it in the bottom left of their images and others like to use the top right. You can even try combining these two positions so that your watermarked photos have a uniform look! This will be especially useful if you’re uploading multiple pictures at once for your blog or portfolio!
When designing an overlay, keep in mind that it needs to be readable against any background colors. Make sure that your font size is big enough and doesn’t have too much texture applied as this could result in a difficult reading experience.
Overall, remember that consistency is key when it comes to adding multiple elements to your images. Some people will even use a combination of both the bottom right and top left positions for their watermarks!
How Does the Watermark Position Affect the Effectiveness of the Watermark?
When you watermark photos, one of the most important things to remember is that there is no “one size fits all” compromise in the watermark position. Positioning your watermark depends on several factors like the niche, content, and how much room you have for text. Watermarks are a great way to ensure copyright protection for your images so people don’t copy or share them without permission. These watermarks can be temporary or permanent – it’s up to you!
Conclusion
The watermark position should always be aligned with other content on the page. It can go in either top, bottom, or right side of the document and is usually placed on a blank space where there are no words. The main purpose of watermarking images is to prevent others from stealing or copying them. The watermark should not distract the viewer’s attention and must not be so big that it will dominate the picture. The best thing to do here is let your imagination go wild. You can add anything you want as long as it’s appropriate to your brand and content (including quotes, logos, etc.).
Related: See our complete watermarking workflow for photographers — brand kit, batch gallery export, and the multi-size pipeline for wedding, portrait, and real-estate work.
Why You Should Add a Watermark To Your Photos? 6 Important Facts to Know
Does it make sense to add a watermark to your photos?
If you are wondering why you should add a watermark to photos before uploading them online, keep in mind that it is important that the copyright of the photo remains intact so that others know who created it and have permission to use it. Moreover, it is advisable to add a watermark to photos because it helps with your branding efforts.
This article will discuss what a watermark is and why you should start adding one to your photos.
What is a Watermark?
A watermark is simply a visual mark that appears on your photos. Usually, it is some form of text but it can be anything really, shapes or even graphics. Watermarks are usually semi-transparent so they can blend into the background of the photo instead of drawing attention away from it.
They are placed onto images to protect copyright, prevent image theft, and for branding purposes. A watermark is often included in the bottom right-hand corner of your image. It can also be placed on other parts of the photo such as above or below, to the side, vertically, or even diagonally. You’re free to do what you like with it!
Are There Free Tools That Allow You to Add a Watermark to Photos?
There are many free online tools that allow you to add a watermark to photos. For the purpose of this article, we’ll be using Watermarquee, a free watermarking tool that allows you to add a watermark to your photos right on your browser. That’s right, no downloading of apps is needed. It allows you to customize and design your own shapes, create text, choose fonts, and even adjust the opacity of your watermark.
Watermarquee also has some pre-made templates that you can choose from for your watermark.
The Steps: How to Add a Watermark to Photos Online
First, go to the website and upload your photo onto the site by dragging and dropping it or clicking “Select Photos to Watermark”.
Step 2: Create Your Watermark
Once you’ve added the photo, start customizing it by selecting a shape and font for your watermark. You can also change the size of your watermark if you’d like. It also allows you to move your watermark around by clicking and dragging it where you want it. Adjust its opacity by sliding the menu to correspond to how transparent you want your watermark.
Step 3: Save Your File
Once you’re done, click the “Save” button and it will create a watermark with your image. There are also options to save as PNG or JPEG images.
Should You Add a Watermark to Your Photos?
Watermarks can be very effective at stopping people from stealing your photos and using them on their social networks or websites. They are discreet most of the time so there’s no need to worry about it taking away the attention from your photo. These days, a watermark is an essential part of any photographer’s repertoire.
The large majority of copyrighted images you see on social media sites have watermarks added to them. This is because copyrights have become more important since it has become easier for people to take pictures with mobile cameras and share them online in seconds. By adding a watermark you’ll stand out among all the other bloggers/photographers who don’t use one.
Why You Should Add a Watermark Before Uploading Your Photos Online
A lot of people choose to add a watermark after they’ve uploaded their photos online and it’s too late. The text is often barely visible or unreadable because the image has been scaled down from its normal size for upload.
A small but perfectly legible watermark can be added at any point before uploading your photo, whether you’re posting it on your blog, or just sharing it with friends via Facebook. It won’t take long and will give you peace of mind knowing that someone hasn’t bypassed all of your hard work by cropping your watermark off of an image then using it elsewhere for their own benefit.
If someone steals your photo and adds their own watermark to it, you can easily see that they’ve done this. You’ll have proof that it was them who took the image and used it for their own benefit without permission or payment because you’ll still be able to see your original watermark on the image.
All images should always contain a copyright statement and people should not be able to steal photos from you, as there is no way of knowing whether an image online has been stolen. Before uploading your photos online you should always add a watermark so you know they are safe from theft if anyone decides to use them for their own interests without permission or payment.
Types of Digital Photos that Could Benefit from Adding a Watermark
The images you are storing and sharing online could be any number of things. You might have taken a landscape photo on your phone that you intend to use for your blog, or if you’re like me – you’ll probably want to share your work with anyone who happens to stumble across it and click through all of your photos! Either way, there is no need for strangers or “fans” of photography to use one of these photos without permission.
If you add a watermark at the time the image is captured means that once it’s uploaded onto the internet its safe from theft, unless someone decides they want to take their own copy and remove it but will still show up as being owned by you in case anyone else takes an interest in using them for their own needs.
You should always be careful about who sees your work and what you share online, as the internet is a very public place and although some people will use photos like this digitally there are others out there who might want to steal them for their own uses.
Conclusion:
Add a watermark to photos to protect your intellectual propertyand make sure that no one can claim the originality of any photo you upload. Adding a logo or text onto your digital images is an essential step in protecting them from being stolen by others for their own gain, but it’s important to choose the right type of watermark before adding it to your work.

 A popular way of producing these photographs is to create panorama shots; this involves stitching multiple images together after they have been taken so that the final image has the correct aspect ratio for your target market. By using this method, you can shoot a super high-resolution panorama that would not be possible with a single image.
The main thing to consider when you create panorama images is how big they are going to be when printed. Don’t forget about this! An enormous, high-resolution panorama may look great on your computer screen, but it will print as an enormous and unprofessional-looking blur if you don’t keep the target size in mind during the shoot.
A popular way of producing these photographs is to create panorama shots; this involves stitching multiple images together after they have been taken so that the final image has the correct aspect ratio for your target market. By using this method, you can shoot a super high-resolution panorama that would not be possible with a single image.
The main thing to consider when you create panorama images is how big they are going to be when printed. Don’t forget about this! An enormous, high-resolution panorama may look great on your computer screen, but it will print as an enormous and unprofessional-looking blur if you don’t keep the target size in mind during the shoot.
 4:5 – square: This is the standard size for photographs taken with a compact digital camera or point-and-shoot. It results in a square picture that is great for online use. A ratio of 4:5 will crop perfectly when put next to a 3:2 aspect photo; this makes it a popular choice for stock photography.
3:2 (or 6:6) – portrait: The most popular photograph sizes are often determined by the user’s preferred sensor size, and DSLR users were happy with this ratio until full-frame sensors became widely used in 2009.
However, many cameras still offer alternative ratios on their screen so you can choose what best suits you without actually changing your camera settings. These options include 6:6 and 4:5. The square ratio on a digital camera is unusual because the sensor is rectangular, usually resulting in photos that are not the correct shape when printed or viewed on-screen.
3:2 – portrait: There are many use cases for this ratio other than portraits; it is used by professional photographers all over the world. These days image editing software has made it very easy to crop large images into portrait shapes so you might not even need to use 3:2 as a standard aspect ratio!
However, if you plan to print your photographs and they will be cropped by a printer (rather than using photo editing software), then getting them right at the source is best for professional-looking results. If you do want to edit your images later though, don’t forget that they will need to be at least twice as wide as they are tall in order to print correctly.
3:1: panorama This is a common aspect ratio for panoramas; it is used by photographers who are using special software (such as Photoshop or the free/paid Autopano Giga software) to create them from multiple images. It also requires you to shoot your photos with this precise aspect ratio in mind.
If you would like to make a standard-sized, postcard-sized photo instead of printing a panorama, try cropping the image into an 18×24 inch photograph after you have taken it. Your camera may not offer this but it is possible!
4:5 – square: This is the standard size for photographs taken with a compact digital camera or point-and-shoot. It results in a square picture that is great for online use. A ratio of 4:5 will crop perfectly when put next to a 3:2 aspect photo; this makes it a popular choice for stock photography.
3:2 (or 6:6) – portrait: The most popular photograph sizes are often determined by the user’s preferred sensor size, and DSLR users were happy with this ratio until full-frame sensors became widely used in 2009.
However, many cameras still offer alternative ratios on their screen so you can choose what best suits you without actually changing your camera settings. These options include 6:6 and 4:5. The square ratio on a digital camera is unusual because the sensor is rectangular, usually resulting in photos that are not the correct shape when printed or viewed on-screen.
3:2 – portrait: There are many use cases for this ratio other than portraits; it is used by professional photographers all over the world. These days image editing software has made it very easy to crop large images into portrait shapes so you might not even need to use 3:2 as a standard aspect ratio!
However, if you plan to print your photographs and they will be cropped by a printer (rather than using photo editing software), then getting them right at the source is best for professional-looking results. If you do want to edit your images later though, don’t forget that they will need to be at least twice as wide as they are tall in order to print correctly.
3:1: panorama This is a common aspect ratio for panoramas; it is used by photographers who are using special software (such as Photoshop or the free/paid Autopano Giga software) to create them from multiple images. It also requires you to shoot your photos with this precise aspect ratio in mind.
If you would like to make a standard-sized, postcard-sized photo instead of printing a panorama, try cropping the image into an 18×24 inch photograph after you have taken it. Your camera may not offer this but it is possible!


 To find watermark fonts that match your brand, first look at the fonts on your website, letterheads, and business cards.
If any of those work well as a watermark font, it would be easy to choose.
If none of the fonts you are currently using work as well as a watermark, you might want to change the fonts on your website, business card, and letterhead to match your watermark fonts.
Using the same fonts across all of these areas will ensure that you have a consistent brand message, especially in
To find watermark fonts that match your brand, first look at the fonts on your website, letterheads, and business cards.
If any of those work well as a watermark font, it would be easy to choose.
If none of the fonts you are currently using work as well as a watermark, you might want to change the fonts on your website, business card, and letterhead to match your watermark fonts.
Using the same fonts across all of these areas will ensure that you have a consistent brand message, especially in  Third, the ideal font is going to enhance your photos. It’s not going to overwhelm your photos and undermine them. Furthermore, it will add to them by enhancing the feeling that your images evoke.
The exact font that complements your photos will depend on what type of image you specialize in.
For example, if you take landscape shots of rural barns, you are going to want a different watermark font than someone who specializes in grunge portraits of inner-city youth.
A flowing font that resembles a handwritten cursive may reinforce the old-fashioned, relaxed feelings that remind us of country barns, while a block lettering font might better suggest the graffiti that is found in a lot of inner-city neighborhoods.
Third, the ideal font is going to enhance your photos. It’s not going to overwhelm your photos and undermine them. Furthermore, it will add to them by enhancing the feeling that your images evoke.
The exact font that complements your photos will depend on what type of image you specialize in.
For example, if you take landscape shots of rural barns, you are going to want a different watermark font than someone who specializes in grunge portraits of inner-city youth.
A flowing font that resembles a handwritten cursive may reinforce the old-fashioned, relaxed feelings that remind us of country barns, while a block lettering font might better suggest the graffiti that is found in a lot of inner-city neighborhoods.

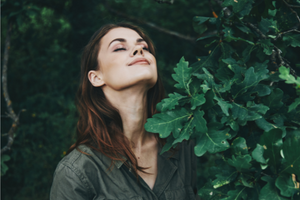

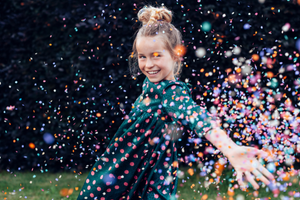
 A watermark is a type of graphic overlaid onto an image. It’s typically transparent or monochromatic so that viewers can still see the details of the asset under the imprint.
 The main reason for watermarking your work is to assert copyright protection. Online content is constantly being poached or plagiarized.
 It’s not just that someone else might profit from your photos (though, who wants that!) The issue is also that your images and content may be misused. Every day people share, copy, cut, and paste others’ content as standard practice, often not realizing that what they’re doing is unethical if not illegal.
 For starters, size does matter. Sure, you want your
  Adding a


 On that note, make sure people notice your watermark, especially if you use it to display
  No matter what you choose, the experience of countless artists shows that people who


 It’s always tempting when you design a logo that incorporates current design trends and fads but it’s not always the best decision.


 This can be especially useful when you are trying to sell products or services from your site using images. For example, if you own an online pet store targeting people looking for dog food, adding a small watermarked logo like “Pet shop” on every image of dogs gives them something familiar to look for when they visit the rest of your website.
The best part is that these images will already be watermarked with a designated logo, so you can either run Facebook ads to find people interested in seeing these photos or publish them on your own site for viewers who are curious about what’s available.
This can be especially useful when you are trying to sell products or services from your site using images. For example, if you own an online pet store targeting people looking for dog food, adding a small watermarked logo like “Pet shop” on every image of dogs gives them something familiar to look for when they visit the rest of your website.
The best part is that these images will already be watermarked with a designated logo, so you can either run Facebook ads to find people interested in seeing these photos or publish them on your own site for viewers who are curious about what’s available.
 For photos containing logos, you may want a watermark that mimics them in terms of color tone and style but is different enough that readers can tell they are not looking at an image used as an advertisement. Make sure this mark does not detract from the images themselves — especially if the watermark is meant to be seen alongside other text or information.

 The bottom center option is also commonly used by photographers who want to have all their branding in one location, but still allowing ample room for other content at the top of their images. Bottom-right watermarks are also great because they allow you lots of flexibility with other
  If you want the best results, then always start by thinking about what important information needs to be featured on every single photo that you create! Overall, remember that consistency is key here. When adding more than one element (i..e an image and a watermark), make sure that the sizes don’t clash together! A great idea is to have your watermark be larger than any of the other content in the image.
 When you watermark photos, one of the most important things to remember is that there is no “one size fits all” compromise in the watermark position. Positioning your watermark depends on several factors like the niche, content, and how much room you have for text. Watermarks are a great way to ensure copyright protection for your images so people don’t copy or share them without permission. These watermarks can be temporary or permanent – it’s up to you!