Creating a Watermark 101: What are the Most Important Basics in Watermarking?

What benefits can you get from creating a watermark?

In creating a watermark, you put a graphical image or text that overlays an image, video, or web page to indicate ownership. Watermarks are typically created as a way of protecting intellectual property and preventing unauthorized use. A watermark can be applied to any type of media, including images, audio files, videos, documents. However, the most common form is digital images and graphics on websites and blogs.

What benefits can you get from creating a watermark?

This article will talk about what a watermark is, why use them, types of watermarks, how to create your own, and tips on creating a watermark.


Why Use a Watermark?

There are numerous reasons you would want to create a watermark for your images, videos, pages, or blog posts. The most common reason is to show ownership of the media and its originality. If someone copies your work and wants to claim it as their own, they cannot if there is a watermark present in the picture or video that states who created it first.

Another reason you might want to add a watermark to your pictures would be for protection from theft. For example, when you post an image to a blog or website without adding your watermark, there is nothing stopping someone from taking the image and publishing it on their site. This can lead to higher page views for you, but at the same time, you lose all rights to that photo. Creating a watermark prevents this from occurring.

What are the Types of Watermarks?

The type of watermark you use depends on what you are creating. If it is a picture, you can add your logo as a watermark. You can also put your contact information in the corner or even across the whole image. For someone who takes professional images, they may want to create their own custom watermark that includes the name of the photographer or the company.

This is done by creating an artistic effect that includes the name and brand of the business. There are multiple ways of creating a watermark depending on what you need it for and how advanced you want the final product to be.

Tips on How to use Watermarks Correctly 

Creating a watermark is one thing, but creating one that looks good and does not distract from the image or video is another. If you are creating a watermark logo for your business or creating some type of artistic effect with a watermark, it is important to know how this can affect your work. There are two types of mistakes you would want to avoid when creating a watermark.

The first mistake happens when people write their name or other text in the bottom corner of an image. This often leads to copyright issues because if someone wanted to steal the image, they could simply crop out the bottom without losing much content. You also do not want your watermark covering any part of the photo, such as eyes or hands, making it look awkward and out of place.


Instead, try creating a watermark that is separate from the image and does not involve any text of your name. This will make it look professional and keep you out of trouble in case someone tries to copy your work without authorization.

If it is an image that is going to be posted online, creating one with no text may work best for this situation. When creating images for print or other uses, you can create a version with text in the corner or across the whole photo if needed.

Another way to use watermarks without creating too much attention around them would be by making them as transparent and subtle as possible, so they blend into the picture and are not noticeable. There are multiple ways in creating an effective watermark, and designing one in different styles can help determine which type you need for a specific purpose.

By creating a watermark, you have rights over your work, and it can lead to protecting them from unauthorized use and theft. Having a watermark protects your images as well as increases their value when published online, so making sure they are used correctly is very important.

Creating a Watermark for Your Brand

Creating a watermark may seem like a difficult task, but it is actually very easy. There are numerous sites online that provide tutorials on creating custom watermarks for you to use. Many of the programs that come with computers also have tutorials in creating a watermark. Generally, creating a logo or text-based watermark is as simple as creating any other image file and saving it as the same name as the original image.


Using Watermarquee in Creating a Watermark

You can use the Watermarquee tool in creating a watermark because it’s one of the easiest methods for watermarking. This free online tool will automatically put a watermark on your images without any need for you to download software. It also allows you to watermark photos in bulk, so you can save time and effort. With Watermarquee, you can create text or graphic watermarks. You can also adjust the opacity, modify the font, and change the size of your watermark.

How Do You Design the Perfect Watermark?

Now that you know how to use free software in creating a watermark, it’s time to start designing your ideal watermark. Your creation can be as simple or complex as you want. One option is to use the same font and text for every photo in your collection, but if you’d rather personalize each one, play around with color combinations instead!

You could also experiment with different fonts styles, including serif, sans-serif, and script options, for even more variety! Creating unique watermarks helps ensure your work isn’t being copied by anyone else.

Start out by choosing a font that compliments the aesthetics of your image. It doesn’t need to be fancy – something clear and easy to read will do the trick! If you’re using text for your watermark, make sure it’s solid and easy to read from a distance.

Creating a watermark that is more subtle but still, professional-looking could be better suited for pictures where the background isn’t important or when space is limited. In creating a watermark, think about why you’re creating one. Is it for copyright purposes or to make sure people don’t steal your photos? If you’re creating a watermark to protect your work, then make it noticeable and recognizable.

The style of the font and how well spaced out the letters are will play major roles in how professional or artistic your watermark looks. When creating a watermark, you can choose to use a photo that will blend in or stand out. If you use one with text on it, your image may look like an advertisement which is not what most people want for their photos.

Conclusion

For all the reasons we’ve discussed in this article, watermarks are an important part of a brand’s identity. To ensure you’re using them correctly and to have access to more resources on how to create your own watermark, visit our website today. We offer some great tips that will help you find the perfect match for your business needs. Thank you so much for reading, and don’t forget to share this article with friends who might be interested in creating a watermark for their brand.


New York City: What are the 6 Best Places To Take Photos in The Big Apple?

What is the best place to go in New York City to take photos?

Everyone has their own idea of what the best place to take photos in New York City is. Some people might say Central Park, others might say Times Square. Either way, there are so many places to go and explore, that you’ll never run out of options for your next photo-shoot.

This article explores some of the most popular spots in NYC for taking pictures. From iconic landmarks like The Statue Of Liberty or Brooklyn Bridge to scenic views like Battery Park or Washington Square Park- there’s something for everyone!


Why Take Photos in New York City?

There are many reasons to take photos in New York City. The first and most obvious reason is that it’s a great city with lots of iconic landmarks, amazing architecture, and beautiful scenery. Another popular reason for taking photos in the Big Apple is because it’s such an international destination – you’re likely to see people from all over the world! One of our favorite reasons for shooting in NYC is that there are so many opportunities for unique shots!

The Best Places to Take Photos in New York City

Central Park

Central Park is one of the most iconic places in New York City. It’s a gorgeous park that has much to offer for both locals and visitors alike, such as an ice skating rink, carousel, Central Park Zoo, and more. If you’re looking for some fun things to do while visiting NYC then be sure to take your camera with you on your next visit!

Brooklyn Bridge

The Brooklyn Bridge is one of the most iconic landmarks in New York City. It’s also a cool place to take photos!  I like to visit it at sunrise when there are fewer people around and you can see the city waking up. The best time to shoot pictures on the bridge is early morning when the sun starts creeping over Brooklyn and Manhattan.


Times Square

If you’re in New York City, the chances are that you’ve spent some time taking photos of your friends or family at Times Square. It’s one of the most iconic tourist destinations in America and a place that just screams “New York!” With so many people visiting this location every day, it can be hard to get a picture without anyone else in it.

Nonetheless, the earlier you arrive, the better chance there is for getting an empty background. You’ll also have more time if something goes wrong with your camera equipment or settings and needs resetting before heading out into the crowds.

Rockefeller Center

Rockefeller Center is a skyscraper in Midtown Manhattan. It was built by the Rockefeller family and opened to the public on May 10, 1933. The center has been featured in many movies and TV series as well as video games. A lot of people visit Rockefeller Center every year for sightseeing or just to take photos which is what I did!

When you get there, you can go up onto the observation deck and see all of New York City from high above it all. You might even be lucky enough to spot some celebrity appearances if you’re looking hard enough!

Grand Central Station

Strangers walk by each other in Grand Central Station. They bump into each other and are unaware of the presence of others, as they are preoccupied with their phones. The hustle and bustle is a trademark of New York City, but mostly unnoticed when you’re busy scrolling through your Instagram feed or updating your Facebook status.

It’s hard to take a bad photo here from any angle – the ceilings go up so high that it feels like I’m walking on clouds; the benches offer perfect spots for people-watching while waiting for trains; every inch is dripping with history and character. And yet, most people don’t seem to notice any of this because they see only themselves reflected back at them on their screens.


Empire State Building

I always wanted to go to the Empire State Building. I’ve never been in it before but had seen so many photos of people who were in it. When I finally got there, I was blown away by how amazing the building is – and then you get a bird’s eye view from up high! It looks like something out of a sci-fi movie. But one thing that surprised me was all of the people taking photos on top of the building – which means they have an even better view than me!

Tips in Photographing in New York City

The Best Time to Take Photos in New York City is at Sunrise

One of the best times to take photos in New York City is during sunrise. The beautiful scene attracts many tourists and locals alike. Daylight hours are a great time for people who want to capture all of the beauty that NYC has to offer but it’s also one of the busiest times as well. If you’re looking for something less crowded, then early morning would be your best bet!

This is a great time for those who want to capture the beauty that NYC has to offer but it’s also one of the busiest times since people will be heading off on their morning commutes and starting work. If you’re looking for something less crowded, then early morning would be your best bet!

The sky can still have beautiful colors during this time so if you are an avid photographer or just like taking pictures as part of your travel experience, then sunrise in New York City is a must-do activity.

Use a Wide-angle Lens for Capturing the Skyline and Cityscapes

It’s a cold day in New York City, and you’re walking down Broadway. You can’t help but notice the iconic Empire State Building towering over the cityscape. As you continue to walk, you see buildings with classic architecture and tall skyscrapers that make up this beautiful metropolis. It’s now time to take your camera out of its bag and capture these amazing sights!

A wide-angle lens is perfect for capturing large landscapes like NYC because it captures so much more than just what is in front of you – it also includes things that are far away from the camera position.


Shoot on Cloudy Days

It’s a myth that you should only shoot on sunny days. The truth is, cloudy days can produce atmospheric shots with dramatic shadows and less harsh light. This means the pictures will have more depth and mood to them, which are great for creative photography. So don’t be afraid of shooting on overcast days – they may not make your photos look as bright, but they’ll still have an interesting feel to them!

What you can do to make sure your images look the best: When shooting on a cloudy day, use fill flash if needed. Fill flash is when there are areas in the photo that are too dark or shadowy – it’s used just like natural light. It helps balance out any lighting discrepancies and makes photos brighter.

In terms of exposure, don’t overexpose shots as much because they’ll end up looking more washed out with less definition than an image taken without fill flash (on sunny days). And be careful not to underexpose them either; this will cause your picture to have shadows but no detail in those shaded areas. You may need to play with your camera settings for some time before getting what you want!

Consider Using Filters that Make Your Images Look Like They Were Taken in Black & White 

Many photographers create their own filters to make their photos look like they were taken in black and white or with an old camera filter. These filters are often free, but if you have Photoshop, you can also try downloading one of the many available plugins that will allow you to convert your images into these styles.

For those who just want a quick fix for this style without going through the process of manually changing it, there are online resources where people can upload images and then convert them to black & white or an old camera filter.


Avoid Shooting at Night When There’s Little to No Natural Light Available

Night shooting can be a beautiful thing, especially when you have the right equipment and know how to use it. Unfortunately, there are some drawbacks that come with night photography. For starters, low light is not good for capturing detail in your images or helping you set up lighting properly.

This leads to blurry photos and improperly lit subjects. If you don’t have any other option but shooting at night due to scheduling constraints, make sure that you take these steps:

1) Bring lots of extra batteries – You’ll need them!

2) Use a tripod or support – Point-and-shoot cameras just won’t cut it (pun intended).

3) Be patient – Getting decent pictures will take time; don’t expect otherwise.

Conclusion

Central Park, Brooklyn Bridge, Times Square, Rockefeller Center. These places are iconic and tourists from all over the world flock to them each year in order to capture some of New York City’s most beautiful moments on camera. If you’re looking for a place to take your next photo that is less crowded than these popular destinations but still has an incredible view, try Grand Central Station or Empire State Building instead!

Of course, there will be other people around – it just might not feel as busy with everyone trying to get their picture taken at once as you would find in more touristy areas.


Understanding Digital Watermarking:6 Ultimate Things to Know About Watermarking?

Can digital watermarking help protect your work from theft?

If you’re a photographer, you know that one of the most important things to protect is your work. You want to make sure people can’t use it without permission and claim it as their own. One way photographers copyright their work is by digital watermarking. This blog post will teach you how to get started with watermarking so that your photos are protected!

What is Digital Watermarking and Why Do I Need It?

Watermarking images with your company name, logo, or contact information is a great way to protect copyright and reduce the likelihood of someone using your copyrighted work as their own. It’s also important for branding purposes so that people will remember you when they see your website. If you’re still on the fence about whether watermarking is something you need, here are five benefits that might change your mind:


  • Protects copyright
  • Reduces plagiarism risk
  • Promotes brand awareness
  • Increases customer loyalty
  • Keeps customers coming back

Watermarks are a great way to protect your copyright and reduce the likelihood of someone using your copyrighted work as their own. They’re also important for branding purposes so that people will remember you when they see your company’s website, which can lead to increased customer loyalty in turn.

In addition to these benefits, digital watermarking images helps promote brand awareness and increases customer loyalty because customers come back for more. If you think about it from this perspective, there really is no downside!

How Does Digital Watermarking Work?

The watermark can be applied at various points in the content development process—or it may be embedded into images before distribution to prevent unauthorized copying.

The watermark is typically applied at various points in the content development process—or it may be embedded into images before distribution to prevent unauthorized copying.

A digital watermarking overlay can be an image, text, or other graphics-based design that appears over a digital file when viewed on screen. It’s most often used for photos and documents (such as PDFs) but can also appear with video clips or audio files if desired.

The mark might contain information such as the date of creation, copyright holder, contact email address, and website URL where you want people who find your work online to go should they have any questions about its origin.


Benefits of Watermarking

Do you want to add a watermark to your photos? If so, here are some benefits of adding a watermark.

  • Protect your photos from being misused on the internet without credit to you.
  • Keep high-quality copies of your photographs just for yourself or share them with a small group of people.
  • Make it easier to identify who took a photo if someone asks about it.
  • Prevent others from using your photograph as their own work and claiming that they are the original photographer.

Why You Should Be Using a Watermark on All of Your Images

The internet is an amazing place. It’s filled with information, cat videos, and cute pictures of kittens (some more than others). There are literally billions of images being shared online every day. But not all the images you see on your favorite websites actually belong to them!

Some people may steal photos from other sites by downloading them directly or using a photo-sharing site without permission. This can cause problems for website owners because they might be held liable for copyright infringement if someone else uses their content without authorization.

You should be adding watermarks to your images and placing text over any identifiable features in order to reduce the likelihood that someone will steal them from you.

Tips for Digital Watermarking in Different Situations

A watermark is a graphic that you place on the image to indicate copyright and/or ownership. You can use it in different situations, such as adding your logo or website URL to an image that you post online so it’s not easily copied. Here are some tips for digital watermarking in different situations:

If you’re posting photos of your work on social media platforms like Instagram, Facebook, or Twitter – add a small version of your logo to protect against any unauthorized redistribution of the photo.

If you want to share a photo with someone who has limited access to editing software – such as emailing the picture – be sure there is no text obscuring anything important before sending them the attachment. This way, if they want to share the photo with someone else (who may not have access to editing software) they can do so without compromising your copyright.


How to Get Started with Digital Watermarking

Watermarking is a great way to protect your work. It’s fairly simple and straightforward, so it doesn’t take long before you’re on your way to being more creative than ever before. Watermarks are also very versatile; they come in a variety of shapes, colors, fonts, and sizes that can be used on anything from art prints to website graphics.

Here are some tips for getting started with watermarking:

– Always consider the importance of your work when selecting a watermark. If it’s for text, make sure to choose an easily recognizable font such as Arial or Times New Roman. Avoid using cursive fonts that are difficult to read. For images, you may want something more creative like brush strokes drawn with black paint on white paper.

– Experiment with different types of shapes and colors until you find one that suits both your design and purpose. You can also play around with size; if you’re creating a logo for print use, try making it smaller so it doesn’t overpower the lettering too much.

Choose a font that doesn’t interfere with the message on the photo

– Look at what other people have done and get ideas for fonts, colors, logos, etc.

Final Thoughts About the Importance of Digital Watermarking

In today’s digital age, it is more important than ever to protect your work by adding a digital watermark. With the risk of copyright infringement and plagiarism at an all-time high, you need a way to prove that you are the original creator of any given work. It doesn’t matter if this is artwork or written content – every person needs protection from scammers trying to steal their ideas!

Conclusion

Digital watermarking is a process by which copyright holders can add their own identifying marks to digital media, such as photographs or videos. The watermarks are typically overlayed on the image in an inconspicuous way that will not affect how it looks when published and shared digitally.

Some of the benefits of adding copyright information to your images include: providing attribution for those who may have contributed in some capacity; more easily combating people stealing your work without permission; and having better control over licensing rights for commercial use (versus non-commercial).

Let’s get started with digital watermarking!


DMCA: 5 Most Crucial Things to Know to Avoid Violation?


What is the DMCA all about and how can it help you protect your content?

The Digital Millennium Copyright Act (DMCA) is a law that was designed to provide copyright protection for online content. It also provides penalties for those who violate the copyright of others online. The DMCA has been proven to be an effective way to protect creators of digital content and their intellectual property, but it can be hard to understand without an expert helping you through it. This article will give you the basics of what DMCA is, how it works, and why it’s necessary in today’s world.

What is DMCA and How Does It Work

The Digital Millennium Copyright Act (DMCA) was enacted by the U.S. Congress in 1998 to address copyright issues when it comes to digital media and online content. The DMCA is intended to provide a legal framework for intellectual property enforcement, while also limiting the liability of internet service providers that unknowingly host infringing material or otherwise facilitate access thereto.

The DMCA provides a safe harbor against claims of contributory copyright infringement if a provider can show it has had “no actual knowledge” that certain information infringed copyrights and acted expeditiously to remove such material after learning of its presence on their systems, among other requirements as set forth in the statute itself.


The DMCA is intended to provide a legal framework for intellectual property enforcement, while also limiting the liability of internet service providers that unknowingly host infringing material or otherwise facilitate access thereto.

The statute provides a safe harbor against claims of contributory copyright infringement if a provider can show it has had “no actual knowledge” that certain information infringed copyrights and acted expeditiously to remove such material after learning of its presence on their systems, among other requirements as set forth in the statute itself.

Who Should Register Their Content with the U.S Copyright Office

Do you want to legally protect your content? If so, it is important that you register a copyright with the U.S Copyright Office. Registering copyright will ensure that your intellectual property and creative work are protected from being used without permission or compensation.

The more people upload their videos, music, articles, and other works to the internet, there is increased risk of losing control over them in ways such as infringements or unauthorized use by others on sites like YouTube / Facebook/Instagram.

Registering copyright can help combat this issue and provide protection for both creators and users of copyrighted materials!

– If you are an artist, author, or composer creating artistic works that people can buy like paintings, photographs, and music.


– If you run a website with original content such as recipes, articles and photos.


When You Need to File a DMCA Takedown Notice

If you have found your content on someone else’s website without your permission, you may need to file a DMCA takedown notice with the site owner. This is typically done when an article or video goes viral and the author does not want it shared anymore because they are no longer connected to it. The Digital Millennium Copyright Act (DMCA) was enacted in 1998 by President Bill Clinton and Vice-President Al Gore for this very reason!

The DMCA is a copyright statute that defines what constitutes an infringement of the rights of copyright holders. The Act provides legal protection for content creators against piracy and theft by making it illegal to copy or distribute copyrighted work without permission, with some exceptions. This applies not just to digital media but also covers physical copies as well.

If you have found your content on someone else’s website without your permission, you may need to file a DMCA takedown notice with the site owner who has violated your ownership rights under this law.

Once they receive notification from their host provider – like HostGator – the offending material will be taken down within 24 hours at most after the review unless an appeal was filed in which case there would be more time allotted before removal occurs.


How to Protect Yourself Against Copyright Infringement

Copyright infringement is a big problem for many content creators. It can be difficult to know what your legal rights are and what steps you should take if you or one of your clients is a victim of copyright infringement. This blog post will help guide you through some important copyright law basics and provide advice on how to protect yourself against this type of violation.

Copyright law is comprised of both federal and state laws. The Federal Copyright Act, 17 U.S.C. §101 et seq., establishes the types of works that are protected by copyright as well as various protections afforded to those who register their work with the United States Copyright Office or who have been granted “common law” rights in particular work through publication without proper registration (17 U.S.C §§406-408).

State statutes vary widely but generally provide protection for authors against unauthorized reproduction, distribution, public performance, and/or display of their original creation such as literary manuscripts; musical compositions; dramatic works including scripts and screenplays; paintings; pictorials including photographs and drawings; motion pictures and other audiovisual materials.

What are the Penalties for Violating the DMCA

The Digital Millenium Copyright Act (DMCA) is a law that was enacted in 1998. The goal of the DMCA is to help protect copyrighted works by preventing people from copying them on digital networks without authorization. There are many penalties for violating the DMCA, but they can be summed up into civil and criminal categories. If you violate the terms of service with your ISP or host provider, then this is considered a civil violation and usually results in termination of contract or suspension of services.

Criminal violations include distribution and manufacturing illegal copies as well as tampering with copyright data. These are more serious offenses because they involve jail time and fines for those who break the law!

Why You Should Always Use Original Content When Creating Your Own Website or Blog Post

We all know that using original content is a major factor in attracting visitors to your website. However, there are many people who still decide to copy and paste content from other websites. Why? Do they not understand what the consequences could be? If you want a successful blog or website, you need to put in the effort of creating unique content. Here are some of the reasons why it’s important:

-It will help make your site look more professional

-You can rank higher on search engines

-You won’t get penalized by Google for duplicate content

-It will save you a lot of time

-You can avoid copyright infringement issues.

Conclusion

The penalties for violating the DMCA can be severe, but they’re not just limited to fines. If you use someone else’s copyrighted material without their consent and it is determined that your actions are willful, then criminal charges could also apply. Remember that if you want to avoid copyright infringement at all costs, always create original content when creating a blog post or website of any kind.


Mirrorless Camera – 7 Things to know about them

Is a mirrorless camera right for you?

Mirrorless cameras are a hot topic in the photography world. They provide many benefits to photographers, including size and weight savings, and better image quality. In this post, you’ll learn all about them!

Mirrorless cameras are a hot topic for photographers who want an easy-to-carry camera that takes high-quality images. You can read more about these devices below!

What is a Mirrorless Camera?

A mirrorless camera is a type of digital camera that utilizes an image sensor, typically APS-C or smaller. They are lighter and more compact than DSLR cameras because they lack the optical viewfinder, prism, and mirror found in traditional SLRs. Mirrorless cameras also feature interchangeable lenses and often offer more manual control over settings such as shutter speed, aperture value (f stop), ISO sensitivity, focus mode, etc.


The Mirrorless Camera Technology is a Relatively New Development in the Photography Industry

The photography industry is one of the most competitive industries in the world. There are millions of people who take pictures every day, and there are countless ways to do it. The first digital camera was invented by Sony back in 1995, but now it’s hard to imagine life without them.

One relatively new development is called a mirrorless camera – they don’t use mirrors like traditional cameras; instead, they use sensors that allow for faster shooting rates that can capture more detail than other types of cameras.

In the past decade, there has been a huge shift in technology and how we use it. People are nowadays more than ever looking for ways to document their memories with an impeccable quality of photos that will stand time test (or at least until new technology comes). So if you’re one of those who’s interested in getting your first mirrorless camera or upgrading from your current model, read on!

Mirrorless cameras have become increasingly popular over recent years because they offer similar performance as DSLRs but come without some of the drawbacks such as size and weight. These qualities make them perfect for travel photography – which is why most professionals prefer carrying them when capturing unforgettable moments abroad.


One of the Biggest Advantages to This Type of Camera is Its Lightweight and Compact Design

Mirrorless cameras are the new wave in photography, and they’re quickly becoming more popular with photographers of all levels. Mirrorless cameras have a lot of advantages over their DSLR counterparts: they are lighter and compact, which makes them much easier to carry around; they produce images that look just as good if not better than those from DSLRs; there is no mirror or shutter slapping noise when you take pictures because the camera doesn’t use a mirror system to capture an image.

One of the best things about these cameras is their lightweight design–they’re perfect for travel!

Why Are They Better than DSLRs?

Mirrorless cameras are a popular type of camera that many photographers prefer to DSLRs. These cameras have been growing in popularity for some time now, and there are good reasons why they have become so popular.

One reason is their size; mirrorless cameras tend to be more compact than traditional DSLRs which makes them easier to carry around with you wherever you go. Another reason is the sensor; these sensors produce images that rival those produced by DSLR’s but without the bulkiness of a mirror box and other hardware required for an optical viewfinder.

This allows mirrorless cameras to be much more compact.

The downside is that there are a lot of features and functions that you can’t do with these cameras, like video shooting or taking very long exposures. But if you plan on using your camera for still photography then this shouldn’t matter too much as most people use their DSLRs mainly for photos anyway.

So if you’re looking for a smaller, lighter way to take great photographs without having to deal with the bulkiness of traditional DSLR’s then maybe it’s time to consider getting yourself an interchangeable lens mirrorless camera!


What are the Benefits of Using Them?

Mirrorless cameras are quickly gaining popularity these days and for good reason. With the prevalence of DSLR cameras, mirrorless cameras offer many benefits that photographers will appreciate.

The first advantage is how lightweight they are compared to their DSLR counterparts – with up to 90% less weight than a traditional SLR lens setup! This makes them much easier to carry around all day long without causing back or neck strain.

They also have better battery life due to their more compact size and lack of internal mirrors which require power from the body’s battery pack. The next great quality about mirrorless cameras is that there is no mirror to get in the way of your light. This means that you will have an unobstructed view and capture all those beautiful moments as they happen!

Mirrorless cameras come with a flip-up screen which works perfectly for portrait photographers who can see their subject on the LCD display while shooting from above or below eye level – something not possible with DSLR’s without using an accessory such as a monitor, tripod, or monopod.

The flip-up screen also makes it easier for videographers to shoot scenes directly overhead by flipping it upwards when needed vs having to use awkward attachments like monitors just to be able to see what they are shooting while looking down onto them.

Mirrorless Cameras are Able to Offer Better Image Quality

Mirrorless cameras are able to offer better image quality than what you might find on a typical point-and-shoot camera. With them, the photographer is able to control all aspects of the exposure and they are also much more flexible. The result? Photos that look great in any situation!

Mirrorless cameras have been available since 2008 after being developed by Leica back in 2003 but recently major companies like Canon & Nikon saw their potential and started producing models of their own.


How to Take Care of Your New Camera 

Mirrorless cameras are an amazing new technology that has been introduced to the public. The best part about these cameras is that they offer a lot of features for a fraction of the cost in comparison to traditional DSLR cameras. However, there are some things you should know when it comes to taking care of your camera so it lasts as long as possible!

– Clean the camera with a microfiber cloth and glass cleaner when it gets dirty.

– Keep your lenses clean by using lens cleaning fluid that is nonabrasive to remove any dust from the front or back of them. It’s also recommended you use this type of fluid on sensors if they are exposed!

– Store your mirrorless camera in an airtight bag so there isn’t moisture damage or other problems caused by changing temperatures. Buy one online for around $30, which ensures everything stays safe inside while keeping away dirt and debris from getting onto the device! If possible, store it in a dark location as well (unless you have photo work coming up).

Conclusion

The mirrorless camera market is booming. If you’ve been thinking about upgrading your DSLR, here’s a list of reasons why you might want to consider going with the latest technology in cameras–mirrorless models. Mirrorless cameras are lighter and smaller than their DSLRs counterparts, making them easier to carry around while traveling or hiking for long periods of time.

They’re also more affordable on average than other digital SLR models, which can put them into reach for many people who would not have considered buying an expensive camera before now. It comes down to this- if photography is something that means a lot to you, it may be worth investing in one of these new products because they offer some excellent benefits over traditional SLR cameras.


Is Watermarking Images Really Important? 6 Things to Know

Watermarking images: is worth it in photography?

Watermarking images can sometimes be a controversial topic. Some photographers think that it’s necessary to protect their work, while others argue that watermarks are distracting and take away from the aesthetic quality of the photo. 

Why do you think this is?

What are some reasons why people might choose not to use them?

In this article, I’ll outline both sides of the argument and let you decide for yourself whether or not watermarking images is worth it in your own photography.  

The first thing to consider when deciding whether or not you should watermark your photos is how important copyright law is to you as an artist.

If copyright infringement has been happening on a regular basis with no repercussions for the offender, then it may make sense for you to add a watermark on your photos. Today’s blog post can help you decide. 


What is a Watermark and Why Does Watermarking Images Matter? 

A watermark is usually a logo that you put on your photos to show who owns them. They are most often used by photographers and artists, but they can be useful for other purposes as well.

For example, if you want people to know who created the content of your website and blog posts, then adding watermarking images would probably help increase conversions. 

The term “watermark” comes from the old practice of pressing paper with a design into the damp fabric to create an impression on it.

Over time, “to watermark” has come to mean any kind of visual design that can be seen through or over another surface (like images in your blog posts).

Watermarks are most often used by photographers and artists because they show who created something – for example, if someone alters your photo without permission then using a watermark will alert people that it’s not original work.

Why Should You Watermark Your Photos?

There are a lot of reasons why you should watermark your photos, but we’re going to cover the most important ones. First and foremost, it’s an excellent way to protect your copyright! You own the rights to every photo that you take.

If someone takes one of your photos without permission and posts them on their website for sale or any other type of use, you have no control over what they do with it.

By watermarking images, though, you can prove that they were created by you in case anyone tries to use them without permission. This is also a great way to build up brand recognition if you blog often or post on social media sites like Instagram or Pinterest!

Second, watermarking images is a great way to build up a portfolio. It’s hard for people to remember who they’ve seen before if you’re not constantly in their faces with the same face and name that they associate with all of your work.


If someone sees one of your photographs on Instagram or Pinterest without any indication that it was created by you, then how are they going to know about other projects?

Just adding something like “photography © Sarah Moore” can make such a big difference when people go looking at more than just the last thing from you!

Finally, watermarking images offer peace of mind. As a photographer, you can rest assured knowing that your works are protected and you probably won’t see your photos all over the internet without proper credits to you. 

Why Shouldn’t You Watermark Photos? 

Watermarking images is a technique that has been used for years to prevent copyright infringement. It’s also a way for photographers to advertise their work and make money from it.

The downside of watermarking images is that it can ruin the aesthetic appeal of an image, detract from other branding elements in your design, or be difficult to read when printed in small sizes.

Many viewers associate watermarks not only with low quality but also bad taste when they see it on professional work so adding one can make your photos less attractive than if you didn’t add one!

Moreover, If you watermark images from other photographers, you run the risk of inadvertently violating copyright law by using their work without permission or payment.

This can result in legal action against both parties involved as well as any business that profits off the use of an unauthorized image.


When Should You Use a Watermark?

Watermarks have been in use since the invention of photography and they continue to be important today because they allow you to protect your creative work from theft and misuse on social media sites like Facebook, Pinterest, and Instagram.

What about when should I use a watermark? Should I add it right away at the beginning or end, or when I post something? There are some good reasons why you may choose one time period over another:

Reason to add a watermark at the beginning: if you’re posting your work on Facebook or something similar, it’s possible for someone else to steal it and post their own photo with credit before you can get in there first.

This way, when they land on your original image, they’ll be reminded that this is yours.

Reason to add a watermark at the end: If people are viewing your images directly from Instagram or Snapchat (perhaps through an app) then using a watermark may not make as much sense because those platforms have built-in features like “share” so viewers know who created them right away. 

How Do You Design a Watermark? 

Watermarking images is an important step in the process of copyrighting them. A watermark is typically text that goes across your image, with space to add your contact information and branding. The first thing you need to do when creating a watermark is to decide what type of font will be used as well as its style and size.

You should also consider whether or not you want it on both sides of the image or just one side if there’s room in the design. The next step is to get the design ready for a transparent background. Next, you need to convert your text into an outline and then fill in the shapes with color or pattern (or both).

There are many tools available, like Watermarquee, to help you design a watermark for your photos. Watermarquee is web-based, so it means that you don’t have to download and install any programs. 

It also has a free version that you can use if you’re just starting out with watermarking images. Sign up to pro version for unlimited watermarking.


What are Some Watermarking Examples? 

Watermarking images is a great way to protect your photographs from being pirated. There are tons of different types of watermarks out there, and it can be tough to choose the right one for you. Here are some examples that might help you decide:

1) The Logo Watermark – This type works by displaying your company logo across the entire image. It doesn’t cover up any part of the picture, but it does make it impossible to tell what the original picture is without zooming in on it.

2) The Image Covering Watermark – This type is less common than others because not many people know how to do this properly. However, they work by having an image covering up a portion or all of an image.

Conclusion

Now that you know more about watermarking images and their benefits, it’s time to decide which type of watermark is right for your images. Remember the three things we mentioned before? Choose a watermark based on what will work best with those factors.

For example, if you’re posting photos without any text or context clues in them then a plain text-based logo might be the way to go.

If you are using an image as part of a blog post where there is accompanying text, consider adding some sort of branding so people remember who took the photo when they see it again down the line.

We hope this article has helped answer all your questions about watermarks! Let the team at Watermarquee know how these tips have worked out for you .


Closely related: How to Make a Watermark for Photos: 3 Best Things to Know.

Closely related: 9 Things to Know About Watermarking.

Why Should You Shoot RAW Format Photos? 5 Facts

What is a RAW format and why is it better than other file formats?

Ever since the introduction of digital cameras, people have been shooting in JPEG format. This is a compressed file that has to be translated into something readable by your computer and other devices like iPads or iPhones. RAW files are never compressed so they will always look exactly as you captured them when you took the photo.

When saving a RAW file, it’s up to you what settings you want for exposure, color temperature, sharpness, etc., which gives photographers more control over their images than ever before! Read on for some reasons why shooting in RAW format could be right for you.


What is RAW Format and How Does It Work?

I’m sure you’ve heard of raw files before, but what are they exactly? A RAW file is a data-rich image that has not been processed by the camera’s software. The photographer will typically use editing software to process their photographs after taking them in order to create the perfect photo. This allows for better editing options, like adjusting white balance and contrast levels more precisely.

This means that the photographer can shoot with their camera in any mode they choose–AUTO, PROGRAM, P, Aperture Priority, Shutter Priority, or Manual. This allows for more control over exposure and creative photography techniques.

Why Should I Shoot in RAW Format?

If you’re a photographer or just someone who has to take a lot of pictures with your phone, then you should know that there are many advantages to shooting in RAW format. This is something that is not as common as it used to be and a lot of people don’t understand the benefits.

RAW format is just a type of file that your camera can take photos in. A JPEG or JPG will compress the photo and it won’t contain as much quality because it has to fit all those pixels into one little space on your phone, computer, etc, with a RAW format, each pixel gets its own place where there isn’t any compression so you get more detail out of them.

Moreover, you will get the most out of your camera and be able to control how you want it to perform. You can adjust for white balance, contrast, saturation, sharpness, and even noise reduction with RAW format. Essentially what this means is that when shooting in TIFF or JPEG (which are compressed formats), these features cannot be adjusted later on; whereas if you shoot in RAW format then all adjustments can take place after taking a photo!

Here are some more advantages to shooting in RAW format:  – You’ll have better noise control (especially if you’re taking pictures at night)  – You don’t lose color information when editing like you do with JPEGs  – The files will be larger than compressed formats which means they pack more details in them.


How to Set Your Camera to Shoot in RAW Mode

If you are shooting in RAW format, then you might be a photographer who is looking for the best possible quality out of their camera. Here are some ways that will help your photos turn out better and retain more detail from your original shots!

To shoot in RAW, you need a DSLR and lens that support it. Check your manual for more details on what this means for your specific equipment! Most modern cameras do, but some older ones may not be compatible with shooting in RAW. If yours does not shoot in RAW, then switch over to JPEG mode instead (and don’t forget to tell us why!)

Why is RAW a Better Format?

When you shoot in raw format, the camera generates a file that contains all of the information captured by the sensor. It also means that there are more bits available for editing and adjusting your photos on a computer. When shooting in JPEG format, all of this work happens inside the camera’s processor instead of on a computer. So what does this mean?

Shooting in raw means saving unprocessed images so they retain all their original data. You have more control over how these photos look when processed with an image editor – even if you don’t know much about them yet! It’s similar to taking a photograph using film instead of digital cameras: as long as you’re good at developing negatives, there will always be something interesting or different about each one.

In addition, RAW files have more flexibility when it comes to how you want the colors to look. When your camera processes images in JPEG format, they are compressed and lossy with some information lost – but that’s not the case with a RAW file! You get all of the details from your photo captured exactly as you saw them because there is no compression or conversion going on.

So if you’re looking for more detail in skin tones or more rich reds in an otherwise brownish area of your image, then a RAW file will be best suited for what you need. And don’t worry about having too much data since our browsers can handle large amounts of data really well now (thanks Google!).


RAW or JPG?

One of the most common questions that photographers hear is “should I shoot in Raw or JPG?” The answer really depends on what you’re looking for. If you are okay with having to do some editing later, then shooting in Raw format will be a better fit for you.

Shooting in this file type means that if there are some parts of your image that need editing (e.g., noise), they won’t affect the rest of the photo because it’s a non-destructive file type.

However, if you are looking for the fastest way to edit and publish photos online or in print then JPG would be a better fit. Shooting in this file type means that any photo editing is done during import so there’s no need to wait until after importing when switching between formats.

Plus, since it’s an internet-friendly format, JPGs load faster than Raw files which makes them ideal for sharing on social media sites like Instagram which require a small waiting period while photos upload before they can be viewed.

The difference between the two is that a JPEG file is compressed, while a RAW file retains all of the data captured by your camera’s sensor. While both formats have their benefits, it is important to understand which one will work best for you before choosing.

There really isn’t one right answer as every photographer has different needs – but by understanding how each of these two file types works, we hope you’re able to find what best fits your situation!

Conclusion

RAW format is the only way to capture all of the data captured by your camera’s sensor. Shooting in RAW format allows you to have more room for underexposed photos and will be able to recover information from overexposed ones as well. You can edit exposure values, white balance, color temperature, and other aspects of your picture without losing any quality or detail.

If shooting in JPEG doesn’t sound like the right choice for you, take a look at how much better your pictures could be if they were shot in RAW format!


What is a Watermark and How Do You Create One? 4 Best Ways!

A digital watermark is a graphic or text overlay that can be applied to an image file in order to provide copyright information. It also functions as the signature of the photographer, preventing unauthorized use of images.

Watermarks are most commonly placed on two edges at the bottom of an image with one on each side, but can also be added strategically elsewhere depending on how it will appear in print and where it needs to remain unobtrusive.

What is a Watermark?

A watermark is a digital image that overlays the original photo. It is typically done to protect your work from being used without your permission or to add some information for people who may not know where you got the photo. A watermark can be text, an icon, or both and it can be placed at any point on the picture.

They are usually placed in the lower right corner of the picture, but can also be added to any area of the photo. Watermarks are typically used to show ownership and copyright information for digital photographs so they cannot be re-used without permission from the owner.


Why Should You Use a Watermark?

Watermarks are a great way to protect your images from copyright infringement. They can also be used as branding for your photography business and give off an air of professionalism. Even if you don’t sell prints, it’s a good idea to watermark them because they will show up in searches that relate to the event or location where they were taken.

In addition, adding a watermark to your photos can deter people from stealing them. When someone tries to share or use the photo without permission and an image is present with words like “© Your Name” it’s likely they won’t want to take that chance of getting in trouble for copyright infringement.

The following are additional benefits of using a watermark:

  • Protects against illegal sharing on social media sites such as Facebook, Twitter, Tumblr, etc. This includes when you repost other websites content (examples include YouTube videos)
  • Gives off a professional appearance and air of legitimacy if used correctly
  • Prevents others from claiming ownership over images by putting their name on it instead of yours
  • It can also be promotional since your watermark is attached to your work and people can trace it back to you, the original owner.


Tips for creating an eye-catching watermark

Keep Your Watermark Simple and Clear

It is important that your watermark doesn’t distract from the original image when it’s added to someone else’s photo. You want people to see this as a way of giving credit for your work, and not something that takes away from it. The first tip is to keep your watermark simple and clear, so that it doesn’t distract from the original image.

Make Sure Your Watermark Isn’t Too Large or Small 

The size of your text is very important when you’re trying to create a good user experience. There are two main considerations: the font size and line-height. When you have too large of a font, it can be hard for people with a bad vision to read because they might need glasses or increase their screen brightness.

You also want people who don’t wear glasses to be able to see your website without straining their eyes by holding their phone closer than normal – this will allow them more time on your site! With all that in mind, we recommend using at least 16px as the default font size and 1.5em as the line height. This will allow for a good experience on both mobile and desktop.

You can also use a logo or watermark that doesn’t take up too much space on the image. One way to do this is by using an arrowhead, which is a small geometric shape (often triangular) used in maps and drawings as part of an illustration showing directionality.

For example, if I want my photo with directional information about where it was taken located at the bottom of the photo, then I could place arrows pointing down towards my location stamp so they don’t cover any important details!

Choose a Font that Complements the Style of Your Photos

Choosing the right font for your photos can make a huge difference in how they are perceived. When you’re looking to choose or create a font, it’s important to think about what kind of style you want and then find one that complements it.

If you select an ornate typeface that doesn’t match the mood of your photo, people might not pay attention to the content and instead focus on how off-putting your choice is. This blog post will cover some tips for selecting fonts so that you can pick one that will help draw readers into your story!

Don’t use a font that is too fancy or ornate; think about what kind of mood you’re trying to convey with the photo. If it’s light and airy, try a more understated typeface. If it has a gloomy tone, then select one that matches those feelings. The fonts we choose can create different emotions in people before they even start reading our words!

Always Include an Email Address 

When you are taking photos of your work, there is always the goal of getting more customers. That means that you need to have a way for people to contact you and learn about how they can get in touch with more photographers like yourself. In this post, we will discuss three ways that you can provide an email address on your website or blog so that people can find out more information about what services you offer!

First, you can include an email in your “contact us” section of your website. This is a great way to provide contact information for people who are interested in contacting you outside of the blog post that they read! Second, you may want to add a sentence at the bottom of each article asking readers if they have any questions about anything within it.

And lastly, one more option is to put an email address on every photo or video that you upload online with additional information like when and where the photo was taken.

This will allow people to find out exactly what type of photography services you offer based on their needs – whether it be product photos or baby pictures! You might also want to attach social media links so they can follow you on your social media accounts and see if your services fit their needs!

Conclusion

In the end, watermarking is a powerful way to protect your intellectual property rights as an artist/photographer and it’s easier than you might think. If you’re serious about protecting your artwork from being used without permission or copied by someone else, then implementing this simple but effective strategy can be one of the best ways to do so.


Watermarking 101: How to Add Effective Watermarks to Photos

How to Add Effective Watermarks to Photos 

Watermarking is the method of superimposing a text, a logo, or both on an image file. It is an essential process concerning both copyright protection and the marketing of your photographs. Here you’ll learn why watermarking images are crucial for your photographs and explore how to add effective watermarks to your photos.

Although watermarking is typically digital nowadays, the word “watermarking” actually dates back centuries. Before, a watermarking would only be visible when the papers were held up to the light or when they were wet, and the watermarking process was done while the paper was still wet—thus the term we now use.

What is Watermarking Used For?

There are two primary reasons why you may need to watermark a photograph. Firstly, watermarking helps you protect the copyright of your photographs and makes sure that the photos cannot be altered or reused without your consent. Hence, your clients and potential clients could still take a sneak peek of your work before paying for it without the risk of the photos getting stolen.

Meanwhile, watermarking could also be used as a marketing strategy. Just like how a painter would mark their masterpiece with a signature, effective watermarks can help to expand your reach, get in front of potential clients, and boost brand awareness. So, whenever your work is shared, on Instagram for instance, your name and brand are always affixed to it.

Nonetheless, a digital watermarking could serve as a stamp to tell the status of an image, with words like “COPY,” “VOID,” or “SAMPLE.” This guarantees that important photographs are never mishandled, thus helping you keep your photos organized and labeled accordingly.

Where Do You Find Watermarks?

It is possible that you encounter watermarks on photos much more often than you realize. You would notice watermarks on most professional photography or stock photos. When you are looking for an image online, you can expect to see a lot of stock photos that are peppered with watermarks, and you could only access the clean, un-doctored version of the image if you pay for it from the copyright owner.

On the marketing side, you would notice visible watermarking on a bunch of professional photography, visual art, design, and even memes, especially on social media sites. Content creators and influencers would watermark their photos to make sure that if anything they create ends up going viral online, their brand or name is recognized.

Some media companies and websites would automatically put watermarking when users download images they have uploaded. Reddit, for example, would add its watermark to photos you download from the Reddit app.

Moreover, you might also want to add a watermarking to personal photos. Just because you post personal images on social media sites and apps does not mean you are giving just about anyone the consent to make use of your photos as they please. To help safeguard your precious memories from people who might try to exploit your photos and your identity, you can choose to put  effective watermarks on any personal photos you upload on the internet.


How to Add  Effective Watermarks

How your watermarking would look is totally up to you, and you could choose to have other watermarks for various image types or purposes.

Your watermark could be an image, text, or a logo, and it could be as prominent or subtle on a photo as you would prefer. You might also want your watermark to have copyright info, an identifier such as your logo or name, or even status information, such as “Draft,” or “For Review.”

Nevertheless, if you are watermarking photographs that you aim to sell online, you can go for a semi-transparent watermarking that covers the whole frame. It is crucial to keep in mind that if your watermark is too small and tucked hidden into a corner of your photo, it could be cropped out by creative photo thieves.

If you are putting a watermark on a digital image to help protect your work, it would be advisable to put your watermarking on an area where it could not be easily cropped out. If you put it on a solid, smooth background, it could be easily edited out, so it is advisable to put your watermark over a busier portion of the photo.

You’ll see this principle on a lot of tabloid shots, where the watermarking is put directly on the subject of the image. By placing the effective watermarks on the part people want to see, they are making sure that nobody else could profit off their photos.

However, if your watermarking is too obtrusive and covers the whole image, it could distract from the subject and overall quality of your work.

Create a watermark that blends well into the image to provide it with a more pleasant look that still markets your brand. Though some would like a more transparent branding, others prefer a more opaque, eye-catching watermarking.

It is essential to create a balance that works well for you based on what you are watermarking and your purpose for watermarking it.

Using WaterMarquee

As we have mentioned throughout the article, watermarking your photos is a good way to protect them from theft and promote your brand at the same time. Still, keep in mind that you don’t have to shell out a huge amount for a watermarking tool, even with the said benefits. In fact, there are free yet efficient watermarking tools, like WaterMarquee, that you don’t even have to download and install—it works right on your browser. How convenient is that?

This online watermarking tool lets you make and add your own watermark or use absolutely customizable templates to help protect your photos. Adding effective watermarks to a photo using WaterMarquee is actually very simple. You just have to upload an image to the site and click on the Add Logo, Add Text, or Use Template options. You could then proceed to put the text, adjust its size, color, font, or transparency, and decide if you want a transparent or solid background. When you’re happy with your design, click on the Save icon and select the destination folder on your computer in which the watermarked image is going to be saved.

Start watermarking today


How to Make a Watermark for Photos: 3 Best Things to Know

Why do you need a watermark for photos?

There are a lot of good reasons why you would want to know how to add a watermark for  photos. Perhaps the most common reason is to deter any unapproved use of your images, especially if you are a professional photographer. Nonetheless, you can likewise use watermarks to get your brand out in front of potential clients and more people to boost your brand.

What Is a Watermark?

A watermark serves as your own signature on your photographs. A watermark can be a stamp, text, signature, or logo superimposed onto an image.

Photographers use watermarks on their images to help make them easier to identify. It’s also a good way to prevent copyright infringement.

If somebody sees your photos and intends to pay for a license to use them, a watermark for photos would make it easier for them to reach you. Also, if somebody purposefully tries removes a watermarking, the photographer could receive compensation for the damages in the event of a copyright infringement.

Some professional photographers prefer to put watermarking in the same way a painter would sign their masterpieces. Others, though, prefer a hardly visible line of logo or text.


Use a Watermark to Protect Your Images

Because it is so simple and easy for anybody to download one of your images on the internet and use them any way they want, adding a watermark on your photos is among the best ways to avoid that. A cleverly placed watermarking would make it tough for anybody to use your photographs for their marketing purposes, and it would likewise dissuade them from using your images for personal reasons.

Use a Watermark to Promote Your Brand

Watermarks are also a great way to add subtle branding to your images. Put watermarking on photos of your products to show people your name and company. Put them on your company’s social media posts to bring together your look and strengthen your brand identity.

If you’re in the phase of building a business, you should think big. Begin using brand kits to unify brand assets such as your brand fonts, colors, logo, graphics, as well as templates. Then you would use them consistently when you’re crafting designs.

How Can I Make My Own Watermark?

Creating a cleverly designed watermarking you can utilize consistently would help build recognition for your brand and your photos. It is a huge part of your identity and branding, so you don’t want to change it often.

Typing your company name or even your name in your favorite calligraphy font may not be very helpful. Some professional photographers like to put their website URL or a copyright logo or symbol.

The simplest way is to make a logo using an app. Arguably, among the easiest apps to use is Canva. It’s free, and it also offers a lot of design and font options. Just look for the text and logo elements you want, and then drag and drop the elements onto the field, and that’s it!

How you want your watermark to look is actually a matter of personal taste. Nevertheless, make sure to put effort into creating a design for your logo to make it look fantastic on your photos. And most importantly, ensure that it does not distract the audience away from your stunning pictures.

You could likewise download your Canva logo design as a .PNG file if you wanted to add it to pictures using Watermarquee.


Using Watermarquee

Water Marquee is an amazing online app for adding watermarks. It offers unique fonts and even templates for beginners.

Also, a premium subscription opens up unlimited batch editing mode to professional photographers. The free access allows only up to 5, though. Still, this tool lets them add watermarking to images with just one click.

It also enables you to edit the size, color, or font so that it blends well with the style of your photographs. Moreover, you can use your images with the added watermark logo for commercial and marketing purposes.

Watermarquee does all the steps easily and quickly, making the entire process of protecting your images less difficult and more streamlined than what Photoshop and Lightroom offer.

Watermarquee is a free and automated watermarking software to help you create and add logos to your commercial or personal photos.

Upload Quality – Image Formats

Even though the free version of Watermaquee works well with JPEG, PNG, and some RAW files, Watermarquee Pro offers you access to more than a hundred image formats, including TIFF, BMP, PNG, PCX, JPEG, CALS, and vector: DXF, AI, CDR, CGM, among many others.

Also, the free version restricts you to a max image resolution of 1600×1200. On the other hand, a premium subscription eliminates any restrictions and handles even the largest image files, including 2398×3602 and more.

More than 50 Unique Fonts to Choose From

The text editor offers over 50 fonts, including Lato, Verdana, Arial, Forum, Georgia, as well as unique and creative ones like Josefin Slab, Pacifico, Comic Sans MS, and others.

You could modify the background and font color using the smart palette, while size and transparency are adjusted by using the sliders.

Adding Your Transparent Logo

Once you have uploaded the photo to be watermarked, you can now add the ready-made PNG logos design. This would help you steer clear of complicated work with Adobe Photoshop layers.

Conclusion

Placing a well-made watermarking to your images could help build your identity and brand as a professional photographer. However badly placed or poorly designed watermarking might turn off viewers to look at your photos.

Take time to test and experiment with watermark designs on your photos. Find something that would work for you and does all that an effective watermark needs to do.

You don’t want to change your watermark too often, as people might start to mistake your photos as being somebody else’s.

Browse through the internet and look at photographers you like and see how they put watermarks to their work. Get inspiration from professional photographers who are already doing watermark for photos and consider how you would design and create yours.


How to Watermark Photos for Free – Best 5 Hacks

Watermarking should be a part of your photography work

A lot of people think that watermarks are only there to protect the copyright of their images. It is indeed one of the purposes, but it is not the only one. Watermarks could be a great marketing tool for budding, even seasoned photographers, so you need to know how to watermark photos for free.

This is something that young, inexperienced photographers frequently overlook.

Your watermark is your signature, your own personal image. And if you’re serious about photography, you need to know this: photos make a lucrative business.

It is great to have brilliant photos, but it is better to have a professional-looking watermark to catch complete attention.


The Watermarking Process

What you want for your photography business is a branding process that includes generating a stunning watermark. Knowing how to watermark photos for free has two stages:

A. Designing a Watermark
B. Stamping Your Images

Let us get into the core of these phases.

Designing a Watermark photo for Free

Not every watermark is a good watermark. Visibility is not the only factor that matters when you create a watermark.

This design process needs attention to detail, like finding an interesting yet readable font. Here are a couple of ideas that will guide you to begin your photography branding process.


5 Essential Tips on How to Design Watermark Photos for Free:

  1. Use your complete name and the word “photography” below. This will ensure both professionalism and credibility as well as the brand.
    People will easily remember who took the fantastic photo they toppled upon.
  2. Apply a calligraphy font for the name and a simplistic font in uppercase for the word “photography.”
  3. Use white for the font color and have the transparency set around 40-60%. That way, the watermark will be unobtrusive but still visible.
  4. Place the watermark in the best spot. Most people put their watermark in the left or right corner of the lower part of the photo. That’s the right placement. However, if the colors of your photo do not allow the watermark to be visible, you can put it in the upper part as well. Never put your Watermark Photos for Free in the center of the picture (unless you’re planning to sell it).

Bear in mind that the watermark must be the focus of the picture.

5. Create and use a branded logo. Using a logo that is identifiable to you will improve your ability to gain recognition as a photographer.

Using these five watermark designing tips, produce a transparent PNG file that can be easily applied over any kind of image. It is better if you make two PNG files: one with white and one with black colored font.

Stamping Your Photos

Before, the process of watermarking was difficult. You had to apply expensive software like Photoshop to learn complicated things like batch processing. Watermarquee is an online free watermarking service that is effective, yet simple and straightforward.

How to Watermark Photos for Free Using Watermarquee:

  1. Go to Watermarquee’s website.
  2. Click Select Photos to Watermark.
  3. Select the image that you want to watermark and uploaded.
  4. At the editor page, you can select to add a logo watermark or a text-based watermark which you will need to upload
  5. Click Save when you are done
  6. Repeat the steps above if you have various photos that you would like to watermark
  7. Once you are done, click Save to ZIP file and it will download every Watermark photos for free in a ZIP file to your PC.


You can then save the watermarked images on your computer. There is no limit to how many images you can Watermark Photos for Free, but the free watermarking service will only support a max of 5 images at a time.

Those who do not want to complicate things can just write a watermark text and modify the size and position of the text. It is very simple with drag-and-drop options.

If you want to have unlimited watermarks, Watermarquee offers a  premium service for a low, one-off fee. That’s right, pay once and use forever!

Watermarquee Pro, allows you to upload unlimited photos, any file size, and any image file, such as JPG, GIF, TIF, BMP, and PNG. This is important if you’re a professional photographer and are using more substantial resolutions.

The Pro version provides users with access to premium templates for something a bit more fancy, and more fonts. The Pro version costs only $19 for a one-off fee.

They can also share watermarked photos on Flickr, Picasa, and Facebook. This is a great thing knowing that social sharing is generally the best way to promote your business and photography art.

Good equipment is essential and keeping them in excellent condition with accessories like this great camera backpack from CADeN.

Protecting your online photos is just as important as taking the perfect photo, so sign up today for unlimited watermarking.


See also: What are the 7 Best Free Watermark Photos App.

How Photography Watermark Can Help Your Photos

How do you get your photography noticed online?

When you start out as a photographer, getting your photography and photography watermark noticed could seem like an insurmountable challenge, especially when you start out as a photographer, getting your photography noticed could seem like an insurmountable challenge.

It is unfair, but shooting spectacular images would not be enough to make the cut.

Here are steps you could take to finally get your photographs noticed online:

Have a Blog and a Website

Here’s the truth: your Flickr photo set is not enough. Before anyone could notice your photography and take you seriously, first need to see that you have put in the time and effort to develop a home for your photography online. Now is the best time to take this step, if you haven’t done it yet.

You could spend some time searching for photography website hosting companies that meet your preferences and needs. You also need to make sure that your website includes a blog – an important part of a website (especially for SEO) nowadays.
You don’t necessarily need to have a standalone and dedicated photography blog. Professional photographers would usually have a blog as a component of their lead-capturing photography portfolio websites.

The trick is always to ensure that you add content and update your website blog regularly and with a highly interesting and diverse selection of your photos. Likewise, you could throw in tutorials that provide your readers with practical advice on photography’s finer points.

Developing a loyal following of subscribers or readers needs effort and takes time, but nothing else beats having a cool blog that is read and shared by a lot of people.

Get into Social Media

Twitter accounts and Facebook Fan pages can help connect you to people who are interested in your photography. You would need to invest time and effort to keep them updated and network through them, but genuine audience engagement is the best way to build up interest in your photography.


For Twitter, we suggest checking out Twello.com. After you sign up, you could search for fellow local or even global photographers.

When you see some whose photography you like, you can go and follow them. Oftentimes, they would follow you right back, especially if they like your work as well.

Ensure that there’s a link to follow your Twitter and Facebook accounts on your website.

Enter Photography Contests

There’s always a lot of photography contests happening online, and winning even just one of them is a wonderful way to get your photographs noticed.

It could be slightly intimidating to enter into a contest and be evaluated by strangers, but keep in mind that the people managing these competitions are always encouraging the photographers who join. They also need your photographs for their contest to be successful.

Here are a few websites with lists of photography contests:

  • Photo Compete
  • The Photo Contest
  • Fan Art Review

Once you have signed up to join the contest, make it a point to promote and advertise your entry via Social Media and on your website.

Nevertheless, keep in mind that it does not necessarily mean that you will always win, even if you have the most stunning photos. Be a sport and just be patient. Remember, if your work is remarkable, the judges would still notice it. Surely, you will get the recognition and credits you deserve, although it could take some time.

Search for Websites in Need

Because of the increasing importance of the internet, most businesses and companies that have websites need professional photos of their products, storefront, or team. As a professional photographer, you could reach out to local companies and businesses and offer your professional service to them.

Enlighten them on the advantages of having quality images on their website, so they could really recognize and acknowledge its value. It would help if you give them a business card and nicely ask for referrals. This would help you establish a strong client network and will bring in more leads.

Watermark Your Photography

Of course, you did not start a photography business just to give your time, effort, and hard work away for free. However, when you are still budding in the business, you need first to get noticed before you could get famous.

You can have some of your photos on your website marked as being Creative Commons. You could also give some of your work away for free on Flickr by choosing the CCA (Creative Commons Attribution) license.

This allows people to use your work but needs them to give you credits or attribution. It is arguably the easiest and most straightforward method to get your photos noticed – by letting other people do it for you!

Run Shows at Photography Galleries

Photography galleries are continuously searching for content to feature on their shows. They could have more than ten exhibitions and shows annually, and some of them are not planned. They would likewise be looking to feature more photographs in the months following this period.

Reaching out to them to request a small exhibition actually saves them time and effort. It is not that much trouble to have your photographs hung in local galleries.

You might discover that your local town or city has a lot of places willing and able to display your art. You might have to rent a small wall space. Nonetheless, if your photographs sell really well, then it would pay for itself.

Local galleries are an easy and effortless way to earn a bit more money while getting your photos noticed.


Keep Trying

Keep in mind that there are no shortcuts when it comes to getting your photo noticed. You need to keep uploading and posting spectacular photos, establishing your Facebook fans and Twitter followers, and writing great content in your blog.

One More Thing

I know the list said seven steps to getting your photography noticed, but we have a bonus step for you.
If you put a photograph watermark with Watermarquee, we would love to feature it on our Facebook Fan page and show it off to our followers. You can send it to me through the site, or reach out to me via Twitter or Facebook.  Start watermarking today with WaterMarquee.

Why Watermarks Matter in the Virtual World


 Why Watermarks Matter in the Virtual World

Watermarks help protect the ‘intellectual property’ of your images – virtual or real!

Through placing a ‘watermark logo’ on your virtual images, makes it difficult for anyone to copy them.  Watermarks can be an important tool that greatly reduces the chances of someone taking your photos/images and using them unscrupulously without your permission.  In addition, they can be used to ensure what is Real and what is Virtual.

Quite simply there are 3 ways watermarks can be used effectively:-

  • Watermarks deter your photo/image being copied or reproduced
  • Watermark logos – displayed the same way each time on all photos/images – become your brand, or signature
  • Watermarks assist in the identification of what is ‘Real’ and what is ‘Virtual


Virtual Renovation Service – use of watermarks

One such company using Watermarquee watermarks successfully in the virtual world is an Australian start-up Proptech group:  PerfectRoom.  This virtual renovation service provides Realtors with a 3D photo-realistic image of the ‘potential’ for a property which is for sale.

Such a virtual renovation maybe to update elements of a home including floor coverings; painting of walls; updated appliances; as well as the removal of walls to expose a home’s true renovation potential.

Unlike Virtual Staging – where an ‘existing’ space is filled with amazing furnishings;  with Virtual Renovation, walls are removed and the entire space of a home may be redesigned or repurposed.

Here, entire walls are removed; window treatments added; light fittings included, and floor coverings changed.

The original photo is superimposed in the form of a watermark with the words, ‘Actual Room’ and the ‘PerfectRoom logo’ together with the words ‘3D visual’ is displayed on the 3D virtual image.

Watermarks are used to clarify which is which!  Real ‘vs’ Virtual

Such watermark labeling also assists with not misleading any potential buyers.  It is clear to a home searcher – which is the Actual Room and which is the 3D Virtual Renovation Room.  This is very important so everyone is clear on what they are seeing (and potentially buying).

Given these images are posted on Instagram and Real Estate sites, all efforts must be made to protect those images.  Just because it is a ‘virtual’ image – doesn’t make it any less important than a real photo.  It still needs protecting from someone stealing it for their use.

Just as in an advertisement for a property for sale, the agent may use a company logo watermark to identify the IP ownership of a particular photo.  This watermark logo identifies them as the copyright owner of that photo.


What about in the ‘virtual world’?

So too in the virtual world.  With every PerfectRoom being an individual design – the result needs protection from theft.  Here, a watermark is a major deterrent from being used illegally as well as not misleading any potential buyers.

This is imperative for the real estate platforms as well, given the high-quality 3D photo-realistic images can often be hard to distinguish from the originals. Perfect Property, Ireland’s fastest growing real estate platform uses watermarks to ensure the integrity for both their buyers and sellers.

In Summary

Watermarking is used for identification and to build your brand.  The last thing you need while building your brand, is your hard work being copied by others without your permission. Safeguarding your online images, your intellectual property, therefore, is not only important, it is essential. 

Watermarking using your name, your contact details, your brand or logo, is a major part of protecting your ‘virtual’ images from being copied for use by others and used anywhere without your permission. 

To protect your online images indefinitely, start watermarking today.


Watermarks The Importance of Location – 6 Points to Consider

Watermarks The Importance of Location

Where to Place Watermarks on Your Images

Really, do you know where to place your watermark to maximize its potential? The photos are taken, the edits are already completed, and you feel pretty good about how you got the image you saw in your mind.

But there is one issue here: you’re not exactly sure where to put your watermarks.


where to place watermarks on your imagesThe photographer’s eye may be skilled in the rule of thirds and how to establish the correct lighting for each shot, but you’re not exactly the expert when it comes to putting your watermark.

You want to protect and claim your work – which is why you’ve got the watermarks in the first place – but you do not want it to distract the viewers from the essence of your image.


Placing a watermark on your work significantly impacts both its intrusiveness and effectivity.

If you are really trying to decide where to put watermarks on your images, here are some standard approaches photographers take and how it affects the photographs.


The Bottom Right is a Standard Choice

The bottom right corner is the usual position for placing a watermark. A watermark is noticeable in the corner, but it does not detract significantly from a photograph. Any corner works, but most photographers decide on the right bottom.

If a watermark is placed on the right bottom, it is generally kept relatively small. The watermark should not cover a large portion of your photos, because the last thing you want your watermark to do is to be a distraction.

The downside of having your watermarks in the bottom right (or any other) corner is that it could be conveniently cropped out of your images. Any simple photo editing software could erase your name and information in just a few clicks.

A Border Below Your Photo is Easily Cropped

Some photographers don’t like how much a watermark in a corner intrudes on their images, so they make a border below their pictures and place their watermark on the border. The border is much easier to crop than the corner, though.

When you post your photos without changing them, your name will remain attached. However, someone who wants to remove watermarks can simply do so.


The Center is More Prominent

watermarks the importance of location - 6 points to consider
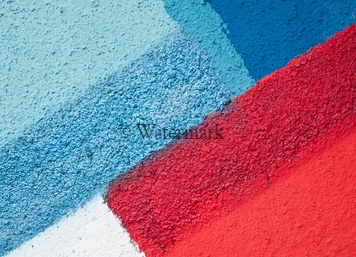
Photographers who are worried about photo theft (and many stock photo sites) put the watermark at the center of their photos. It is extra challenging to remove a watermark that was placed in the center of a photograph.

This could still be removed using photo editing tools, but getting rid of the watermarks without changing the original image requires specialized knowledge.

Those who are not used to photo editing may not be able to delete the watermark, and even those who know how to get rid of it would have to spend some time changing some of the images they take.

When watermarks are placed in the center, it’s usually quite large. Keeping the watermark large ensures that it covers the focal point of each photograph that it is placed on, even if the focal point is not in the middle of the image.

The downside of putting a watermark in the middle of your photographs is that it’s going to be a distraction. Its impact on your images could be minimized by reducing the opacity of your watermark, but any visible watermark in the middle of a photograph will at least have a slight effect on the image.

How About the Rule of Thirds? 

The rule of thirds is tried and tested in the world of photography, but for the sake of your watermark, it might be better for you to disregard it.

This rule is that if you break your photo into even thirds horizontally and vertically – seeing your photo as an imaginary tic-tac-toe board, split into nine even boxes – the focus of your image should lie either on the lines of separation or at their intersections.

What is important to note is that the rule of thirds is used to properly stage and capture the action of your photo. It makes your image more dramatic, drawing attention to people, objects, or landscapes that are meant to be focused on.

But if you try to position your watermarks using the rule of thirds – to put it on a line of separation or intersection point – you’ll be diverting the focus to your signature rather than to the subject of the picture.

Rather than using the rule of thirds, clearly avoid these lines of an intersection so that you do not unconsciously take the observer’s eye out of the magic of the image.


Why It is Advised to Shy Away from the Attention

why it is advised to shy away from the attentionWhen you know what you’re doing, there’s going to be a portion of every picture where you’re going to attract the viewer’s attention.

When you know where the part of the picture is, avoid it like the plague.

The advantage of being away from the attention is twofold: it doesn’t take away something that is supposed to be concentrated on.

By tucking your watermark away to the subject(s) of your picture, you’ll know that you’re not distracting anyone who’s viewing it.

It would not get lost in the mix of all the rest that happens. You want people to know you have taken every one of your photos. If your watermark is different from everything else, it is quite easy to decipher who photographed it. It would be harder to distinguish if it were placed on top of the subject(s).

Individual Placement Takes Time

Several photographers change their watermark placement with each photo they publish. They’re looking for a visually complex area that is not the focus of every image and putting their watermark there.

A watermark is difficult (although not impossible) to remove at such a location, and does not significantly interfere with the image.

Still, it takes a lot of time to customize the watermark of each image, which is why only a few photographers adopt this approach.

You might want to use only your most valuable images, and use a faster approach of watermarking photos.


“Watermarks The Importance of Location on your images”

Place Your Watermark Anywhere You Like with Watermarquee

place your watermark anywhere you like with watermarqueeIf you are searching for a simple resolution for watermarking, consider using Watermarquee. The platform lets you put your watermarks in your photographs wherever you want.

Your watermarks need a balance between being noticed not being the center of attention. You can easily claim your work by following these tips while also avoiding a distracting image.

You could use them all, or just try one at a time. Ultimately, you will find a dramatic way to create a statement with your signature.


How Do You Batch Watermark Photos in 5 Easy Steps?

Why should you batch watermark your photos?

Whether you love them or not, placing watermarks on your photos is a good deterrent to prevent other people from posting your photos on the internet without proper credit. Even though the right skills and great patience could remove some of the watermark, watermarks would still help prevent image thieves from taking credit for your work, as well as making it easy to let viewers know who took that image. 

However, due to our busy lifestyles, you might think that adding a watermark to tons of photos is pretty tedious. Luckily, we can batch watermark photos and it wouldn’t take a lot of your time so you can still do the things that you love (i.e. photography).

Design Custom Watermark

Watermarquee, an online watermarking tool that works directly on your browser, has a lot of watermarking elements and options. It allows you to add watermarks to images using text, website URL, copyright symbols, and your company logo. You could also adjust your watermark any way you please: make it big or small, transparent or opaque, straight or rotated. Watermarquee comes with hundreds of fonts and various effects that you could use to make a wonderfully unique watermark.

Why You Should Batch Watermark Photos

In today’s contemporary world, a lot of people make visual content, posting tens of thousands of photos online every single day. If you are one of those people – you have a blog, a website, or you just love to share your pictures on social media platforms— then you might have already pondered on the importance of a visual watermark and if you should put it on your photographs.


Prevents Image Theft

The first and primary purpose of a watermark is to prevent image theft and protect your copyright. Imagine that you uploaded your photos online without putting a watermark on them. A few days later, you suddenly discovered that someone had downloaded your photos, posted them on the internet, and asserted them as their own, attracting new followers or customers. If you have watermarked your images, you could have prevented this untoward situation because putting a watermark on your photo clearly says who the original owner of that photo is.

Promotes Your Brand

Another benefit of putting watermarks on your photographs is being able to promote your brand and your business, as it is generally a free ad. Having seen your photographs online, prospective clients could easily find your business on social media sites with the help of your watermarks as identification.

It’s much easier than trying to determine the source of the photo on your own. For example, clothing companies put a tag on every single one of their products so that their customers would be informed of who made the items. Watermarks, similarly, are tags for our photographs.

Also, your audience people start to link your brand with particular types and styles of photographs. Decades ago, brilliant artists often marked their art, signing their names inside of a photo. It was their way to expand their client reach and protect their copyrights, even though during that time not a lot of people could forge accurately remarkable masterpieces.

Sadly, the dawn of the internet makes your photographs just a few clicks away from getting stolen. Nonetheless, if you want to avoid image theft and promote your brand, drive traffic to your site, and increase your revenue at the same time, then you should definitely choose to batch watermark your photos.


How to Batch Watermark Photos Using Watermarquee

It goes without saying that we all have a lot of photos in our computer folders, and it is not likely that we’ll add the watermarks one by one. Thus, we need a batch watermark tool to do the job for us quickly and efficiently.  

Before we get begin, it is worth noting that no program or software is needed. WaterMarquee is an easy-to-use online tool that enables you to batch watermark many photos at once. To use this watermarking tool:

1) Open the WaterMarquee site and click the “Start Watermarking Now” button to start the batch watermark process.

2) Next, click the “Select Photos to Watermark” button and upload up to five images you wish to watermark. Please keep in mind that the free plan of WaterMarquee accepts up to 5 photos at once. However, you could purchase the Pro plan to be able to batch watermark unlimited photos.

3) Once you have uploaded your photos, add your brand logo by clicking the “Add Logo” button at the bottom.

4) When you have uploaded the logo, you could change its position and adjust the opacity.

5) And that’s it. When you’re happy with the final output, just save all of them or click the “Save as a ZIP” button to download the images in a ZIP file.

Tips on How to Watermark Photos

If you choose to batch watermark your photos, here are a few tips to make them attractive and add a touch of professionalism to your images instead of detracting the viewers’ eyes from your creative work.

Incorporate Your Watermark

The advantage of incorporating your watermarks is that they could go unnoticed if they’re stolen. Then you can easily identify the thief who’s using your photos illegally, demand them to remove your pictures from their site, and possibly get paid royalties, so you don’t file a lawsuit.


Try a Frame or a Border

When you batch watermark your photos, another strategy is adding a visually appealing frame or border around your photos with a banner at the bottom or top where you could highlight your brand name or website. By creating the banner at the top or bottom of the photo, you develop a Polaroid vibe, which is ideal for other people’s websites or social media.

Keep it Simple

An important aspect of watermarking is to just keep it simple. Regardless if you’re using your brand name, logo, or website URL, your watermark should be clean, effective, and simple. Use tasteful style elements on Watermarquee such as color, opacity, and font, and always consider the purpose of your watermarks.

Once you have created your first watermark, go over it again and see if it could be made even simpler. The key to effective and professional watermarks is that they serve their purpose. Please bear in mind that complexity would only catch your viewers’ eye and undervalue your work.

To start watermarking today click here

Worth a read: How Can You Watermark Photos without Photoshop for Free? 5 Easy Steps.

How to restore old photos and bring them back to life?

How can you restore old photos and bring them back to life?

How to restore old photos. It is innate to us humans to treasure old photos. We cling to photos of your parents’ wedding, the family with the youngsters, the homestead, and the awkwardly cheesy fifth-grade haircut. Good, awkward, or bad, old photos help tell our history, our stories and serve as a reminder of who we are.

Floods, fires, hurricanes, and wars — whether the disasters are man-made or caused by the wrath of a very pissed-off Mother Nature, there’s an abundance of ways your old photos could be ruined. Even when properly stored, all kinds of terrible fates await old photos: warping, discoloration, staining, fading, rips, cracks, and tears.

The awful truth is that not many people actually take care of old pictures. Before you despair, however, there’s a way to bring old photos back to life. Yes, you might not be able to remedy the physical copy of the photo, but you could definitely fix a digital version to salvage the lost glory of the old photos. Here are our top tips for bringing old photos back to life.


How to restore old photos

Digitize the Old Photos

The initial step in repairing old images is to digitize them first. When digitizing them, it would be best to use a photo scanner rather than using a smartphone app. A scanner can really capture important details, and it can give you a clearer digital copy of the photo.

Likewise, you should scan the photo in color, regardless of whether it is black and white and at the highest quality possible. This would make it easier for you to fix and edit the picture later on, mostly when it comes to the finer details.

If the old photos are too fragile to scan, that’s alright. Find a bright and evenly lit area, and use your professional camera to snap a picture of the original image. Use your cam’s highest resolution setting, and remember to turn off the flash.

When you already have a digitized copy, please keep your original picture, store it in a safe place, and load your image-editing software or program. Regardless of which photo-editing and photo-enhancing software you pick, it would come with standard features that work great for remedying some kinds of photo-damage.

However, take note that the names of those commands might vary slightly, depending on the software or program.

Try Auto-correction Features

Because they are the quickest way to fix your old photos, give automatic correction features a try first.
With just a single click, automatic color correction can modify contrast and color based on your liking. Likewise, the auto levels feature can adjust overall contrast and usually affects color, too. This auto contrast feature, nonetheless, doesn’t affect color and adjusts contrast only.

Auto sharpen can identify edges in your old photos and make them even more defined, emphasizing smaller details and giving the image a much crisper look. Furthermore, the dust and scratches command can eliminate slight imperfections in the image. This feature works well for easily smoothing out a lot of minor problems with just one click.


Crop Out Damaged Backgrounds

It should not really come as a surprise to discover that the outermost part of your picture gets the most damage. The edges tend to get creased, bent, and be torn. Nonetheless, the good news is that these damaged edges are not all that significant in a lot of photos. As a matter of fact, they probably contain just blank spaces or small insignificant details.

This is the reason why you should just crop out these portions of the old photos. Otherwise, you would wind up spending a lot more time on an area that you might not be able to fix effectively. It actually makes sense to just get rid of those areas and concentrate on the image’s important elements.

Brighten Up Faded Images

You might likewise notice that the hues in your photos are already a bit faded. This could happen with black and white images as well! When old photos fade, however, it becomes a lot harder to distinguish between the details there. Thus, you would need to brighten them up.

This is fairly easy to do with a photo-editing program like Adobe Photoshop. You could do it through these steps:

Layer > New Adjustment Layer > Curve

Afterward, choose the black-point eyedropper icon, then proceed to click on the heaviest and darkest part of the photo. Next, choose the white-point eyedropper, then click on the lightest and brightest part of the image. To soften the effect slightly, you can reduce the opacity.


Fix the Details

If you want to fix the finer details in your image, there are a couple of tool options here – the clone stamp and healing spot brush. If you want to remedy the minor flaws in the background, the healing spot brush would be your best option. This would fix the texture of the flawed area of the photo and help fade it away.

If you are looking to fix a bigger flaw, however, the clone stamp would come in handy. This tool enables you to make a replica of a particular part of the image and recreate it somewhere else in the photo. Keep in mind to zoom the image first before using any of these tools.

How to restore old photos – Bottom-line

Image-editing software and programs take a bit of practice and effort to learn. Luckily, if you look for tutorials on the web, you are sure to find a treasure trove of advice and instructions for bringing old photos back to life.

Once you have successfully fixed an image and made new copies, store them properly. Humidity and extreme temperatures, along with light, insects, and water, ruin many pictures.

You would want to keep your photos in a firm box in a dim location at a temperature of about 70 degrees. A rigid plastic box with a hard cover could do the trick, but for the best protection available, a fireproof box is your bet for lasting storage.

Bringing old photos back to life could be a time-consuming project, but it is also gratifying. When you practice your skills and techniques on some old photos, you will see how a bit of photo editing could reap considerable rewards in the form of enhanced picture quality and preserved memories. In the end, you will also have the satisfaction of helping retain essential parts of your family’s history, as well.

Now that you have restored your old photos, remember to watermark them before you put them online. You can do unlimited watermarking with Watermarquee‘s easy to use watermarking.


2 Ways a Watermark Online Can Help Your Photography in a Post-Covid World

How Can You Make Your Watermark Online Relevant in a Post-COVID World?

Novel coronavirus, or COVID-19, has ignited the growing trend of home-based work, making millions of people into remote workers almost overnight, as companies seek to continue operating amid the global pandemic. Many employers hire remote employees in sales, accounting, customer service, and human resources.

Other industries, such as wedding photography, product photography, and real estate (here’s why realtors should use a watermark online for their property photos) also thrive in home-based work settings.


These jobs involve sharing a lot of images, and these images are not just shown on a shared screen in the office; they’re being shared online as well.

Posting and sharing photos on the internet is essential for some jobs. However, it also increases the possibility of these photos getting stolen and used without the consent of the original owner. Therefore, a watermark online in the post-COVID world is more than just a security precaution – it’s a necessity.

What Is a Watermark?

The idea behind watermarking is simple and straightforward: by putting a semi-transparent logo or line of text on an image, you make it clear that the ownership rights belong to you, the photographer, or your company and that they cannot be used without your consent or authorization.

How Can a Watermark Online Help You?

Watermarks are typically embedded so they become part of the image. This means that if the picture is stolen in some way, your watermark online will stay in place.

For Protection

There are many advantages to using a watermark online, starting with the protection of your digital works. A watermarked photo is rarely stolen since it is not a ready-to-use image; one would still have to delete or crop out a watermark with the help of advanced photo editing applications.

This makes it more time-consuming and, therefore, less attractive for potential image thieves.

It is essential to protect your photos,  as you wouldn’t like to see them used for commercial purposes without your consent. There are also a lot of cases where people simply steal pictures of others and present them as their own.

If someone steals your photo and watermarks it with their name or website, it will be hard for you to convince people that it is yours. Likewise, online viewers would begin to associate someone else’s name with the picture, not yours, which could mean that you lose your followers or potential clients.


For Marketing

Like famous painters, you sign your photos by watermarking them. There is your name, logo, or website address embedded in your photos, so, if someone wants to use your services, they can find your name or visit your website. It’s a win-win, either way.

Watermarking is, therefore, also a type of marketing. When you share and present your photos online, they become available for your target audience to see them. But that’s not enough – it’s best if viewers can remember the name of the photographer or the place where they can find it – your website, social media accounts, etc.


Making the Most Out of Your Watermark Online

Watermark Online making the most

Ivory Fyre is one of the companies that tapped into the marketing and security potentials of watermarking. Ivory Fyre offers a photo-realistic, virtual wedding design so that brides and grooms can see their big day before the actual big day. It is also perfect for stylists to present their vision and showcase a variety of looks.

Because this company shares a lot of photos of their clients online, they use WaterMarquee, an efficient online watermarking tool that embeds watermarks onto your images.

“We are making impressive 3D wedding designs that are shared most of the time on Pinterest and social media. It is essential to watermark any of our work before it goes online so that when it is shared, it’s clearly given.

It also means that couples & wedding planners who want to use our service know how to find us, which is the key to further expanding our business & brand” – Mark Brandt, Ivory Fyre’s founder.

Being able to set up a template in WaterMarquee and then dropping the images in, means the process is quick and easy. Ivory Fyre also keeps the high resolution of their images, which is one of their key selling points.

Other watermarking sites and applications have limits when it comes to file sizes; however, with the Pro version of WaterMarquee, the user can upload and watermark unlimited file sizes.

When an age-old industry such as the wedding industry gets a technology upgrade, it becomes apparent how important your personal copyright is in all your work.


Why WaterMarquee and How Do You Use It?

WaterMarquee is an online watermarking tool that you can use to quickly and easily put a watermark on your photos. You do not need to download or install anything – you can use WaterMarquee right on your browser.

It has an easy user interface, which you can use to easily change the location, color, and font of the watermark to get your favourite effect on your image.

You can also watermark multiple photos at once, saving you time and effort. Here’s how to do this:

  1. Open WaterMarquee and click “Start Watermarking Now” to start the process.
  2. Click the “Select Photos to Watermark” button and add up to five photos that you want to watermark. The free version of WaterMarquee allows up to five photos at a time, but you can get the Pro version ($17.98) to go unlimited. You can also conveniently drag and drop your photos directly.
  3. After you have added your main images, add your logo by clicking the “Add Logo” button at the bottom of the page. You can also add text (e.g. your name and website) if you wish to do so.
  4. Once the logo or text has been added, you can adjust the position and change the opacity. You can also unlink the logo, so the changes you make to the primary image will not affect the other images you choose.
  5. When you’re done, just save all of them or click “Save as a ZIP” to download them as a ZIP file.


The Bottom Line

In the time of a pandemic and even after, thieves are desperate to steal photos and claim them as their own. On the flip side, it also paves the way for a lot of digital marketing opportunities to come your way.

You have to be ready for both circumstances, and the best way to do that is with an online watermarking tool that’s easy, convenient, and keeps up with the times.

Next, check out the kinds of digital watermarks and their uses and start watermarking today.


Companion piece: Why Watermark: Get Your Photos Noticed Amidst Covid 19 Pandemic.